Today I fitted the new blinkers that I made so that they can be removed easily if I want to. The blinkers itself are, what I believe to be, from the Belgian army around the 1950s or '60s. These are much nicer than the blinkers that were fitted when I bought the HUM.


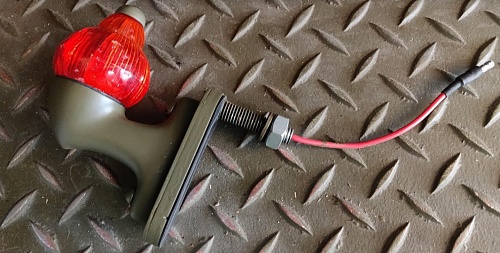
I didn't want to drill any holes so I had to pick a location that has a bolt that is easily removable. Luckily the bottom bolt which holds the windshield post is exactly that! I ordered some laser-cut metal plates which are held together by the two M5 screws in the blinker body. The bottom plate has an M10 threaded rod with a hole drilled through the center to accept the positive wire for the light.

After tapping, the bottom (thickest) plate had to be modified a bit to let the cable through to the tapped hole and into the threaded rod. (I didn't want to break the tap of course)
It took a bit of tinkering to get what I wanted, but I'm very pleased with the result!