|
|
|
#1
 24-03-09, 04:18
|
|||
|
|||
|
See pictures below.....
The good one is from the cab 11....the bad one from a cab 12...... These Wedge parts are available from Mac Auto Ford...... The next Photo is where the wedge fits in the door.... in most cases the sagging of the door has caused some extreme wear of broken parts.... ...and the resulting damage to the wedge,,,,, Now inside the door frame is this ..Ford again... latch which is usually broken... Now for the latch removed..... in a number of cases at least one of the rubbing blocks willme missing ... having fallen off when the tab broke. on to the next part....
__________________
Bob Carriere....B.T.B C15a Cab 11 Hammond, Ontario Canada 
|
|
#2
24-03-09, 04:32
|
|||
|
|||
|
The following are pcitures of the replacement latch mechanism
... the actual lock mechanism and NOS cab 11 door handles both inside and outside.... you will notice the chromed repro from MAc Auto... again made in China butr very close to the original.... see back side for difference in casting... once sandblasted they will take OD paint quite well.... One more photo showing the replacement pot metal tubes for the side curtains.... they are slightly shorter but will be made to fit... tweo are needed per doors..... Last is profile look at inner and outer handles....
__________________
Bob Carriere....B.T.B C15a Cab 11 Hammond, Ontario Canada
|
|
#3
24-03-09, 05:14
|
|||
|
|||
|
Doors skins not fore skins you neenee....
Removing the door skin at first appeared fairly easy since some doors were so rusted that we did not detect any spot weld..... has we progressed to areas not so rusted we found that the folded over outer skin had in deed been spot welded...... spot weld cutters.... very sharp samll chisel and the typical abuse of a good screw driver had them popping in no time...... soem doors were so corroded and thenetal so fatigue form years of door slamming that the skin and part of the frame was coming apart.. ley me show you..... Here is a crude sketched of the profile of the door frame and its weak areas... the frame is folded back onto itself to provide an area for the door skin to be folded and spot welded to...... with rust and constant door slamming the over folded area breaks loose at the arrow. Far too complex to reproduced we have opted for a simple U bent frame and we will cut out an exact duplicate of the folded over part except ours will be spot welded to the frame and we hpe more solid. The oly part that is different on the frame is the top part which is covered by the external door skin and is actually 1.75 inch wide plus the tickness of a 14 guage sheet.... in the case of the top part the metal is actually folded inside the U shape of the frame. So we got our courage and cut off the bottom of the door.... you can see the repro part Grant and I fabricated. We simply made a pattern out of old 2x6 lumber and heated and bent the U shape frame by hand.... once hot enough it bacme very plastic..... yeah the wood charred but that is Ok.... We made the cut up to the good metal on the curve side..... and just below the hinge position so as to maintain dimensions. Grant measured everything 3 times beofre cutting and we still had some complete doors to fall back on in case of dimentia.... In between giving me a hand Grant was busy redoing his cab 13 door.... butr that is a whole different story....
__________________
Bob Carriere....B.T.B C15a Cab 11 Hammond, Ontario Canada
|
|
#4
24-03-09, 05:43
|
|||
|
|||
|
The semi finished product..... still some touch up grinding... don't want ot make it too perfect or it will not look original.....
Concerned with getting the door the exact size it was before.... Grant had the excellent idea of bolting the inner skin back on as a jig for positioning the replacement bottom part..... sure made things easier.... Of course being Public servants and overly cautious we opted for a re-enforcement plate on the inside the frame to give more strength to the door frame.... we also had no wartime metal shortage.... I predrilled the inside plate and welded from the inside.... with proper penetration it almost looks like spot welding work..... The other side was also re-enforced from the back side but we had to cut out the space for the hinge...... we had to cut out other wise the hinge would have been 14 gauge out of alignment,,,,, Final picture....... no bad for a bunch of government paper pushers.... of course we still have to replace the large plate at the bottom.... half was cut away as being too rusted.... but it was supper time and it was time to go!!! Thanks to Grant for the helping hand... to Rob who keeps helping around the barn thereby allowing me freedom to work on the door and for Barry's inspiration........ More will follow but for now I must close the door on door repairs...... Bob
__________________
Bob Carriere....B.T.B C15a Cab 11 Hammond, Ontario Canada
|
|
#5
24-03-09, 13:35
|
|||
|
|||
|
Bob,
Thanks for posting pictures and the description of your door repair. It looks excellent. Another great "volume" in the Hammond Barn series! Thanks for the tip on the door parts at Mac's auto. I havent closely checked the doors on my cab 11 yet, but I know one of the doors is only hanging by one of the hinges...and that hinge seems to sourced from the garden fence of the former owner.... Quote:
Alex
__________________
Chevrolet C8 cab 11 FFW BSA Folding Bicycle
|
|
#6
29-03-09, 03:38
|
||||
|
||||
|
The Hammond Quartet was in fine fettle on Saturday - we all behaved ourselves (more or less) at Gracies last night, so there were no major complaints in the morning.
Myke from Wyndsor joined us for a day of slave labour. He and Grant took a tour of the wagon lines (wading thru the mud was fun) upon arrival. Nothing like the sight and smell of CMPs in the mid morning mist...smells like...obsession! Bob joined them thereafter. Just after the two entrepid ones took to the mud, Guy arrived with the morning coffee and tea (for Bob). Guy lent a hand fixing my fender pans onto the front clip - much appreciated, amigo.  When the tour ended, the entourage made its way back to the barn and coffee. Bob and Guy chatted about the excitment in their lives - CMPs of course...  Myke and Grant took on the task of welding up the holes in my Chev grill.  The master at work:  They used common nails pounded flat and welded them in. They also joined the broken off pieces of the expanded steel grid.  After some time with a file, it was difficult to pick out where the repairs were made. After sandblasting and painting, it was impossible to find the welded in spots. Good job lads! The grill was temporarily fitted to the clip and sure makes the front end look great!  Myke then refurbished my HUP's horn. He took apart the horn I bought at the Barrie flea market and tuned up its guts. He then put the cleaned up elements into a refurbished horn housing. Again, a superb job. We broke for lunch at Mike's Place in Hammond. We chatted about a number of things and after a few rants (on my part - politics of course), we headed back to the barn for some more fun and games. Bob took Myke to see his "Tickle Trunk" of CMP goodies in the back of the barn. I think Bob bought shares in Macs Auto...Grant sandblasted his door while Myke supervised the ongoing operations at the barn. 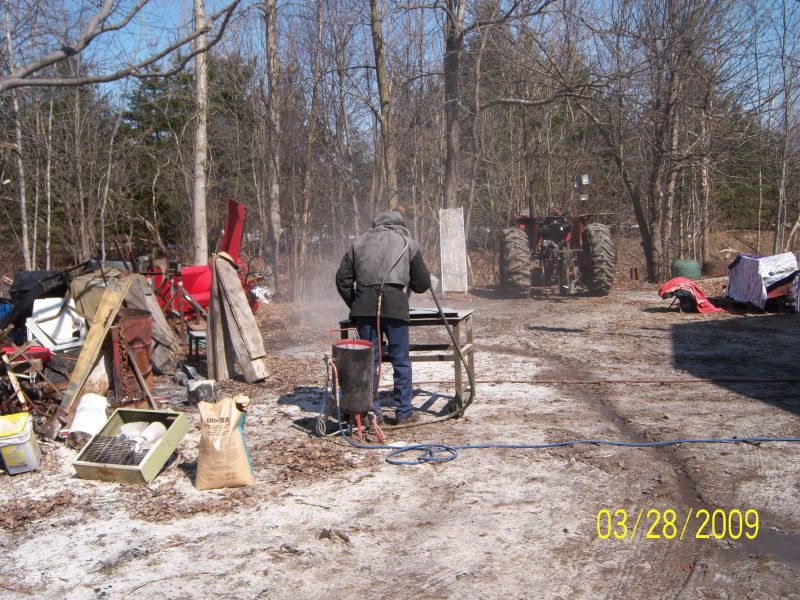 I tried to get the HUP to fire up for its Spring roll out (maybe wade out would be a better way of putting it), but the starter gave up the ghost. Bob took the starter apart and some new parts are now on order... Just as well, I wouldn't want to get too much mud on those gorgeous new tires just yet. The afternoon temperature hit 17oC and the road to the barn turned into a quagmire. It was great having Myke at the barn. This was his second trip and he didn't disappoint! This man has the skills to get things done - witness his superb F15 project! Thanks for the help and advice Myke. It was well appreciated. I am sure Bob and Grant will try to get Myke to stay another day...if not, then they will be on their own on Sunday. All too soon the leave pass expired and I had to head back to my paternal duties.
__________________
RHC Why is it that when you have the $$, you don't have the time, and when you have the time you don't have the $$? Last edited by RHClarke; 29-03-09 at 19:01. Reason: May I have an "n", please, Pat?
|
|
#7
08-04-09, 04:19
|
||||
|
||||
|
Not much to report. Bob and Grant roasted a cab 13 door, and I dug canals to help drain Bob's roadway which is now mostly mud. We will have more substantial news to report this coming weekend - ROAD TRIP!
__________________
RHC Why is it that when you have the $$, you don't have the time, and when you have the time you don't have the $$?
|
 |
| Thread Tools | |
| Display Modes | |
|
|


 Hybrid Mode
