|
#481
 04-06-12, 13:35
|
||||
|
||||
|
While my chassis has been shortened, it's not as short as F15, so I guess that stuffs that! Unless I find someone with a good F15 chassis. It would save me from cross member work on this one too.
I met a guy several weeks ago who said he has a rear cross member I can have but I lost his number somehow.
__________________
Ford CMP, 115" WB,1942 (Under Restoration...still) Medium sized, half fake, artillery piece project. (The 1/4 Pounder) 
|
|
#482
04-06-12, 16:59
|
|||
|
|||
|
Hi
Where was your chassis shortened between the wheels or off the back end? Cheers Phil
__________________
Phil Waterman `41 C60L Pattern 12 `42 C60S Radio Pattern 13 `45 HUP http://canadianmilitarypattern.com/ New e-mail Philip@canadianmilitarypattern.com
|
|
#483
04-06-12, 23:16
|
||||
|
||||
|
Quote:
I've only joined MLU recently but I've been greatly enjoying your posts, and finding much useful information in your detailed reports of this very fine resto job. Keep up the good work! I'm looking forward to many more hours of enjoyment following your progress! I've gotten about half way through this thread so I'm not fully conversant with your plans, but one thing I've been wondering about is the chassis. To my mind the F60L chassis is not up to your standards - having been butchered pretty badly towards the rear, and missing what looks to be two crossmembers, as well as all four spring hangers. Those chains give new meaning to the term "fully floating rear axle"! Also, in using that chassis, you'd need to choose a wheelbase, which for the sake of originality I imagine you'd want to keep standard, ie. medium or SWB. Eventually you may want to put an original body on it, which means sticking to a standard blitz wheelbase. But even then, it would always be something of a "mongrel" chassis, due to the incorrect taper at the rear. I'm sure you've considered all this so I hope you don't feel I'm insulting your intelligence! It's just that I'm curious about the next installment in the story! You mention finding someone with a good F15 chassis, which I agree would be ideal. However, judging by the pics in your very first post, the original F15 chassis looks pretty good to me. The rear crossmember appears to be intact (difficult to tell from the pic) with only the rear chassis rails having been docked. A new pair of ends wouldn't be too hard to fabricate, along with the missing gusset plates, as seen in the pic below. You'd probably want to reinforce the weld joint internally, so you could fit a pintle hook and tow stuff without seeing it overtake you on the highway! One query though...I'm not that familiar with F15 chassis, but is it missing the gearbox mount crossmember? If so, perhaps the one off the F60L would fit. I can't quite discern the front axle in the pics, which looks to be original F15, but with 6 stud hubs fitted. Very weird! Almost looks like F8, which would be extremely unlikely. Of course, you could always get hold of an F15A chassis and go 4WD! Depends what you want to do with it I guess. I'm told the F15 is much lighter to steer, and I've certainly seen Keith throw one around corners! As you mention, an F15 chassis would allow you to use the sunshine roof and still keep it original (as would an F15A chassis, like Euan says). Personally I'd go with the sunshine roof, I reckon they're a good Aussie feature, quite handy in hot weather I imagine. Besides, you've already Australianized the floor, so why not the roof as well! Anyway, looking forward to the next exciting episode.... Cheers, Tony
__________________
One of the original Australian CMP hunters.
|
|
#484
04-06-12, 23:46
|
||||
|
||||
|
Quote:
__________________
Film maker 42 FGT No8 (Aust) remains 42 FGT No9 (Aust) 42 F15 Keith Webb Macleod, Victoria Australia Also Canadian Military Pattern Vehicles group on Facebook https://www.facebook.com/groups/canadianmilitarypattern
|
|
#485
05-06-12, 01:57
|
||||
|
||||
|
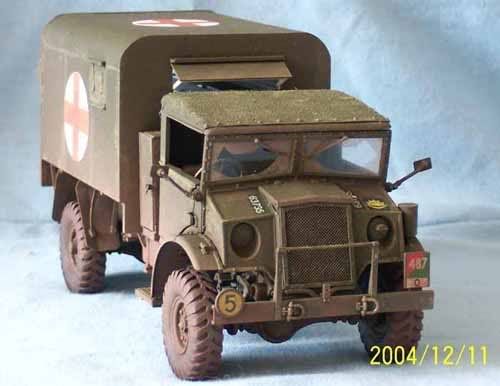
I have seen one Chev. Australian Pattern Ambulance with what appears to be a Sunshine roof and this photo is one which I modeled my 1/35 scale model on.
__________________
Cheers Cliff Hutchings aka MrRoo S.I.R. "and on the 8th day he made trucks so that man, made on the 7th day, had shelter when woman threw him out for the night" MrRoo says "TRUCKS ROOLE" 
|
|
#486
05-06-12, 03:20
|
||||
|
||||
|
Guys, my F15 chassis had been very much modified by a previous owner. That chassis was 'adapted' to fit modern engine and gearbox, so a great deal of crossmember mods were done to accomodate, thus buggering it for economical repair. Tony, the vehicle this chassis belongs to has become a parts truck. No plans to attempt repair. The rear cross member on the F15 is not nearly good enough, because it is bent and has a section cut out of it, making a replacement essential. Because of all the changes to the F15 chassis, it is basically useless.
The front axle on my F15 may be original, but at some stage, someone has fit later model hubs and wheels from another make of vehicle, Dodge if I recall correctly. Rear axle is definately NOT CMP at all. The chap I bought this from said the owner before had started to turn this vehicle into a 'Hotrod' project. Thats' the way, get a really heavy vehicle and then try to make it go fast. Christ man, BUY A CORVETTE or something......jeez! That truck did come with two rooves and several other goodies which made it attractive. The chassis of my F60 has definately been shortened, but I am grateful it is only from the rear, not middle. Axle has been moved forward, and this seems to have been done well. I did a test fit of springs before I pulled them apart, everything lined up OK and measured same on both sides! I do have all the spring hanger brackets for this vehicle, and overrider bump stops as well. In fact I have several additional spares of these, should one or more prove to be less than ideal. I couldn't tell you WHY the prior owner decided to disassemble to extent that he did.....and then just stop work and leave truck to suffer weather damage etc, but that's what happened. Tony, the two rear cross members you refer to would include one which was bolted in place. This piece, and a spare, is currently on one of my parts shelves. Apart from the absolute rear member, there are no further parts I need for the F60 chassis.....as far as I can tell! I am planning to replace the very front cross member, becuase I don't like the extent of cracking around bumper bolt areas. A competent welder could easily repair this, but I already have a perfect replacement which came on the piece of chassis that was attached to an engine I bought ages ago. That piece of chassis also had both cross members that engine bolt to (of course), so I COULD redo the F15 chassis back to original if so inclined. I'm not really! While it may seem a bit of a waste to scrap the F15 (or Frankentruck), it did donate two quite usable doors to my F60 rebuild. I have searched high & low, and not seen too many doors in ANY condition recently. Having said that, I do have three spare doors that might come in handy one day, but they are almost RUBBISH! I think I have written than I met a fellow around 4-5 weeks ago who happens to have a Ford rear cross member I can have, free. Pity I can't find his phone number.........yet! He also has a Chevrolet CMP for sale at $1400, which he says runs, stops and is complete. Not of interest to me but when I find the phone number, I will arrange to go inspect and take photos in case anyone else may want to buy it. 
__________________
Ford CMP, 115" WB,1942 (Under Restoration...still) Medium sized, half fake, artillery piece project. (The 1/4 Pounder)
|
|
#487
05-06-12, 09:09
|
||||
|
||||
|
Quote:
Note the sun compass mount above the windscreen in the AWM pic, this mount is not uncommon to sunshine cabs. On your model i'm not sure about the canvas fixing along the front edge as the canvas returns under a metal angle that is held by two wing nuts.
__________________
Euan McDonald 4? C-GT (Aust) #8 44 C-GT (Aust) #9 42 Jeep, Trailer Aust 3 Welbike MK2 complete Welbike MK2 inconplete under resto C15A x3 C60S x1 ex ambo F60L x3 LP2a carrier SAR #4993. Trailer No27 Limber Trailer, Cario cargo Trailer, Pontoon semi Wiles Cooker 2 wheeled (jnr) Last edited by Hanno Spoelstra; 05-06-12 at 11:26. Reason: Formatting
|
|
#488
05-06-12, 09:37
|
||||
|
||||
|
Quote:
__________________
Cheers Cliff Hutchings aka MrRoo S.I.R. "and on the 8th day he made trucks so that man, made on the 7th day, had shelter when woman threw him out for the night" MrRoo says "TRUCKS ROOLE"
Last edited by Hanno Spoelstra; 05-06-12 at 11:28. Reason: Formatting
|
|
#489
05-06-12, 13:21
|
||||
|
||||
|
Quote:
It's good to strive for originality, but there's a critical mass of damage and alterations and missing parts beyond which you lose interest in trying to rectify everything. I'd go the extra yards for a FGT chassis because they're rare, but unless you specifically want an F15, there's no real point here. I've also just remembered that you have some very nice 11.00 x 20 tyres...which look so much better than 16s IMO. Plus they look best with intermediate wheelbase IMO - I've always considered the medium wheelbase with 20" tyres to have the most aesthetically pleasing proportions. Thanks for your reply BTW Tony, I can see now where the project is going. Under the circumstances I'd take exactly the same approach as you. In fact I already did! My first resto was F60L shortened to F60S, and it came up a treat (see pics). As you can see the rear crossmember was cactus, and the gusset plates had been torched through when the chassis rails were docked (why was this so commonly done?!!  ) I think the rear crossmember on my first blitz (the bent and plated chassis) was salvageable, but not the gusset plates, and I never got around to finding some more. Apart from that, all I had to do was move everything forward 24", and remove the extra F60L crossmember (the rearmost bifurcated one, which lies 24" behind the front one, to fill the extra F60L length). ) I think the rear crossmember on my first blitz (the bent and plated chassis) was salvageable, but not the gusset plates, and I never got around to finding some more. Apart from that, all I had to do was move everything forward 24", and remove the extra F60L crossmember (the rearmost bifurcated one, which lies 24" behind the front one, to fill the extra F60L length).As an interesting aside - I retained the F60L two-piece tailshaft set up, which saved me having to find an F60S tailshaft (which runs directly from transfer case to diff). IIRC, I was able to use a spare front drive shaft, which conveniently proved to be exactly the required length. I could be wrong, but I don't recall getting the F60L one shortened. Anyway it was a good move I reckon, which bought me a little extra ground clearance. In your case Tony, if you can't get hold of an original rear crossmember, I'm sure you could get one bent up from flat quite easily. Maybe chop out a section of the damaged F15 one for them to work off. Likewise the gusset plates - if you don't have any for a pattern I can send you some pics and dimensions. Anyway I'm looking forward to seeing it shaping up as an F60S, or thereabouts. Having seen the work to date I'm sure it will be an exceedingly tidy job, and very hard to pick as non-original. And I certainly wouldn't worry about the sunshine roof being non-original (which we don't seem to know for sure anyway). Cheers
__________________
One of the original Australian CMP hunters.
|
|
#490
05-06-12, 13:56
|
||||
|
||||
|
Tony,
I agree with you on all points you made, as to what you feel looks most pleasing!!!!! Must be a 'Tony' thing  I can't wait to get those wheels/tyres on and stand back to take in the visual effect. I will need to get a hurry on, or I will need some form of mobility hoist just to get up to the cab. After my reply to you this morning, I have now found the phone number of the contact who offered a cross member for free. I will call him tomorrow. Not to concerned about not getting that one, because the company that does my sandblasting is primarily a heavy engineering business that specialises in..................are you ready for this.................truck chassis repairs and driveline modifications They are good folks and I have already lined them up to make a new one if all else fails. Always good to have a backup plan!When I did a measure up of the wheelbase some time ago, it came to 115". I believe that is length of the F60T. If I have that correctly. I don't really fancy restoring as a bland prime mover. Am thinking of putting some sort of AA gun replica on the rear. It will need to be no higher than the truck cabin, or at most 6" higher, because last weekend I tried to check clearance of truck to garage roller door. I will have 8" to spare, MAXIMUM. Once the vehicle is finished, the gantry crane I built outside the workshop will need to be partly disassembled to get the truck through. The diagonal stays for the beam will foul the cabin sides if they aren't taken off. Mind you, by that time there won't be any need for it. That is of course unless I get another project. Was thinking of a Bren Carrier or similar. My wife does not think this is a good idea.  I think she may have the begining of dementia. I think she may have the begining of dementia.
__________________
Ford CMP, 115" WB,1942 (Under Restoration...still) Medium sized, half fake, artillery piece project. (The 1/4 Pounder)
|
|
#491
05-06-12, 16:31
|
||||
|
||||
|
Quote:
__________________
One of the original Australian CMP hunters.
|
|
#492
05-06-12, 19:49
|
||||
|
||||
|
Quote:
Actually I'll be very interested to see how the prime mover wheelbase looked. I'm not sure I've ever seen a pic of one, except this sad looking Chev below. In some ways it's almost fortuitous that you're forced to shorten the chassis, given that it will effectively be an F60T replica. It's not something you'd do by choice, but in doing so you'll have something a bit out of the ordinary, and of legitimate interest to CMP purists. That's how I'd be looking at it anyway. It's also a very practical wheelbase, and I imagine quite impressive with 20 wheels, while still being nicely proportioned. Was it 115" or 110"...I can't recall...not that it matters much. I agree though, a turntable is not a particularly fascinating object to stand around and admire. A big gun on the other hand would certainly turn heads in the main street!
__________________
One of the original Australian CMP hunters.
|
|
#493
05-06-12, 20:26
|
||||
|
||||
|
Quote:
The photo makes them look identical, but they're not. They're definitely L and R pair - I checked after seeing the photo! One was upside down. I've also got the little ones somewhere, which go on the upper side of the crossmember. You can see them in the other pic, which is my F60S. I don't have the pigtails though.
__________________
One of the original Australian CMP hunters.
|
|
#494
05-06-12, 23:05
|
||||
|
||||
|
Our prime movers were the 134" wheelbase, we didn't use the F60T here in Australia. And only Ford made the 115" wheelbase tractor late in the war.
Quote:
__________________
Film maker 42 FGT No8 (Aust) remains 42 FGT No9 (Aust) 42 F15 Keith Webb Macleod, Victoria Australia Also Canadian Military Pattern Vehicles group on Facebook https://www.facebook.com/groups/canadianmilitarypattern
|
|
#495
06-06-12, 06:33
|
||||
|
||||
|
Quote:
__________________
One of the original Australian CMP hunters.
|
|
#496
06-06-12, 07:06
|
||||
|
||||
|
Quote:
__________________
Cheers Cliff Hutchings aka MrRoo S.I.R. "and on the 8th day he made trucks so that man, made on the 7th day, had shelter when woman threw him out for the night" MrRoo says "TRUCKS ROOLE"
|
|
#497
06-06-12, 07:16
|
||||
|
||||
|
Quote:
Thanks Cliff. I have a drivers handbook for this. And I was going to answer: "They look chunky and beautiful."
__________________
Film maker 42 FGT No8 (Aust) remains 42 FGT No9 (Aust) 42 F15 Keith Webb Macleod, Victoria Australia Also Canadian Military Pattern Vehicles group on Facebook https://www.facebook.com/groups/canadianmilitarypattern
|
|
#498
06-06-12, 08:42
|
||||
|
||||
|
Quote:
Quite a coincidence that Tony's chassis has been shortened to 115" - makes it a very worthwhile exercise IMO.
__________________
One of the original Australian CMP hunters.
|
|
#499
06-06-12, 12:34
|
||||
|
||||
|
These are some of the pics I have of F60T. To me, it looks quite good, but bit boring on the rear end, don't you think?
__________________
Ford CMP, 115" WB,1942 (Under Restoration...still) Medium sized, half fake, artillery piece project. (The 1/4 Pounder)
|
|
#500
06-06-12, 12:46
|
||||
|
||||
|
Boring that is, unless you add one of these behind it Still not for me I would say. Also suppose the transport department would class it as an articulated vehicle and require a licence accordingly. How do people get away with those 5th wheelers that the elderly like to tow behind their medium sized utilities???? Can't tell me those things are all driven on articulated licence. They look ridiculous when you see one coming, and it's a whole foot to 18" wider than the tow vehicle on each side. Tony, I would love those gusset plates, but they would be a nightmare to post wouldn't they
__________________
Ford CMP, 115" WB,1942 (Under Restoration...still) Medium sized, half fake, artillery piece project. (The 1/4 Pounder)
|
|
#501
06-06-12, 12:59
|
||||
|
||||
|
Quote:
Acceleration (with a 12,000 pound load) is a blistering 29.5 MPH achieved in 46 seconds over a 1/4 mile run, and a top speed of 41 MPH. Compare this with a F15 which achieves a speed of 42.5 MPH over the same distance in 33 seconds with a 1500 pound load.
__________________
Film maker 42 FGT No8 (Aust) remains 42 FGT No9 (Aust) 42 F15 Keith Webb Macleod, Victoria Australia Also Canadian Military Pattern Vehicles group on Facebook https://www.facebook.com/groups/canadianmilitarypattern
|
|
#502
06-06-12, 13:05
|
||||
|
||||
|
Quote:
__________________
Film maker 42 FGT No8 (Aust) remains 42 FGT No9 (Aust) 42 F15 Keith Webb Macleod, Victoria Australia Also Canadian Military Pattern Vehicles group on Facebook https://www.facebook.com/groups/canadianmilitarypattern
|
|
#503
06-06-12, 13:13
|
||||
|
||||
|
Is this what it should look like? I don't like the 'bobbed' look. Not on CMPs, hair......or even a cat!
__________________
Ford CMP, 115" WB,1942 (Under Restoration...still) Medium sized, half fake, artillery piece project. (The 1/4 Pounder)
|
|
#504
06-06-12, 13:27
|
||||
|
||||
|
Quote:
Here's the cover of the handbook: 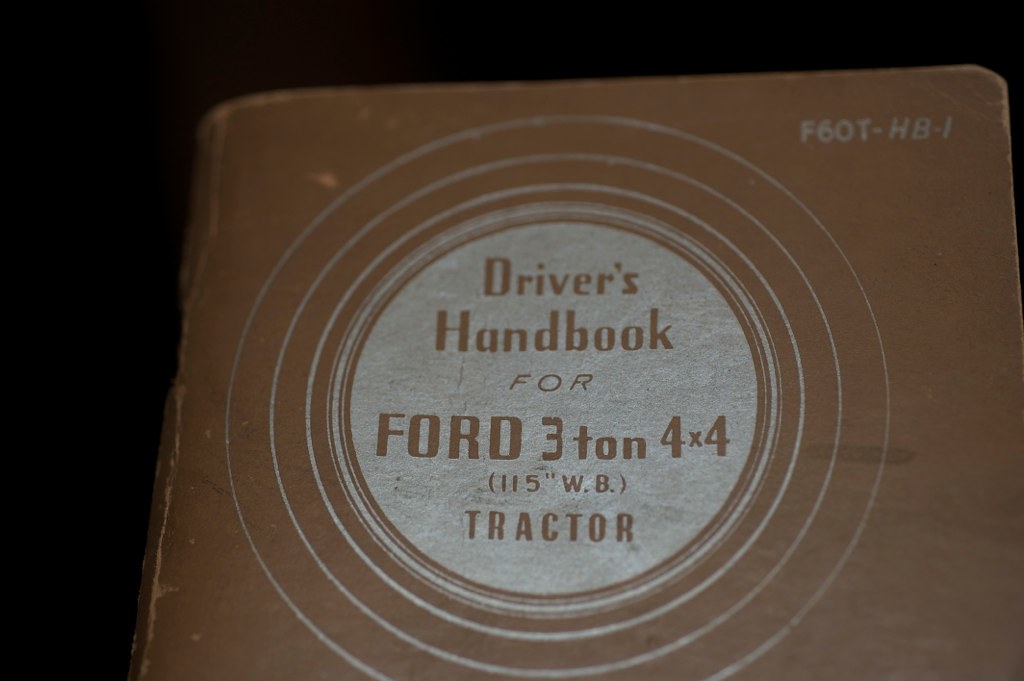
__________________
Film maker 42 FGT No8 (Aust) remains 42 FGT No9 (Aust) 42 F15 Keith Webb Macleod, Victoria Australia Also Canadian Military Pattern Vehicles group on Facebook https://www.facebook.com/groups/canadianmilitarypattern
|
|
#505
06-06-12, 13:40
|
||||
|
||||
|
With regards to the chassis drawing above. The crossmember that sits across the front most rear spring hanger, is it an optical illusion, or is it actually crooked? As in left side looks further back than right side. May be that angled line right near it making it look that way!?!?!? Actually, the whole rear axle looks crooked too 
__________________
Ford CMP, 115" WB,1942 (Under Restoration...still) Medium sized, half fake, artillery piece project. (The 1/4 Pounder)
|
|
#506
06-06-12, 13:52
|
||||
|
||||
|
Quote:
__________________
Film maker 42 FGT No8 (Aust) remains 42 FGT No9 (Aust) 42 F15 Keith Webb Macleod, Victoria Australia Also Canadian Military Pattern Vehicles group on Facebook https://www.facebook.com/groups/canadianmilitarypattern
|
|
#507
06-06-12, 20:23
|
||||
|
||||
|
Quote:
This is a replica too, shortened from F60L. It's a pretty impressive job, but they've sure made a mess of the rear chassis. For starters they've chopped off too much, so it's missing the end bits as Keith says. They've made up a new rear crossmember, but haven't bothered to drill the correct holes in it. It's also a little too fat in section, because they've left off the fishplates. The top one (ie. the little one) fits between the crossmember and the chassis rail, so if it's not there, the crossmember has to be a fraction fatter to fit snugly. Not by much, but enough to look wrong. The eye is very sensitive to aspect ratios. The problem may be compounded slightly, because this is the point on the F60L chassis rail where it starts to taper. Forward of this point, it becomes wider in section. You may find Tony that even with top fishplates fitted, a geniune rear crossmember may still be a bit sloppy inside the chassis rail. There wouldn't be much in it though, maybe 1/16" at most, which you could pick up by making some new top plates out of 3/16" flat, instead the original 1/8" plates. Alternatively, make up a new crossmember 1/16" fatter. With fishplates and chassis rail ends present, the result would be infinitely better than the job they've done here. Of course, the chassis rail itself will always look wrong, because of the overly long midsection - ie. the straight section before it starts to taper. This is the only point of difference b/w the various CMP chassis rails. The rearmost 7 foot or so is identical on all wheelbases. Hence you can only replicate a shorter wheelbase faithfully by chopping out a section in the middle - which is generally considered a little unwise! If I'm not making any sense, compare the images below. The first two are both F60S wheelbase, but the B&W one is a shortened F60L. Note the overly long midsection, extending beyond the front spring hanger, instead of tapering a foot or so in front. Likewise the second pair of images - the replica chassis is virtually ALL midsection. By chopping a massive 43" off the F60L chassis, it's lost the entire skinny section at the rear. It has no shape, so it lacks that distinctive blitz chassis look. A better result would be an F60S shortened by 19", or possibly even F15A lengthened by 14". Not that I'm suggesting it here! In every other respect it's an excellent replica, with things like the walkway and vacuum tank all present, and they've even riveted the spring hangers. The fuel tanks are wrong - they appear to be repro, but they're not 21 gallon. Clearly they've tried to get everything right, which makes me wonder how they screwed up the rear chassis so badly. The chassis drawing is quite interesting Tony. I can't see too much wrong with it, except the rear spring hangers which are definitely out of alignment. That handbook is a gem Keith, I imagine you'll be hanging on to that one! Tony, if you PM me your address I'll get those fishplates off to you. Shouldn't be any problems in the post I don't think, I've mailed similar stuff before. I just need to find the little ones, which I seem to have hidden from myself! Cheers
__________________
One of the original Australian CMP hunters.
|
|
#508
06-06-12, 21:08
|
||||
|
||||
|
Quote:
Anyway it doesn't matter, because I've just measured up my F60L chassis, and you'll definitely have to make up a new rear crossmember. It has to be quite a bit fatter, just like the one in the photos.
__________________
One of the original Australian CMP hunters.
|
|
#509
07-06-12, 12:42
|
||||
|
||||
|
Tony, I have read through your post several times now and it has FINALLY sunk in
I'm a bit worried now about the shortening of my chassis. Do I understand that the two rails narrow together as they travel back to rear portion? If so, I expect that may cause problems with either use of a correct cross member or a manufactured piece. I realise it would be essential to get it right, or issues would arise with rear springs width apart and where they must attach to the rear axle.Quote:
Years ago when I was a spraypainter and working with a smash repair and restoration shop, I bought a Ford Fairlane, and after driving it for several days I remarked to one a panel beater friend that I felt the front of the vehicle was not 'square' when veiwing the guards and bonnet against the windscreen base. He took a look and declared it was fine. I was not convinced, and as a result of my whinging over next couple of weeks, he felt he had to put the car onto a measuring machine they used to chassis repair. When the car was attached correctly and measured in a number of locations, it became aparent that the front WAS definately sitting higher on one side..........by 3mm. I never let him forget that I was right. As I said, I have a thing for symetry. Not much else though. Years later, and in another work envioronment, one bastard I worked with went so far as taping a 50c piece behind one corner of a large picture that hung in my office. He knew that picture would just about drive me insane with failing to straighten it. Every time I straightened the picture, it would move within minutes. I did this for several hours, with all the associated swearing that naturally follows such frustration. It was towards the end of the day, when I took the picture off the wall (adding blu-tack to hold in place) that I found the coin. Naturally I removed it.........and pocketed it, of course Well you didn't think I would give the coin back surely?Anyhow, moving on. Visited the upholsterer this afternoon. Door curtains will be ready for me to take tomorrow afternoon. They were half finished when I was there, and they look REALLY good. I have asked the guys to keep the canvas color on file, because I will be wanting mud flaps, bag for storing curtains & possibly other stuff in coming months. P.S: Tony, P.M sent. Much appreciated
__________________
Ford CMP, 115" WB,1942 (Under Restoration...still) Medium sized, half fake, artillery piece project. (The 1/4 Pounder) Last edited by Private_collector; 07-06-12 at 12:48.
|
|
#510
07-06-12, 20:47
|
||||
|
||||
|
Quote:
No, they're perfectly parallel all the way. When I spoke of "tapering" I was referring to the profile of the chassis rail itself, not the distance between the two chassis rails. Apologies for the lack of clarity. You'll have no trouble shortening the chassis, it's just that you'll have to make up a new rear crossmember. It has to be fatter than the original one, so it will fit snugly inside the chassis rail. By that I mean fit vertically - ie. inside the chassis rail not between the chassis rails. You're inserting the crossmember into the channel of the chassis rail, and the end of your chopped chassis rail is wider than the end of a full length chassis rail. The channel is wider, so you need a fatter crossmember to fill it. Hopefully that makes a bit more sense than my previous post. It's all about the profile of a blitz chassis rail, which tapers from the midsection towards the rear section. Or as Anne Elk explained on the Monty Python show: "All brontosauruses are thin at one end, much, much thicker in the middle, and then thin again at the far end."
__________________
One of the original Australian CMP hunters.
|
 |
| Thread Tools | |
| Display Modes | |
|
|


 Linear Mode

