|
#1
 07-06-09, 12:09
|
||||
|
||||
|
Well thought i would start a resto thread, saves people sifting through my intro thread to find progress on the carrier.
Well she finally hit UK soil Thursday 4th June 2009. and what a mess she is in ! i took all the bits out of the hull and checked everything was there which it was. started the resto by removing the asbestos heat sheilds which are breaking up so off they came, they have been bagged up and will be used as templates later. managed to get ther air intake boxing removed from the remnants of the center bulkhead, everything as you can imagine is seized up and severely rotted. i have not got my compresser at this garage yet so everything is being done by hand (which are now both cut to ribbons hahhah) took the heads off the engine and poored AT fluid down the pots, then took the inlet manifold off and filled the valley with the same fluid, I used this on recomendation from a carrier collector from Thunder Bay  needless to say the engine is severely clogged up and after some gently prying on the crank it was obvious that this is going to be a full rebuild. good thing is the block appears to be good and is holding fluids. Engine comes out when i can scrounge a hoist able to take the weight ! needless to say the engine is severely clogged up and after some gently prying on the crank it was obvious that this is going to be a full rebuild. good thing is the block appears to be good and is holding fluids. Engine comes out when i can scrounge a hoist able to take the weight !i went around the carrier just spraying all the nuts and bolts with penetrating oil just in preperation for the tear down. the battery holder disintegrated as i brushed past it so that will need re made after blasting. managed to get the gunners side track off, basically as i have been working on my own i have had to improvise somewhat, so i removed the sprocket tied a strap to the track tied the other end to my tow hitch and slowly drove away pulling the long section off without incident. So far i have about twelve links which need broke free, i have free'd the rest off. That said looking at the pins i have knocked out they are pretty bad i dont think they will be safe to run so i may have to steel Kevins pins...........Just kidding mate....... will have to make some new pins.. noticed that both my rear bogie wheels are caput, i thought it was just the rubber that was perished but the beading on the rim has been smashed out on both wheels in various sections, so they are goosed to say the least. have a source that can make front and rear fenders and the fender skirts so i have farmed that job out will wait and see what the quality of the repro is like if its good will let you all know who did them. so order of service is to get the engine out strip the hull and remove the road wheels etc cut the remainder of the center bulkhead out and remove the remainder of the glacis plate, trip to the blaster then etch prime, followed by high build zinc oxide prime. then the bits go back in to make a running tub. thats the plan anyway ! 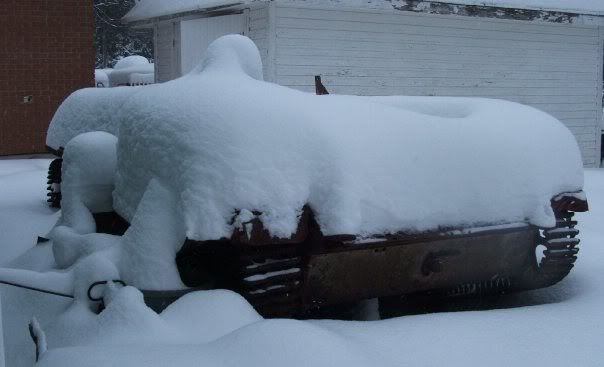   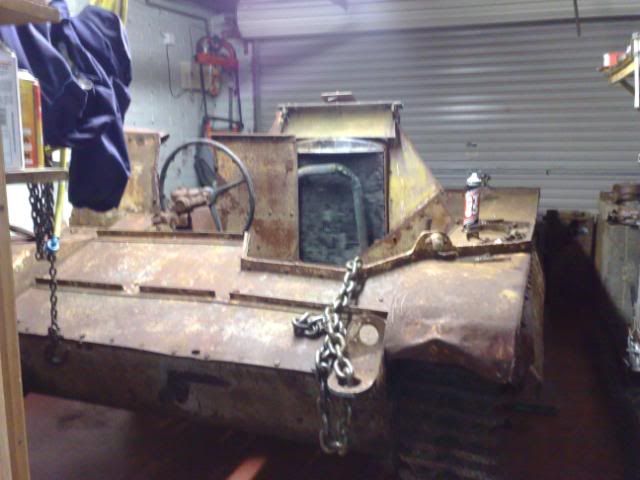 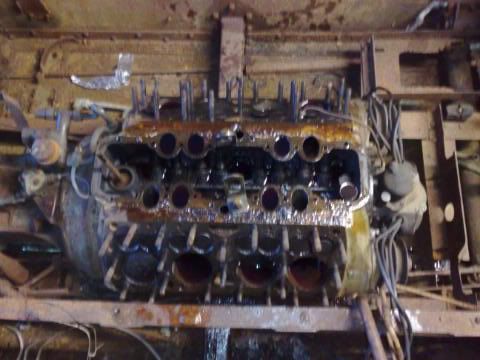 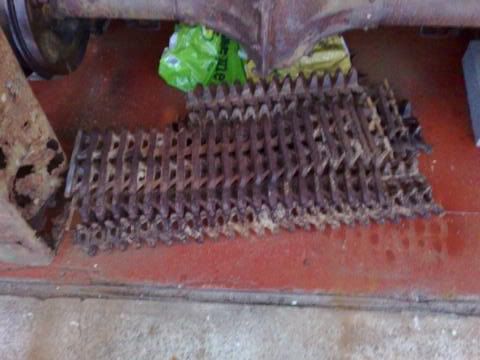 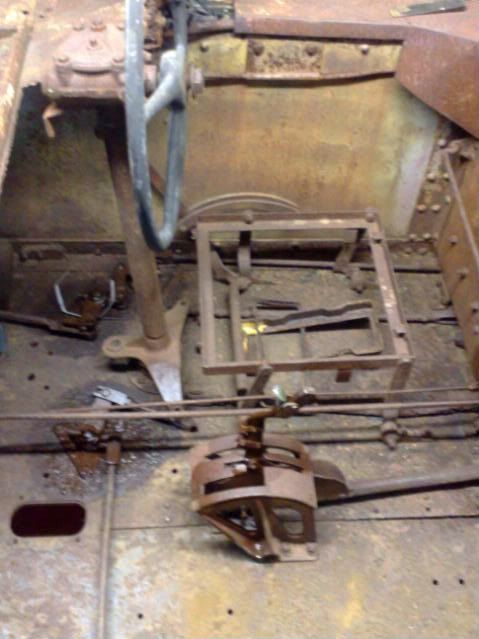 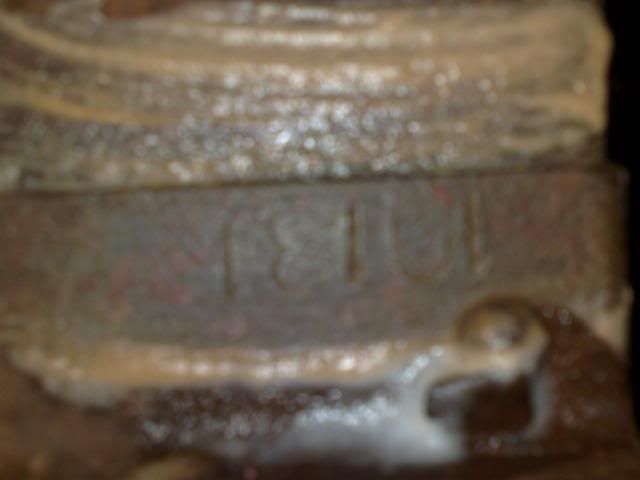 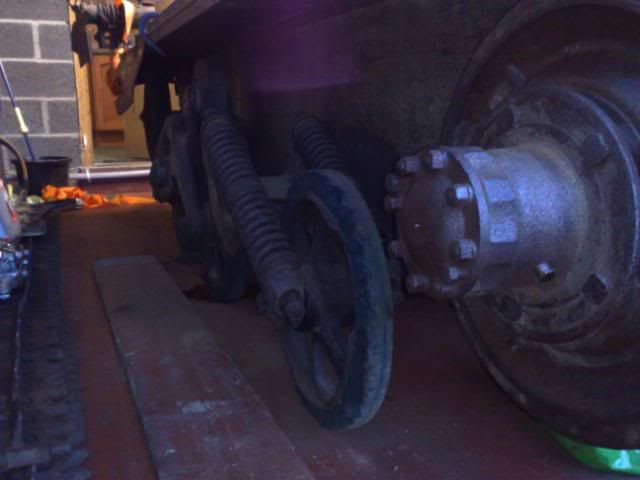 also the lower tub number is confirmed as 10131 it has too many digits and does not appear in the lists, however 1013 appears in a batch listed as "Missing"
__________________
is mos redintegro __5th Div___46th Div__ 1942 Ford Universal Carrier No.3 MkI* Lower Hull No. 10131 War Department CT54508 (SOLD) 1944 Ford Universal Carrier MkII* (under restoration). 1944 Morris C8 radio body (under restoration). Last edited by RichardT10829; 25-08-12 at 19:34. 
|
| Thread Tools | |
| Display Modes | |
|
|


 Threaded Mode