|
#1
 30-03-17, 14:51
|
||||
|
||||
|
Hello, folks.
I was attending a shindig for my employer and one of the guest speakers was the CO of the local reserve arty outfit. We got talking, found some common ground, and the next thing I knew I was a guest at his office looking at this old lady: 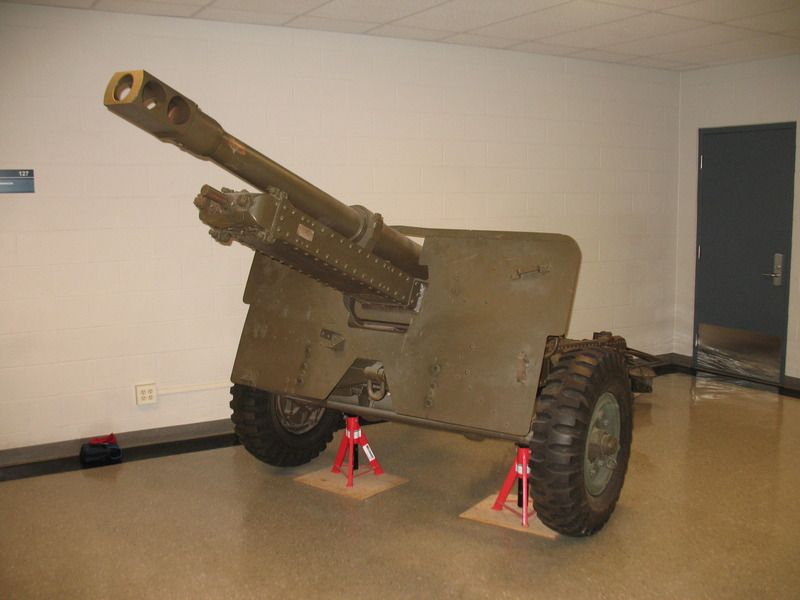 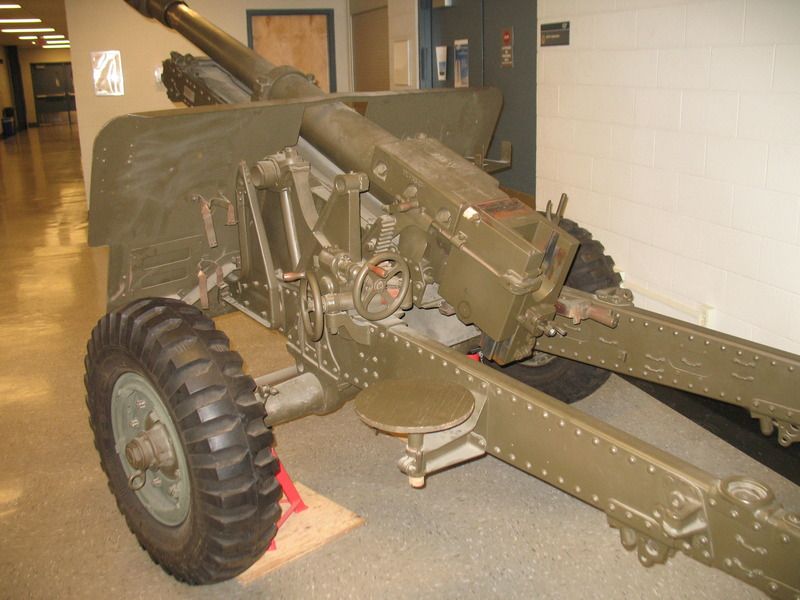 Yep, a 25 pounder, 1943 Canadian production, missing a few bits but fireable. Came home, warmed up the interwebs, sent a PM to a fellow on Canadiangunnutz to ask advice. He put me on to Mr. Rob Love who has been both a gentleman and entirely invaluable in my efforts to find resources to get her back on her feet. It was Rob sent me here. And yep, I've read the lengthy and enormously useful thread posted by Private_collector. Excellent stuff, and very reassuring. Thanks to Rob for getting me here, and to the rest of you for your contributions to that thread. So, the gun:  She's largely in one piece. The first thing that jumps out is that cut down gun shield. She was last used as a funeral gun, carrying old artillerymen to their graves, doubtless with dignity and appropriate respect. The platform was laid atop the cut down shield and then attached to brackets welded at the muzzle and the breech. The brackets have been removed, but the scars remain: 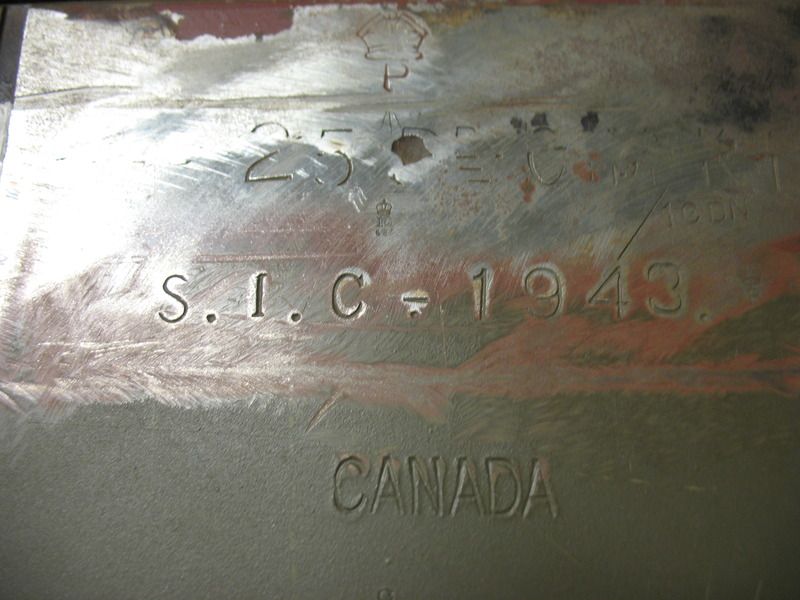 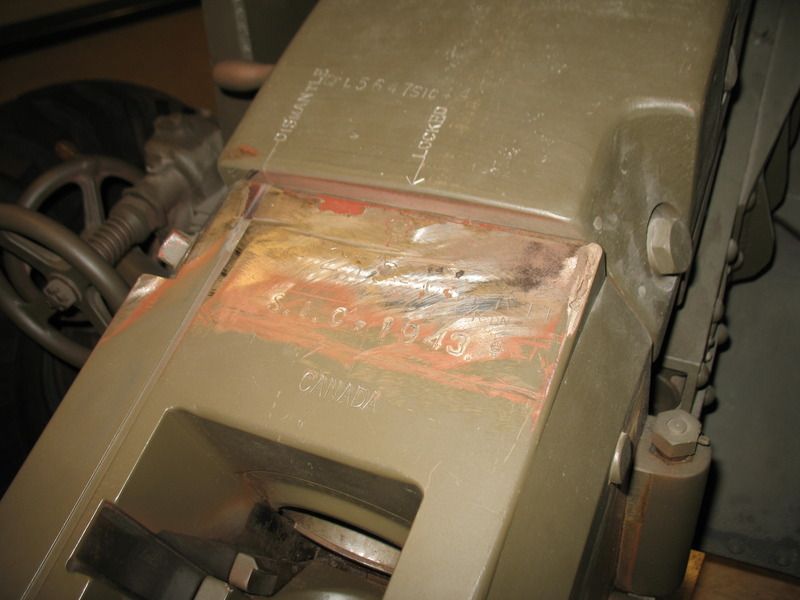 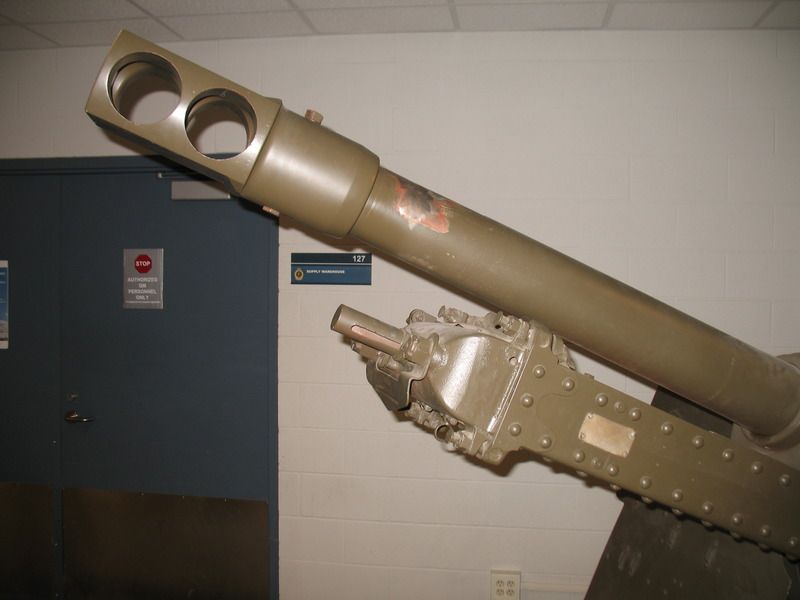 The shield still has a number of useful brackets and such attached. We'll be salvaging those. 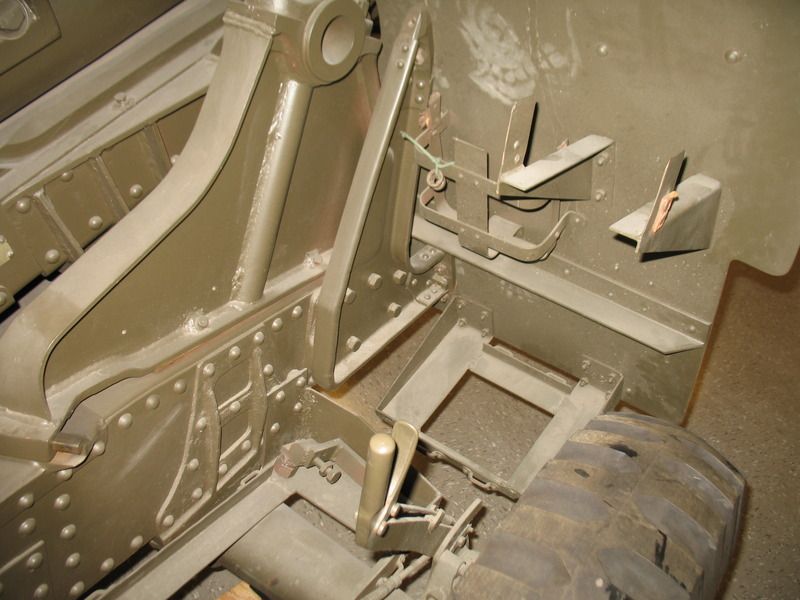 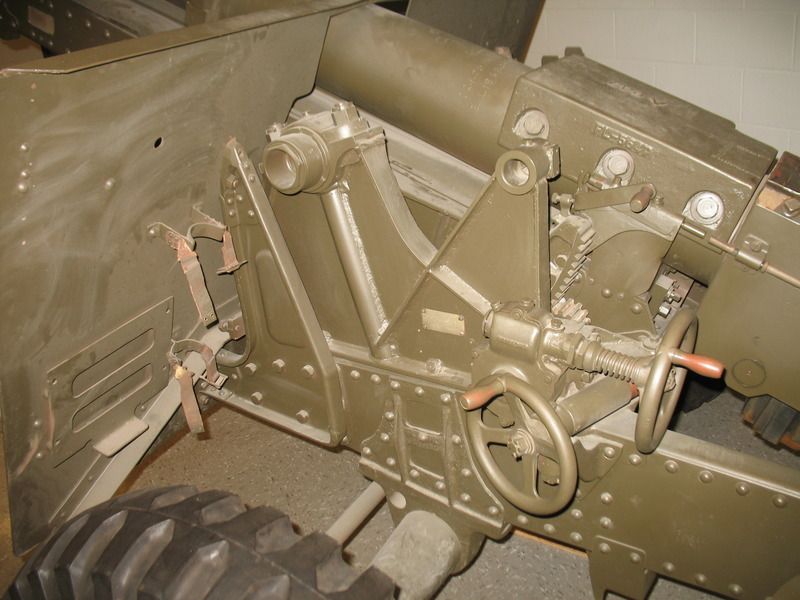 At some point in her life, someone saw fit to sandblast her and then paint her green. The sandblasting did the wee plaques and notices no end of harm... 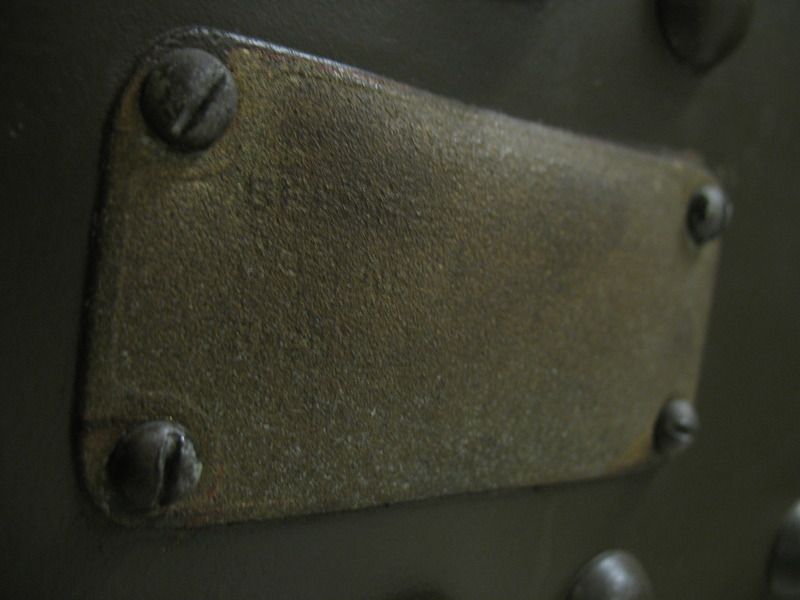 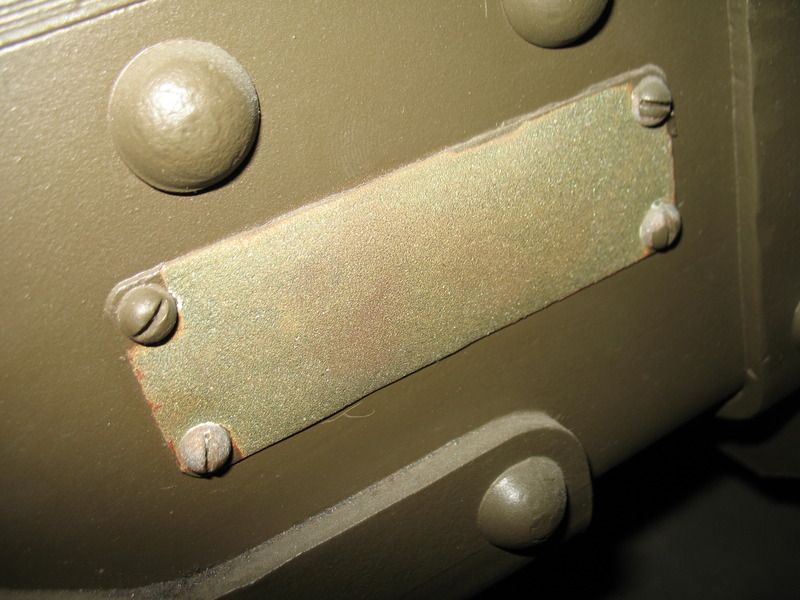 (I hope there's a source for replacements) and that green paint went everywhere. 
|
|
#2
30-03-17, 14:51
|
||||
|
||||
|
Note the traverse equipment is now brass and green paint:
 Most of the markings are still very clear: 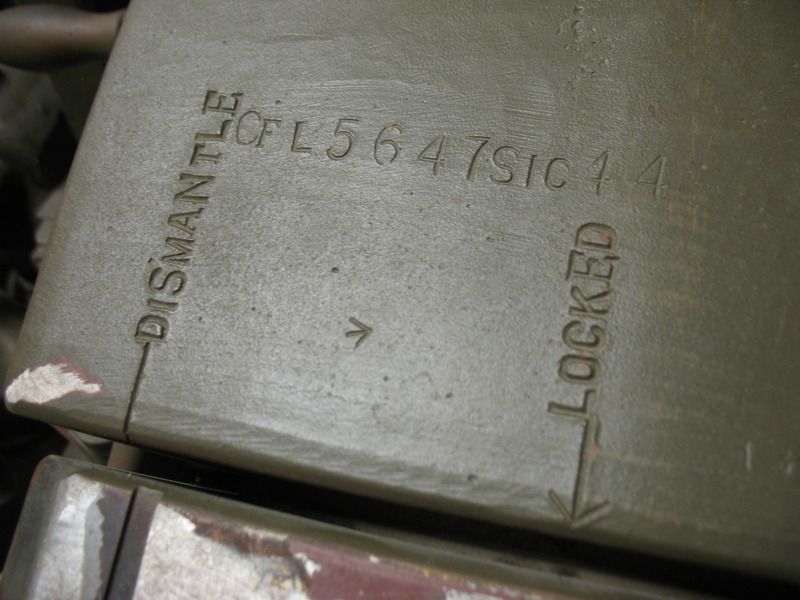 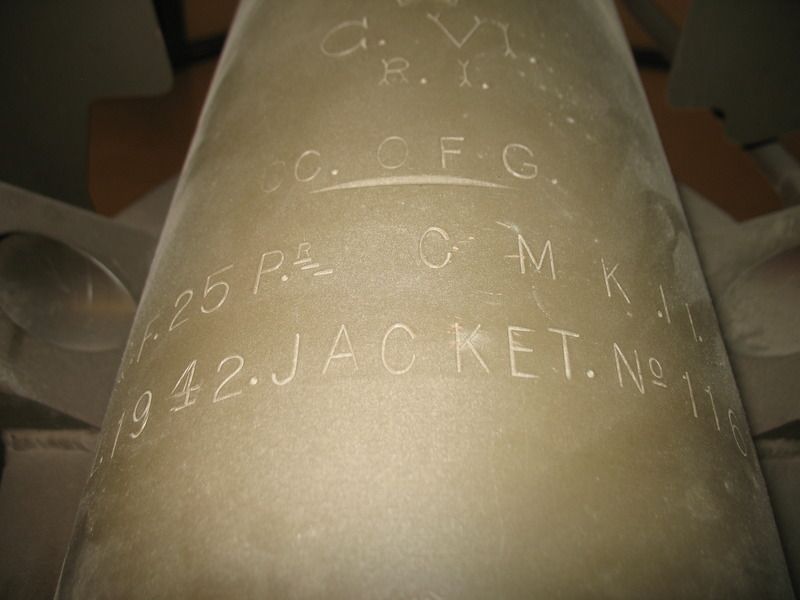 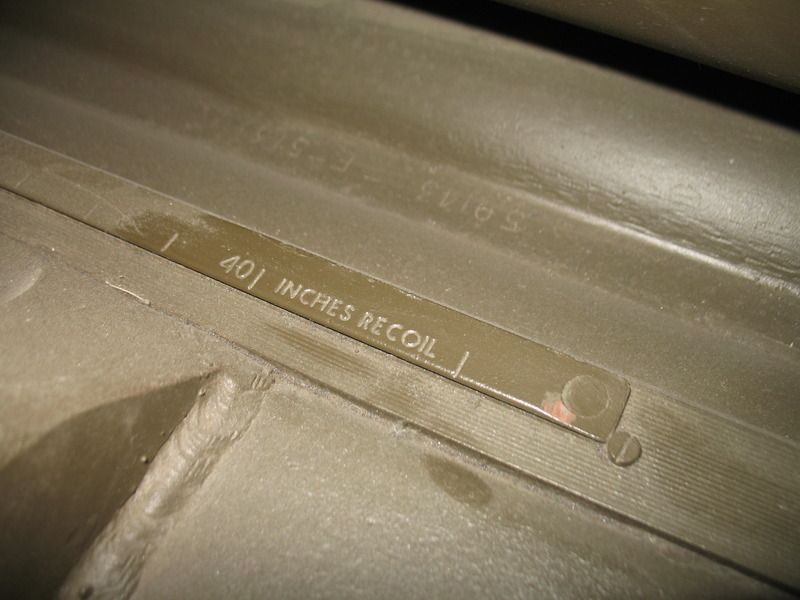 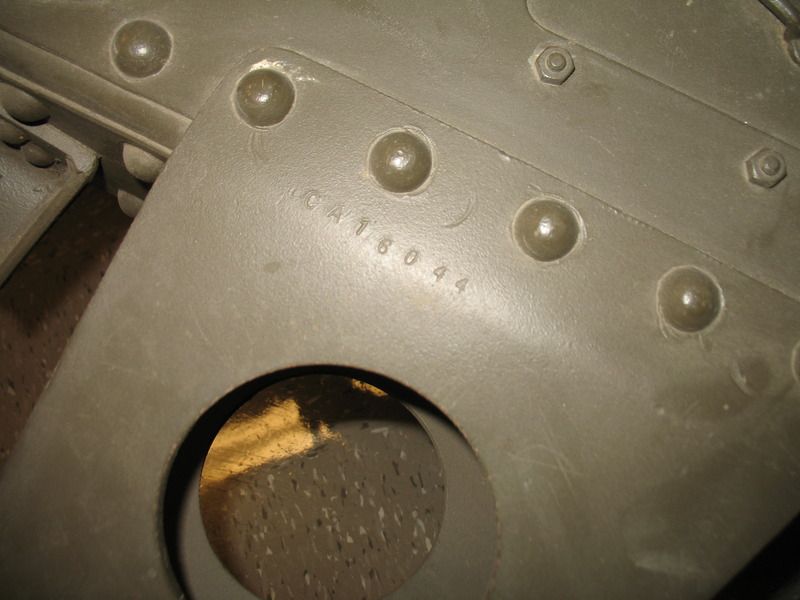 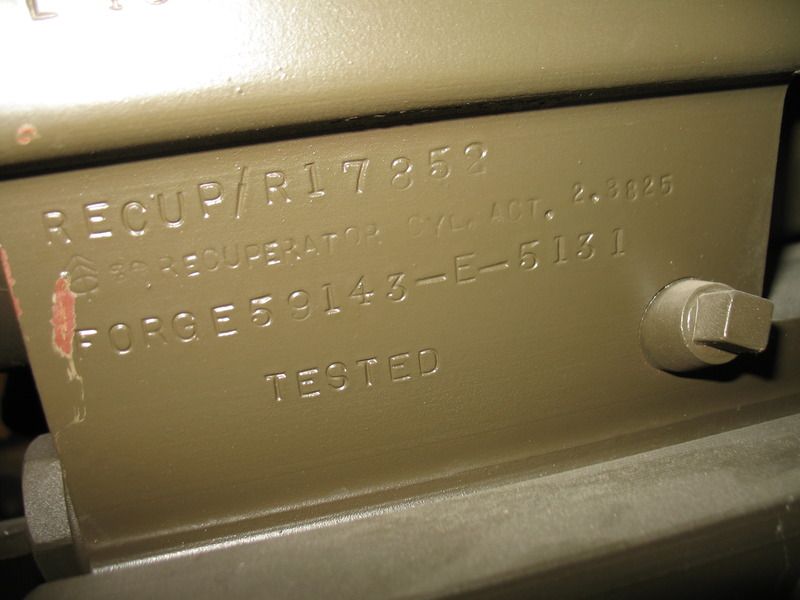 The bore rates NRA train tunnel: 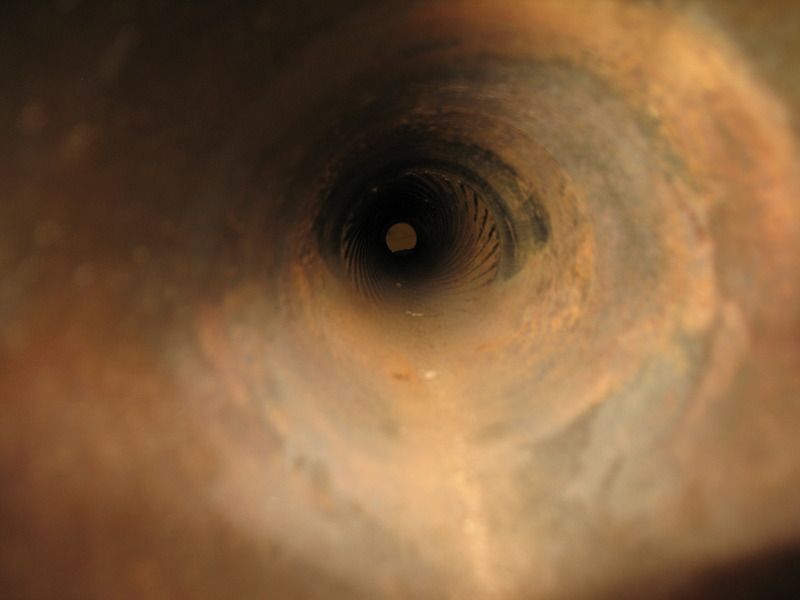 "Light frosting in the grooves, should clean up well..." Breech mechanism is functional and feels solid to my untutored hand. 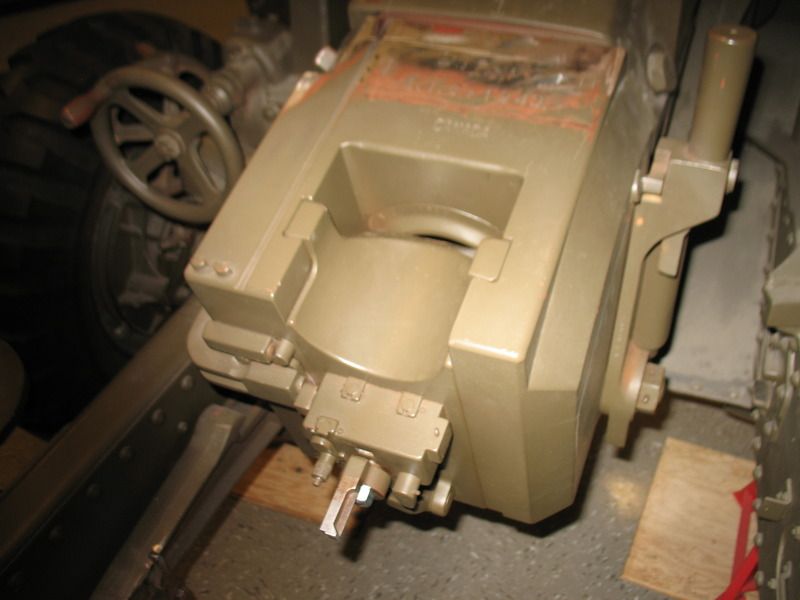 Tires are solid - holding air and appear NOS - they still have the wee moulding hairs on 'em. 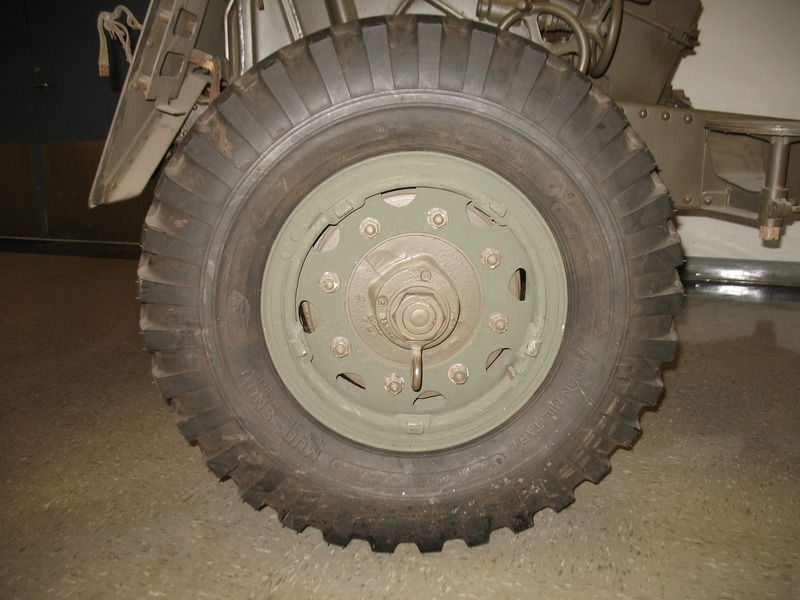 So here I am, utterly new at arty or projects of this size, and ignorant in the ways of Very Large Guns. Step one in such situations is to RTFM. Alas, I can't find one. Been all over the internet, and come up empty. The IWM will run me a copy of the one they have for about a hundred Canadian bucks, and make no guarantees of quality. If any of you know of one, please let me know. There's an interesting political/financial angle on this job. The gun is currently the property of the Friends of the Regiment Society and NOT National Defence. I'm told that this means there can be ZERO spillover in resources between ND and the organization that owns the gun. No parts can change hands, no transport resource can be employed, no labour on government time can be used. The RCA museum may have a ton of spare bits, but we can't access any of it. I understand this and am very OK with playing within the rules outlined by necessity, but it does make the job harder. Things we need right now: - sight mount - associated sights - uncut gun shield - big-ol' round firing platform - various bins, boxes, bags, ranging sticks, shovels and accoutrements to hang off the multitude of brackets, webbing, and such. - a pull through about the diameter of my Popeye-like forearm. I've done some internet nosing around. There's that outfit in the UK has the sight mount, but won't ship overseas. There's that Australian source for drag ropes. But that still leaves a lot of bits and bobs. I want that firing platform more than my next breath, and every time I look at that cut shield I die a little inside. If any of you have blueprints that would allow us to make a replica shield here, that'd be grand. The Society has corporate connections in oilfield manufacturing, and some clever bastard with an equally clever machine could doubtless make us a fresh shield with the holes in the right places. Once that's done, I have to figure out how to do big ol' rivets... Thank you for the benefit of your wisdom, folks.  Dan Last edited by Dan Johnston; 30-03-17 at 14:57.
|
|
#3
30-03-17, 22:00
|
|||
|
|||
|
Interesting project, Dan.
With regards to the shield, if you can get access to an original, might it not be easier to just clone the missing upper section and have it grafted onto what you have? That way might be more cost effective and enable you to preserve the vast majority of the original at the same time. David
|
|
#4
01-04-17, 06:16
|
|||
|
|||
|
Two things for you - it has been stored indoors, and the Chain of Command is supportive.
Two bad things for you - the Chain of Command can't support you, and some SOB who ought to have known better welded over the breech markings. (Some people!) Gunner Mike in Kars, On has a ploughshares and swords museum. He is active with 30th Fd Arty's collection. There are more historic guns in his lines than active guns in the CO's.
__________________
Terry Warner - 74-????? M151A2 - 70-08876 M38A1 - 53-71233 M100CDN trailer Beware! The Green Disease walks among us!
|
|
#5
01-04-17, 08:26
|
||||
|
||||
|
Hi Dan,
You might want to have a look at this website for all your manual needs. Rob does very good reprints at a good price too. Look here: http://www.robvanmeel.nl/ Good luck on your project!
__________________
Marc van Aalderen Daimler Dingo Mk1B 1941 Daimler Armoured Car Mk1 1943 Daimler Ferret Mk1/1 1959 Ford Universal Carrier No2 MkII* 1944 Ford GPW British Airborne 1944 Lightweight 10 Cwt Trailer SS Cars Ltd 1944 Anti-Tank Gun 6 Pdr 7 Cwt MkII 1942 Daf Trailer YAA602 1954 Daf Trailer AT16-24-1NL 1977 Daf 2100Turbo 1982
|
|
#6
01-04-17, 15:34
|
|||
|
|||
|
Hi Dan
Nice looking project. I would check (as others have noted about restoring the shield back to its correct shape and size. Others can throw in about welding required of armour to mild steel. The goal should be to preserve as much "original" as possible. Also sad someone did not removed the brass tags prior to sand blasting, that really did a number on them. Lastly get that gun punched and de-crapified, it hurts the eyes just looking down that tubes pictures. James
|
|
#7
07-04-17, 02:51
|
||||
|
||||
|
Thanks, gents, for the suggestions. Keep 'em coming!
Found the manual online as a .pdf, printed her off and so there's Job One done: 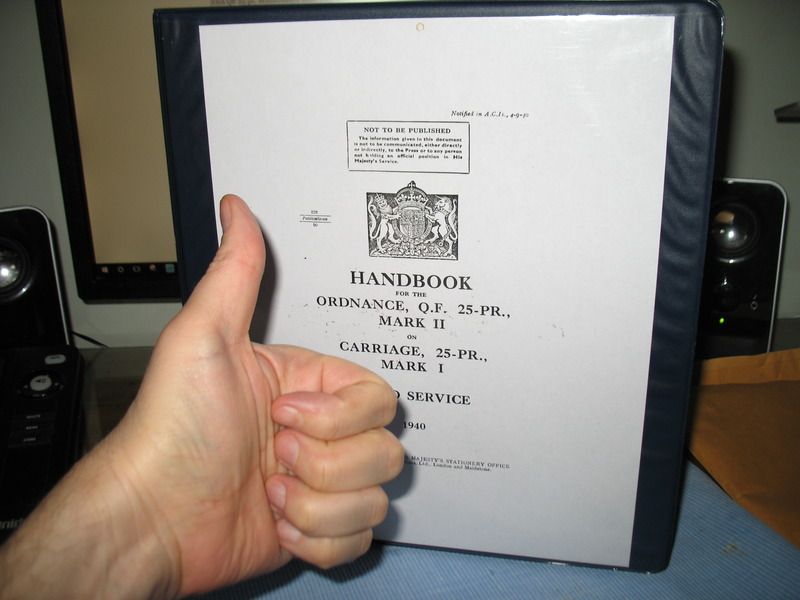 Much excellent reading to be done there. I've made contact with the Limber Gunner fellows in Toronto as well as Gilles Aube of 3BAM in Quebec who are all doing now what we want to do with our gun in time. They've been very helpful indeed. Re: welding an addition onto the top of the shield - yeah, I'd like to keep the gun as original as possible. If that weld could be done in such a way as to be invisible, that'd do nicely. My only concern is that there's a hinged piece up there that might be hard to reproduce. Bears more research. Does anyone know of a set of blueprints, or very accurate dimensional drawings we could work from? Question to the current owner/operators of a 25 pr. Mark II - any trick to getting the striker block out of the breech block? Near as I can tell from the manual, one pulls out the catch and rotates the striker block 1/6th of a turn clockwise, then slides it out back. I can't help but think that if it was that easy, some chimp would have taken it years ago when she was parked outside accumulating that lovely patina in the bore... I'd like to get the striker block and breech block out of the gun and scrubbed free of paint, then relubed correctly and reinstalled. That'd be easy enough, and allows us to bring loose part home where they won't fall prey to sticky fingers. Re: brass tags - I imagine these can be reproduced if we have a set to work from. Any ideas? And yeah, that bore. As a lifelong shooter, looking down that cruddy old pipe makes me slightly tearful. Gotta get that shiny. Last edited by Dan Johnston; 07-04-17 at 19:24.
|
|
#8
07-04-17, 04:27
|
|||
|
|||
|
Quote:
While I may get a little flak from the herbies in the crowd, they are well known for making life harder for themselves than it had to be.
|
|
#9
07-04-17, 14:17
|
||||
|
||||
|
Dan,
You cannot remove the firing mechanism if it has been cocked. This one sort of looks like it has been as the slide is all the way to the left and the safety catch is on fire. But the bit sticking out the back of the firing mechanism is around the wrong way and it looks to have a nut in place of the T piece, so it is hard to tell. Your manual has a good drawing in it and from that you should be able to work it out. Good luck.
__________________
Phillip Thompson "He who has the tiger by the tale, is often afraid to let go" - Confucius Ford FGT No.9 (long suffering restoration project) 25 Pdr (Under Restoration) No.27 Artillery Trailer (Under Restoration) Bit and pieces of a 2 pdr AT (Looking for bits) LP2a Carrier - 3" Mortar Trials (Restored)
|
|
#10
07-04-17, 19:22
|
||||
|
||||
|
Thanks, Philip. Might have a bit of a problem there...
The gun won't dry fire. There's a rock-solid resistance to operating the firing mechanism. I had worried that the safety was stuck on (zero rotation of the safety lever - I'm hoping that's just paint adhesion) but as you note, it's off. So to get the block out of the gun, the striker must be in the fired position. Problem is our gun won't fire. I'm loathe to force anything, having seen the end results of "kitchen table gunsmithing" too many times in my life. I really don't want to just grab the firing handle and reef on 'er until something goes click. Next time I see her, I'll make a close inspection for welds that shouldn't be there. Some enterprising soul has tack welded some of the bolts on the shield, I assume to prevent theft. I hope to hell he didn't get all enthusiastic and throw a couple into the firing block as well, or we'll have to do some very, VERY tentative grinding to get past that... Ideas?
|
|
#11
13-04-17, 23:01
|
||||
|
||||
|
OK, update:
Met some of the lads in the outfit last night. Good people, very interested in helping out. HUGE institutional support on this job, which is wonderful. Got the gun to cock and click once we figured out we had that one piece of the firing mechanism in backwards. Such are the trials of the neophyte. Learning new stuff daily, it seems. Ran a hedgehog down the bore, producing a horrifying cloud of rust. That will not do. Job one next week is a pail of CLP, the same hedgehog, and much scrubbing. We are missing an essential piece - the wee t-handled cocking piece on the firing block has wandered away. We would very much appreciate either the loan of one that we could copy and return (paying postage both ways, of course) or drawings sufficiently detailed to recreate one from them. Can someone lend us one? We have a millwright/machinist in the crew who could turn one out in his lunch hour at the shop... Cheers, Dan
|
|
#12
13-04-17, 23:45
|
|||
|
|||
|
I have NOS T caps still in sealed packaging.
£25 plus postage. PM or email for more info. Rob................rnixartillery. Last edited by rnixartillery; 27-07-19 at 20:58.
|
|
#13
21-04-17, 19:45
|
||||
|
||||
|
Thanks, Rob. Working on getting the bureaucracy to kick loose the necessary funds. Will advise.
Update: Wednesday was very productive. Dropped by early with a bag full of tools and blood in my eye. That firing block was gonna come out or else I was going to apply harsher language and more animal brute force. Last week we pulled out the Firing Block Catch, made sure the striker was in the "fired" position, and attempted to rotate the block clockwise as per the manual. Sadly, the combined force of a brawny WO and me shouting encouragement accomplished nothing. She was on there as tight as if she was welded. I retired to consider strategy. Fast forward to this past Wednesday, when I returned to the battlefield with a soft-faced hammer and a plan. Scribed around the perimeter of the piece with a dental tool, applied penetrating oil, waited five minutes, whispering soft words of affection to her the whole time. Pulled the disassembly catch rearward, applied torque. Nothing. Hammer time. Gentle taps showed slight progress. Good. Not breaking stuff. Hit harder. Rotation. 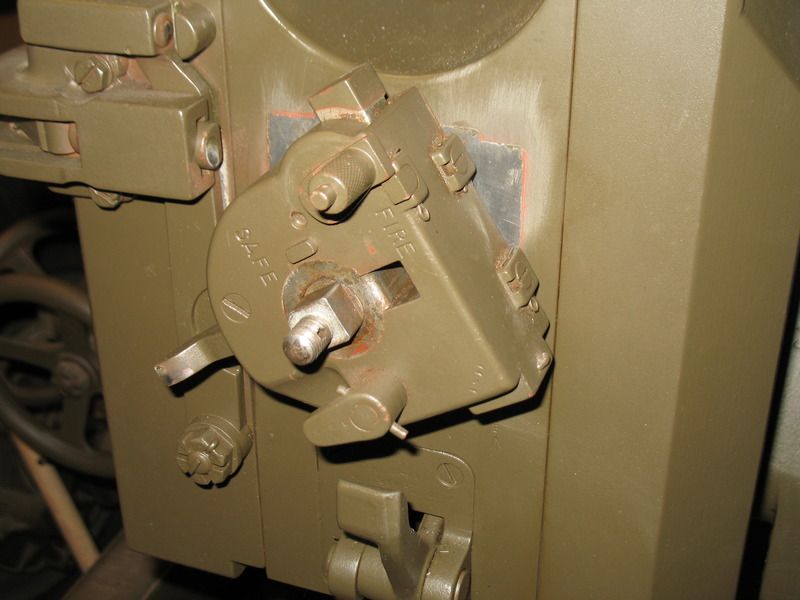 More tappage. Interrupted threads disengage, block is free. Feeling pretty Indiana Jones about now. 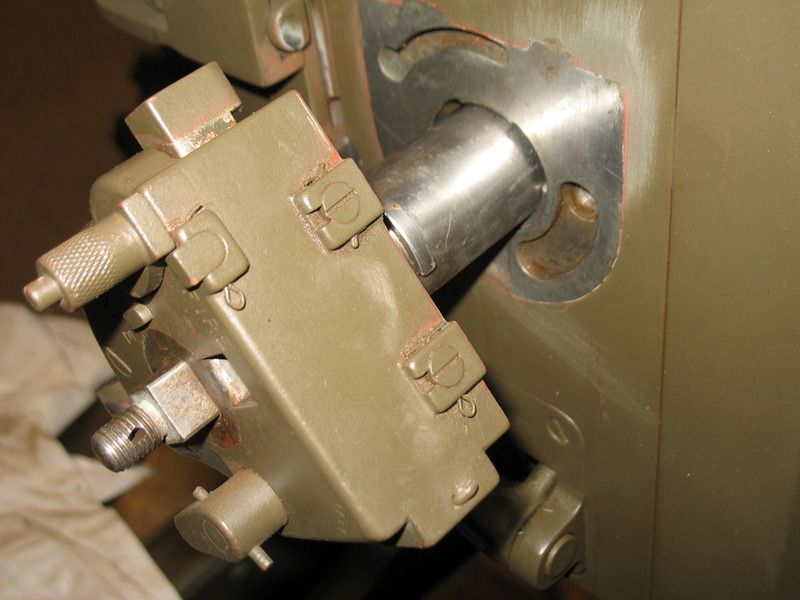 There she is. 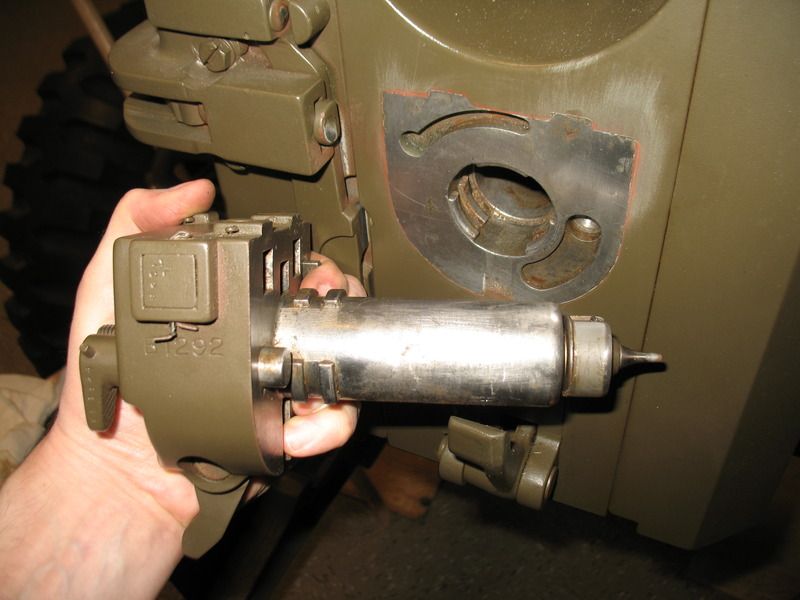 Some rust present, but the lads who last had her apart were generous with the oil and grease. Zero pitting or problems, just dried grease and paint adhesion. 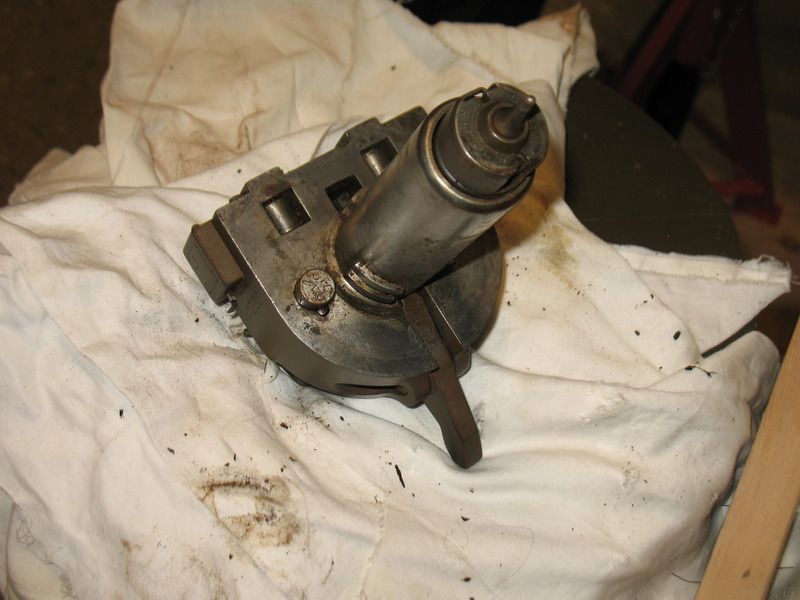 Flushed with success, we moved to the breechblock itself. 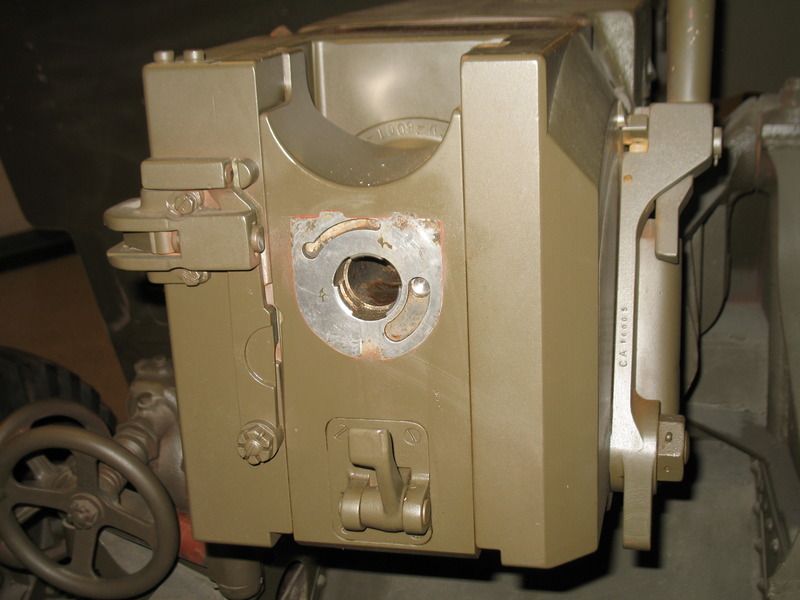 After tapping out the Breech Operating Handle Buffer (held tight by paint and time) the breech block was delivered into the hands of a helpful MWO who happened to be wandering by. Thanks again, mate. 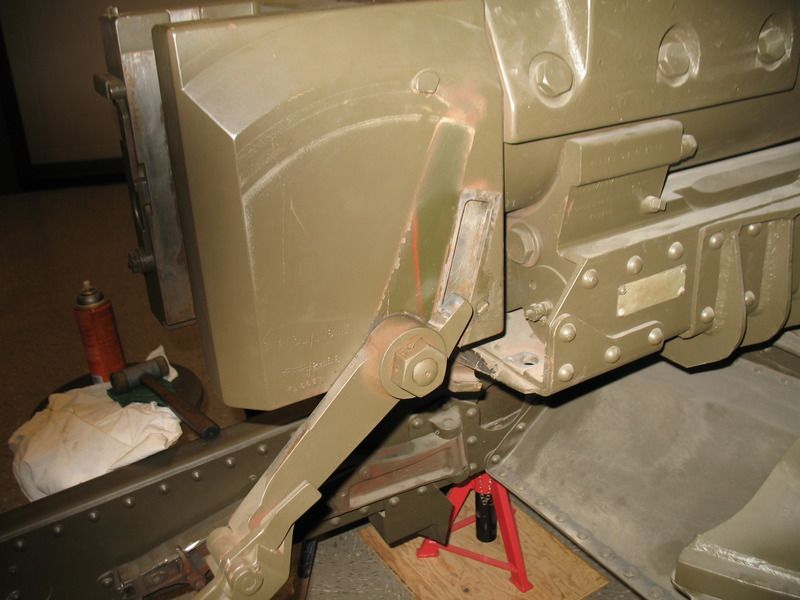  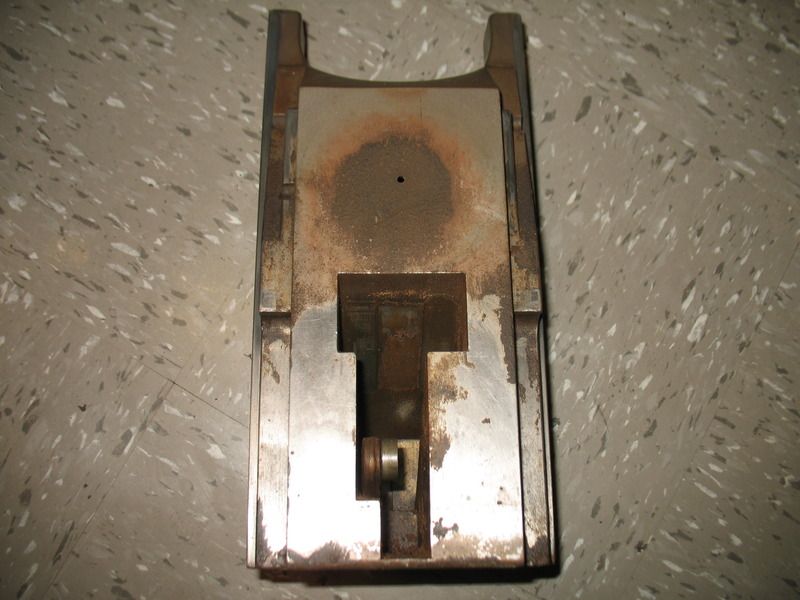 Looks horrifying, I know, but most of that was dried grease and oil and came off with gentle scraping using a razor blade. There's very little if any rust on that breechblock. Weighs about as much as one would expect a large loaf of bread made of steel to weigh. I also pulled the firing linkage off the port side of the breech ring - all of it painted green. Broke my heart to get it off and find brass. There should be a law about painting brass. never mind. I'll make it right. Took the firing linkage and firing block home for teardown, cleaning, paint stripping, relubrication, and affection. Teaching a course this weekend, so I lose two days, but come Monday I should have more pics. Quick question - I want to get that grisly green paint off the entire breech end of things. Any suggestions re: paint stripper that's kind to steel and brass?
|
|
#14
21-04-17, 19:56
|
||||
|
||||
|
Quote:
|
|
#15
01-05-17, 14:31
|
||||
|
||||
|
Thanks, bud. I'll give that a try.
Update from last Wednesday. Stripped off the breech ring: Before: After: 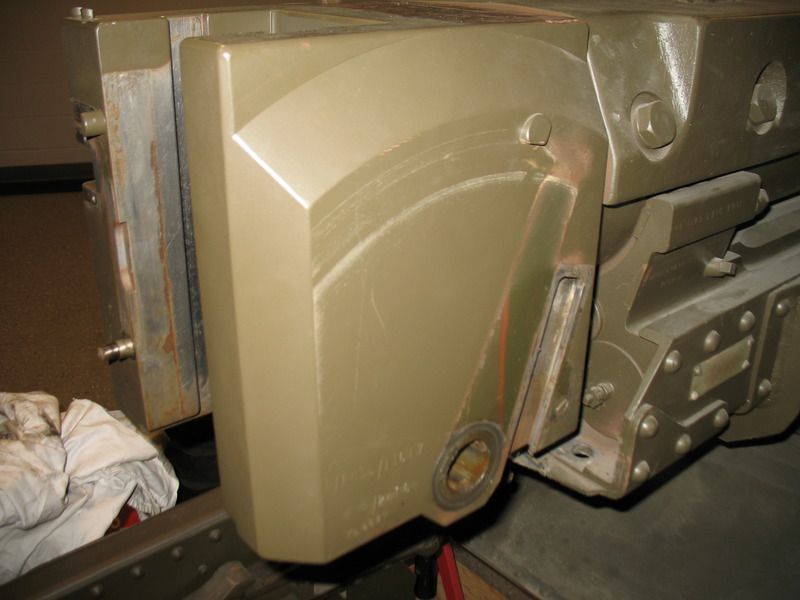 Internals are in pretty decent shape. Dried grease, very minor corrosion, and about a cup of coarse sand. 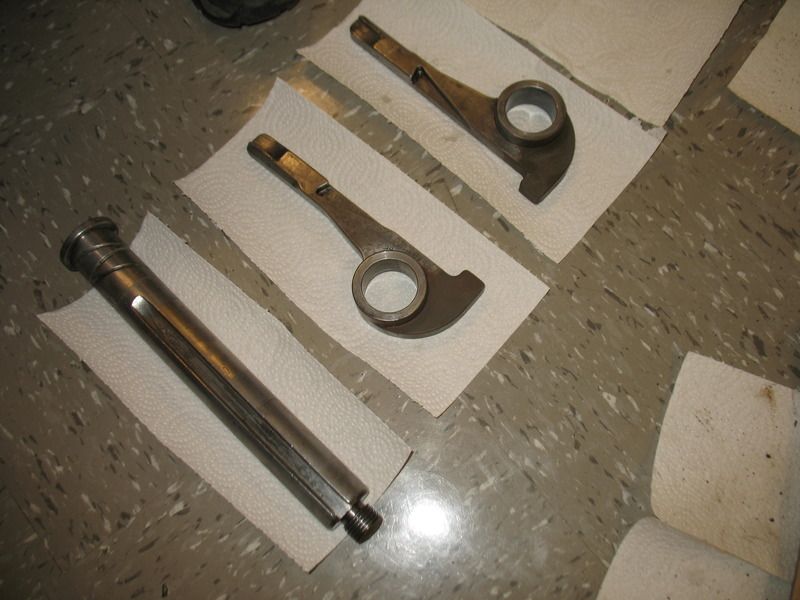 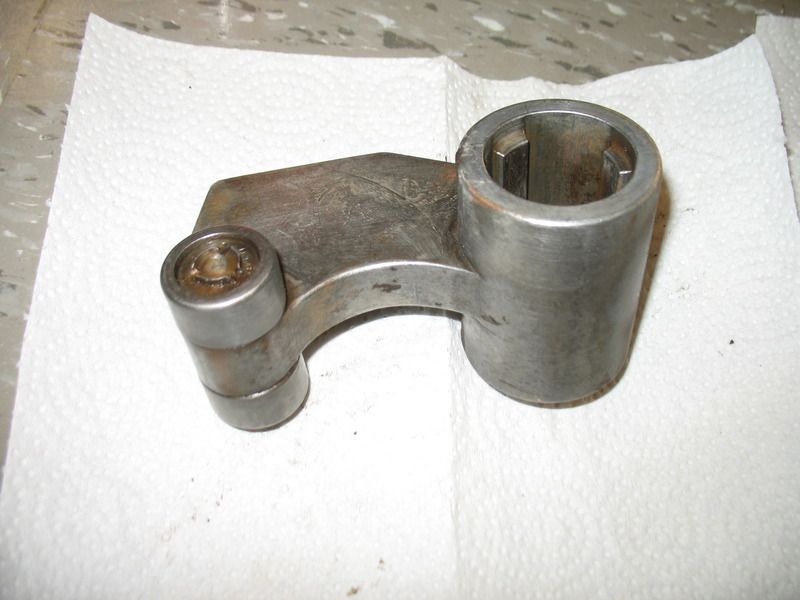 Here, my son channels his inner Khyber Pass Child Labourer/Apprentice Gunsmith and gently returns the bits to an acceptable state. Dental tools were key to the operation. 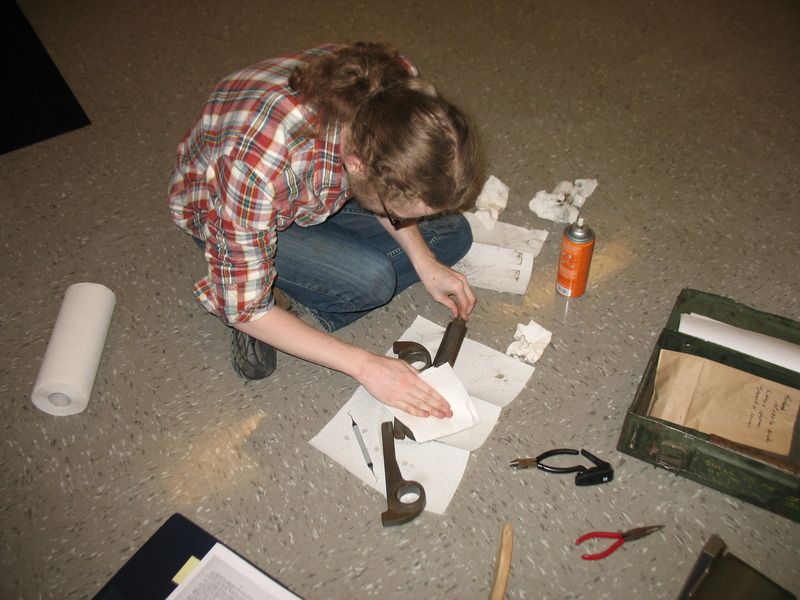 I note that each extractor is clearly labelled in 20-point font: 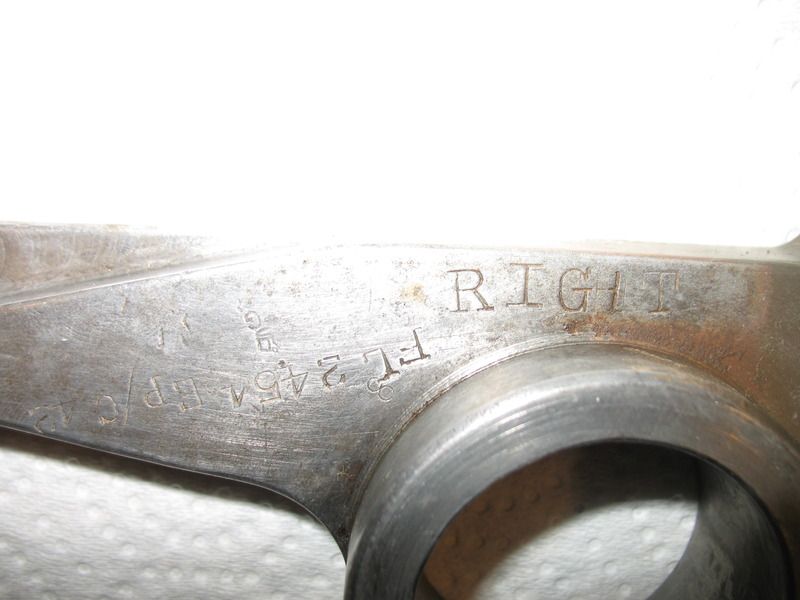 No screwing that up. With the breech ring gutted and as light as it could get, time to spin it off. Sorry, no pix of the operation. We were pretty busy watching the Padre wrassle with the thing. But here's the back end of the barrel. 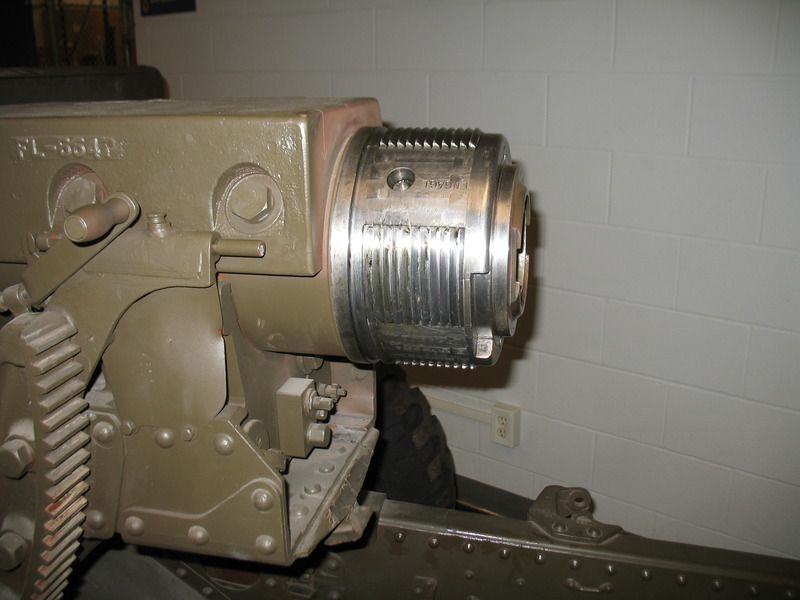 Buck naked and covered in a thin layer of grease. Nothing Freudian about that. Note the complete absence of corrosion. Whoever tucked her in for her nap read and followed the manual, God bless 'em. And off to the front of the gun, where the Padre again channelled the Power of the Spirits and spun the muzzle brake off. 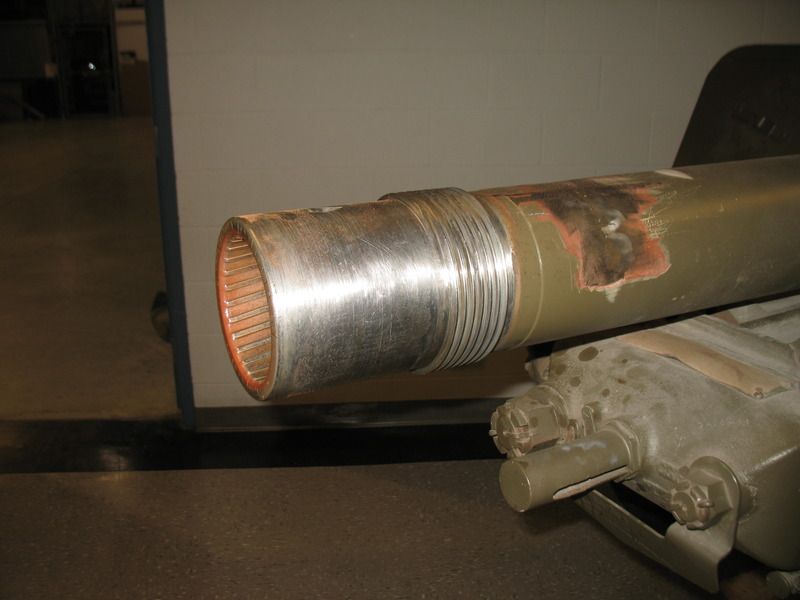 Note the hint of rust at the muzzle. That's indicative of the best of it. The floor of the chamber area looks like the bottom of a gravel pit. She's soaking in CLP right now awaiting this Wednesday's labours. I fear she'll need something stronger, perhaps a 90mm wide ball of steel wool on a drill. Poor old thing. We'll get her running, and soon. Onward, Dan
|
|
#16
01-05-17, 15:07
|
|||
|
|||
|
Where did you find the pdf of the manual? That might be a good place to start looking for the ones I need (17 pounder and Bofors 37 mm)
|
|
#17
09-05-17, 14:59
|
||||
|
||||
|
Hey, Ed.
I got the manual from an online source in England. Not the best way to do it - buddy sent it to me as an unprintable .pdf, then ignored three separate emails asking if I might have my newly acquired property in a form that I could actually use. I ended up paying another twenty bucks for a downloadable program that removed the print protection. The manual ended up being pretty pricey. That being said, I'll dig around and see if I can find his address. If you choose to go that route, send me the print protected version and I'll "unscrew" it here and send it back. Cheers, Dan
|
|
#18
12-05-17, 01:23
|
|||
|
|||
|
Very nice what you are doing..keep up the good work.
Hopefully these shots...across from the RCMP station at White Rock BC . may be helpful to you re. the original armour shield shape and the cast ID plates ..Sandblasting sure did a number on them. The weird green colour is due partly to camera response of a typical overcast day here on the Coast and badly faded paint of unknown origin.
|
|
#19
12-05-17, 01:28
|
|||
|
|||
|
This is what the ID plates looked like on the White Rock memorial gun
|
|
#20
12-05-17, 01:33
|
|||
|
|||
|
Armour shield shape comparison between original and the challenge you are facing..
|
|
#21
12-05-17, 01:53
|
|||
|
|||
|
Comparison shot of White Rock CofG markings
|
|
#22
12-05-17, 02:14
|
|||
|
|||
|
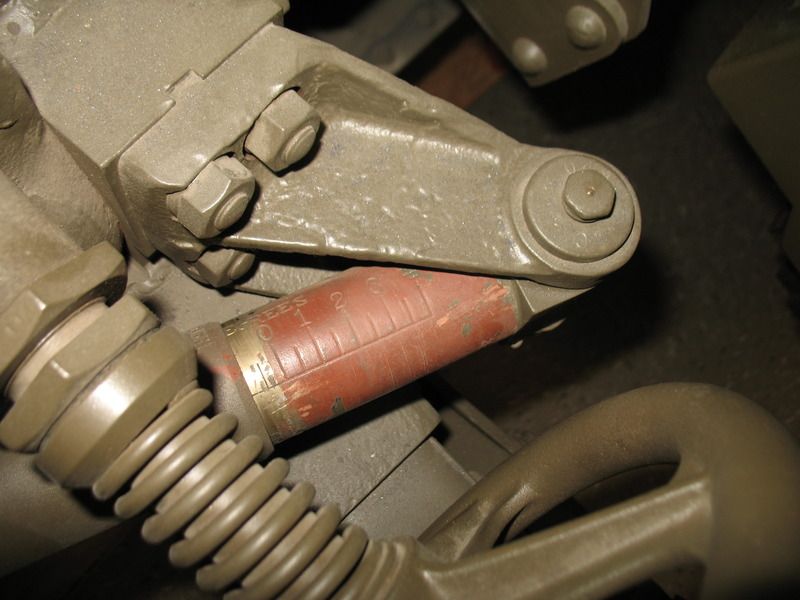
Breech layout..comparison
|
|
#23
17-05-17, 14:19
|
||||
|
||||
|
Thanks very much, Dennis. She looks largely intact, if a bit neglected.
This is the second piece I've seen that's been "dewatted" via removal of the firing block and sloppy cutting done around the ensuing hole. I wonder if that was the approved method of the time. It's certainly effective, if a little bloodthirsty.
|
|
#24
19-05-17, 01:23
|
|||
|
|||
|
Glad I could be of help.
If any specific photo's would be useful in your rebuild...…WhiteRock is just a short drive away.
|
|
#25
22-05-17, 23:38
|
||||
|
||||
|
OK, update.
In service, the 25 pr gun had an unpainted breech ring/breech block/firing apparatus. The whole arse end of the gun was left in the white. You'll note ours isn't. So that green crap's gotta come off. Enter the first really nice evening here in Edmonton in a while and a big ol' jug of gel paint stripper. Let's slop it on the horrifically-heavy breech ring and the muzzle brake (several outfits operating the 25 as a ceremonial gun have polished their muzzle brakes to a high gleam. Looks flash, if not authentic, but we can always repaint.) Early success reveals that paint stripper is colour-sensitive. It hates green paint... 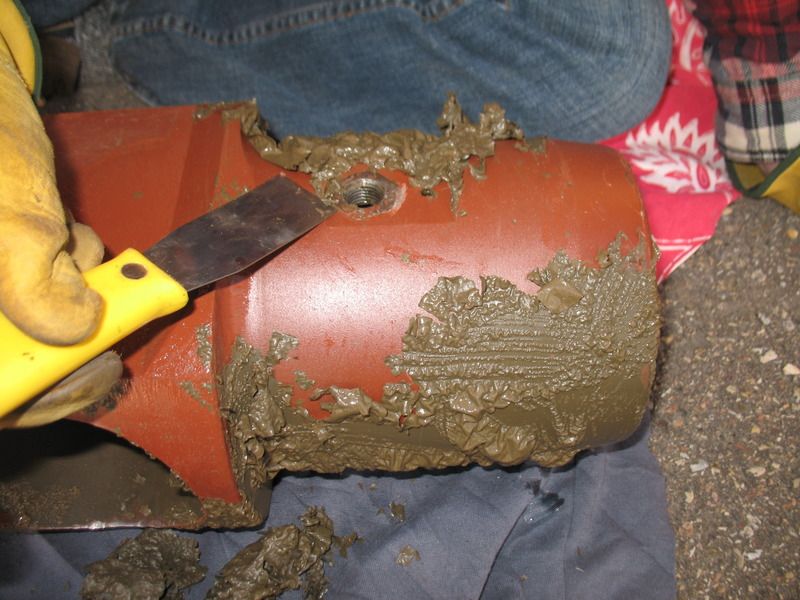 ...but is entirely powerless against red primer sprayed over a sandblasted finish. The wee bit of bare metal you see on the right is from light sanding with 1200 grit paper. 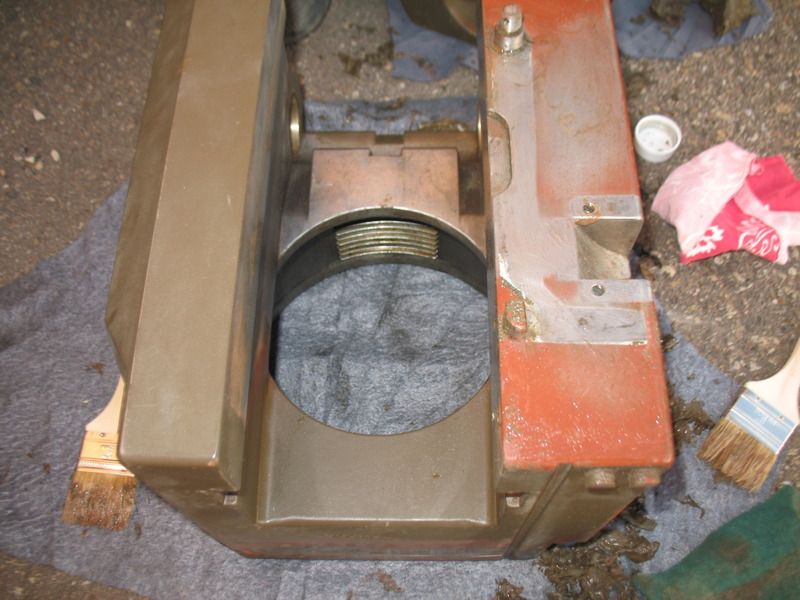 Hand sanding will be laborious and possibly only marginally effective against paint down in tiny pits. I reckon some sort of bead blasting/soda blasting/dry ice business will be called for. We retire to consider our options. In the meanwhile, a package arrives from England, courtesy of Mr. Rob Nixon. 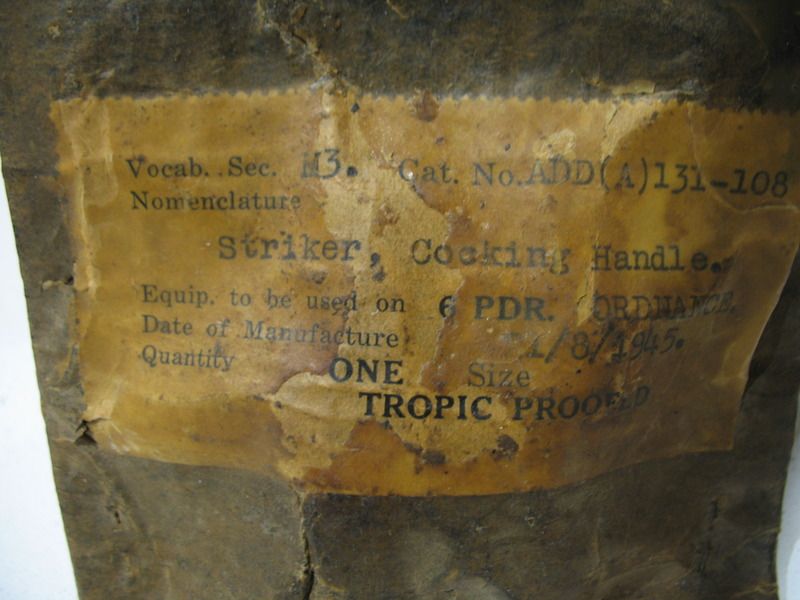 It's a replacement for the long-lost cocking handle, packaged in January of '45 and readied for somewhere warm and humid. The envelope is heavily waxed and made of horsehair or something. 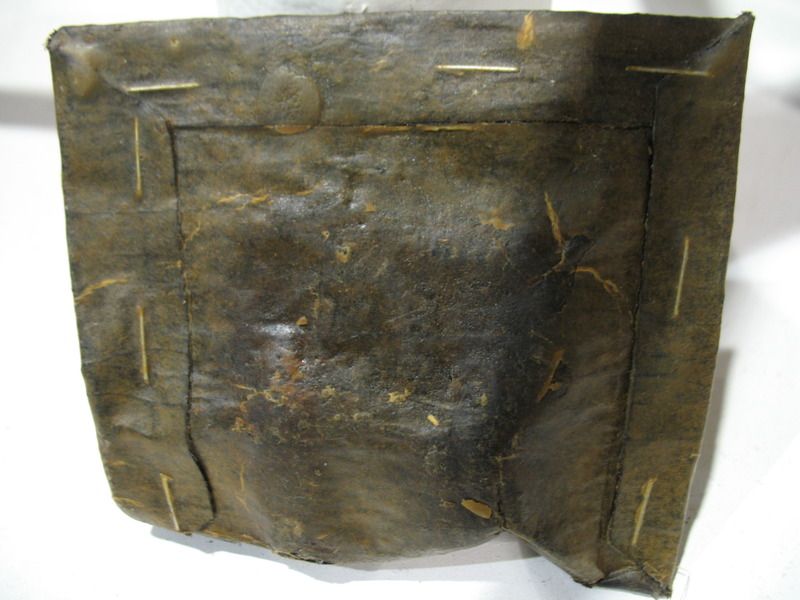 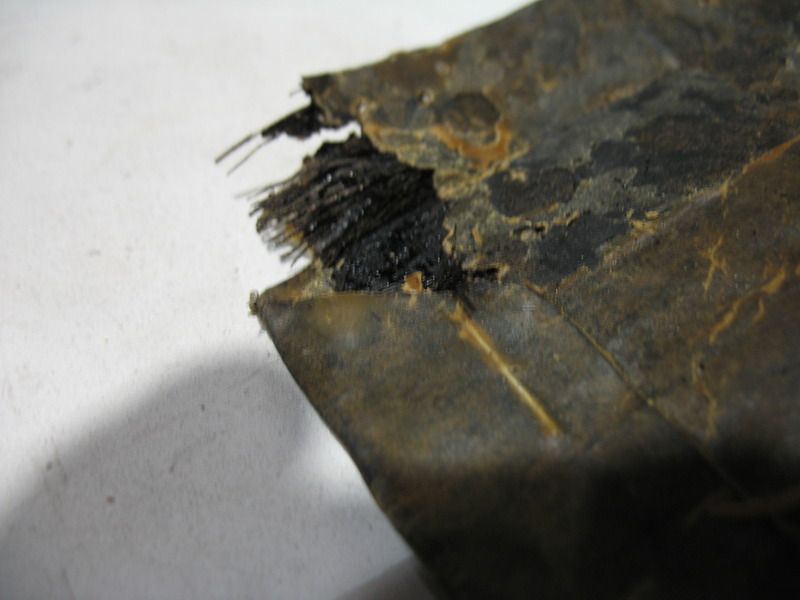 Upon careful opening, we find a wee package of wax paper. What could be inside? 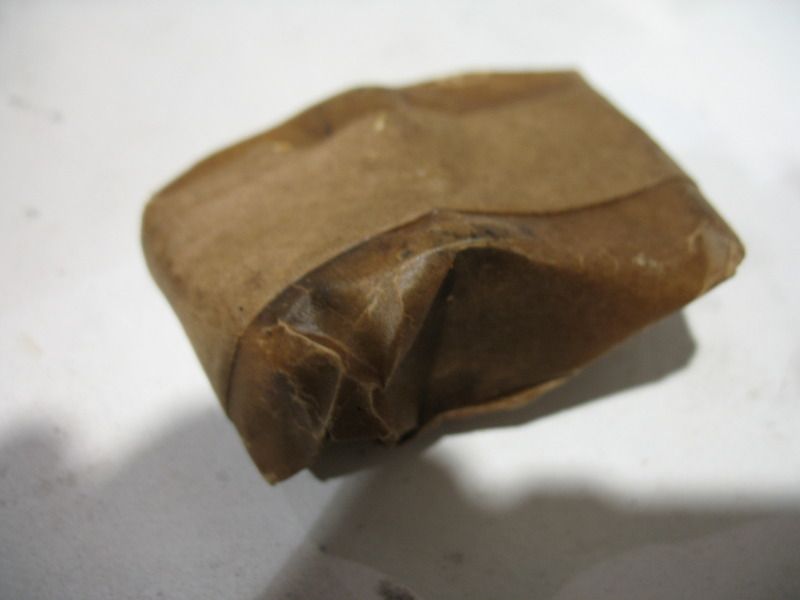 It's the promised cocking piece! 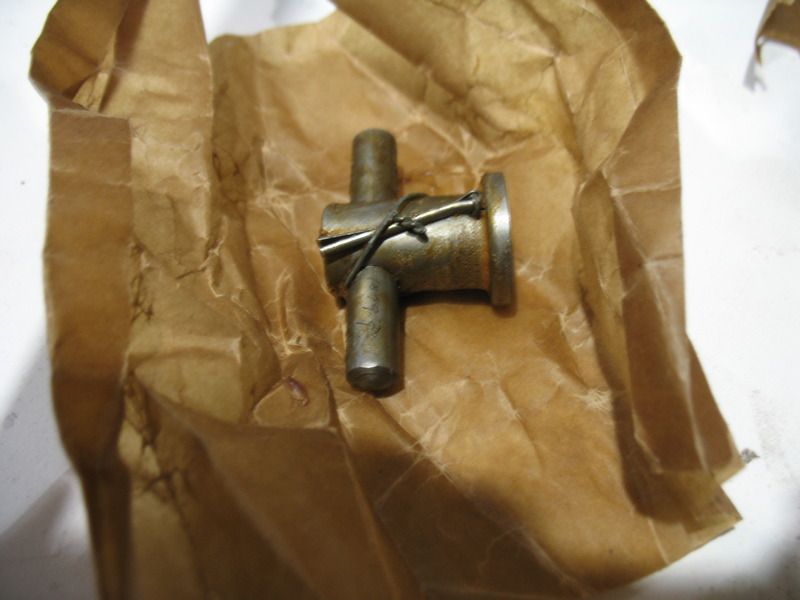 Last touched by humans seventy two years ago. The cotter pin attached by a length of wire wound on there by someone likely long since gone west. 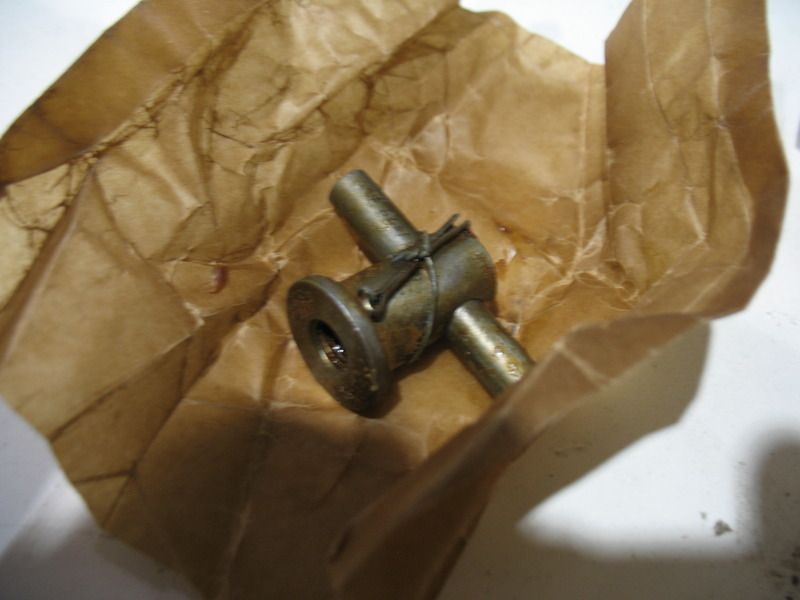 Many strange numbers and markings. 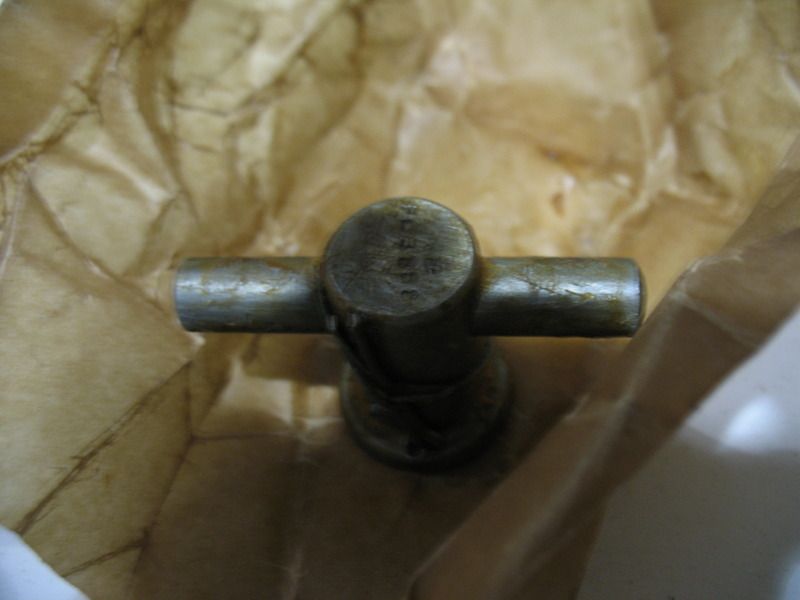 She needs a ride through the solvent tank to get the remains of the Tropic Proofing off her, but I did a quick test fit and she threads straight onto the firing pin. I am very pleased indeed. Progress is slow, which is fine. We've made up a list of priorities and intentions and if we can find what we need we can be firing our first blank in no time. Cheers, Dan
|
|
#26
23-05-17, 08:48
|
|||
|
|||
|
Breech rings were not always bare metal. Period pics of all Q.F. artillery seem to show painted and unpainted in roughly equal measure. The manuals state that everything is painted except the working surfaces, this suggests that the outside of the ring should be painted.
__________________
Adrian Barrell
|
|
#27
22-08-18, 17:47
|
||||
|
||||
|
Necrothread arise!
Duly noted re paint/no point on the breech ring. We're hoping to go forward with a naked breech ring almost purely because we think it looks flash. We've entered into the project wholeheartedly and have taken on a second gun, this one from a sister battery in Red Deer, AB. She is largely non-restorable, but we're learning a lot about the breed and will return her to her plinth in much better cosmetic condition than we found her. We also hope to weatherproof her as best we can. Pics as they come available. Dan
|
|
#28
22-08-18, 23:31
|
|||
|
|||
|
Dan
Glad to see you are still on this project and posting again. Try, try, try to keep your gun indoors or someone 20-30 years down the road will be following in your footsteps and working to "undo" the ravages of mother nature.
|
|
#29
23-08-18, 00:58
|
||||
|
||||
|
Hey, James.
With any luck the lads in Red Deer can establish some sort of covering for the poor old girl. Weather is profoundly unkind to these things. The rust we're finding is heartbreaking.
|
|
#30
23-08-18, 23:24
|
||||
|
||||
|
Quote:
Cheers, Dan.
|
 |
|
|
 Similar Threads
|
||||
| Thread | Thread Starter | Forum | Replies | Last Post |
| C8A HUM s/n 3844536691 1944 | Shayne | The Softskin Forum | 89 | 19-01-20 17:54 |
| Intended Carrier recovery, wisdom sought | Robin Craig | The Carrier Forum | 50 | 25-12-12 07:22 |
| 17 Pounder | CWO (ret) Gilles Aubé | The Gun Park | 0 | 21-12-08 21:03 |
| Wit and wisdom from military manuals | RHClarke | The Sergeants' Mess | 2 | 22-01-07 04:40 |
| 25 pounder | zanzare | WW2 Military History & Equipment | 2 | 09-02-06 21:29 |


 Linear Mode

