
 |
|
#181
|
|||
|
|||
|
There are variations in the size of the 2 gallon can, especially between Australian manufacturers and again between Australian cans and the Canadian, as I think Euan is suggesting.
I published an article in Army Motors several years back which had a table of size variations. I think KVE might have republished it more recently? (Richard??....). I don't remember the details of the sizes, but certainly worth looking for a foreign (CDN) can. The one you show is almost certainly an Aust made can - very basic folded handle, cast metal cap (probably not brass) with no provision for a chain keeper, top and bottom pressings the same three shallow depressions, etc etc. Mike |
|
#182
|
||||
|
||||
|
Quote:
Your article was in KVE News no. 15 and 16 ( 2 parts). not been able to get back issues on the new website yet, but will push for it. In the mean time, Dale, I can email these to you. According to a table of details of cans in Mike's article, the cans were 6 inches wide except for the Water can which was 6 3/8" wide. Is the stowage for a water can? If so the stowage is correct. regards, Richard
__________________
Richard 1943 Bedford QLD lorry - 1941 BSA WM20 m/cycle - 1943 Daimler Scout Car Mk2 Member of MVT, IMPS, MVG of NSW, KVE and AMVCS KVE President & KVE News Editor |
|
#183
|
|||
|
|||
|
Thanks guys . I'll do a better measurement tonight when I go home but looking at Euan's photo my tab is the same spot , looks like I need a 6 inch can . It would be great if I can buy a spare one off someone ! this way My carrier rear end is complete . Dale
__________________
1944 GPW and Bantam trailer |
|
#184
|
|||
|
|||
|
Finished off the air filters yesterday , I used WIX WA6487 filters . I cut off the flange on the top with sharp knife , then made four cut outs on the bottom of filter this , make a nice tight fit , with no air gaps . Dale
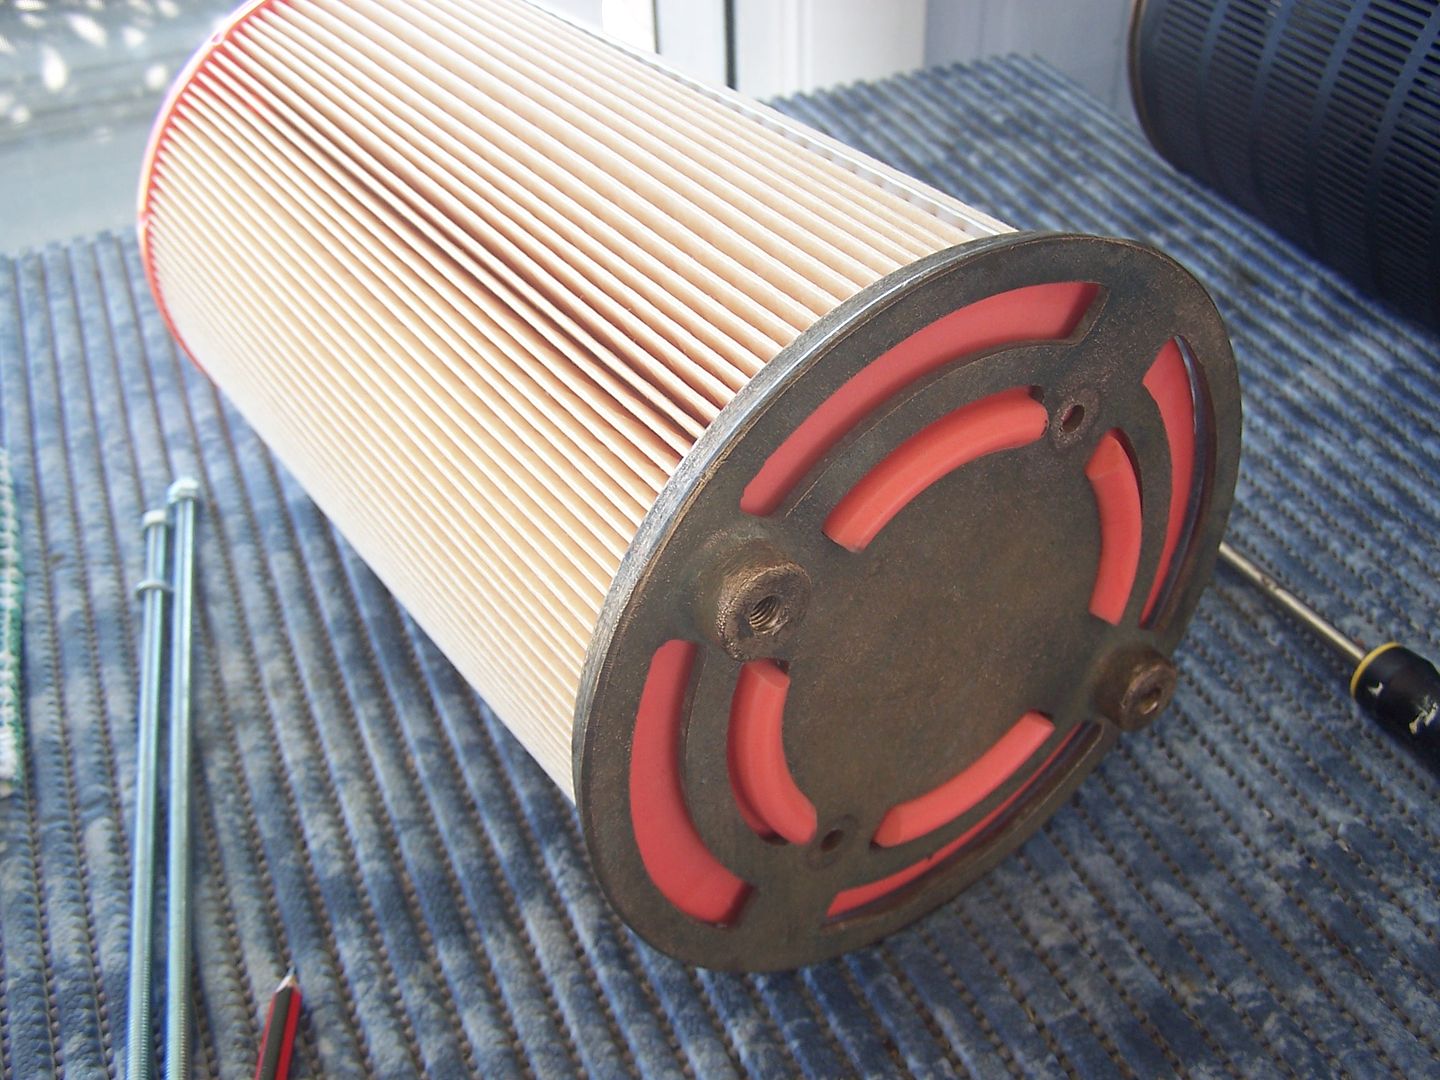 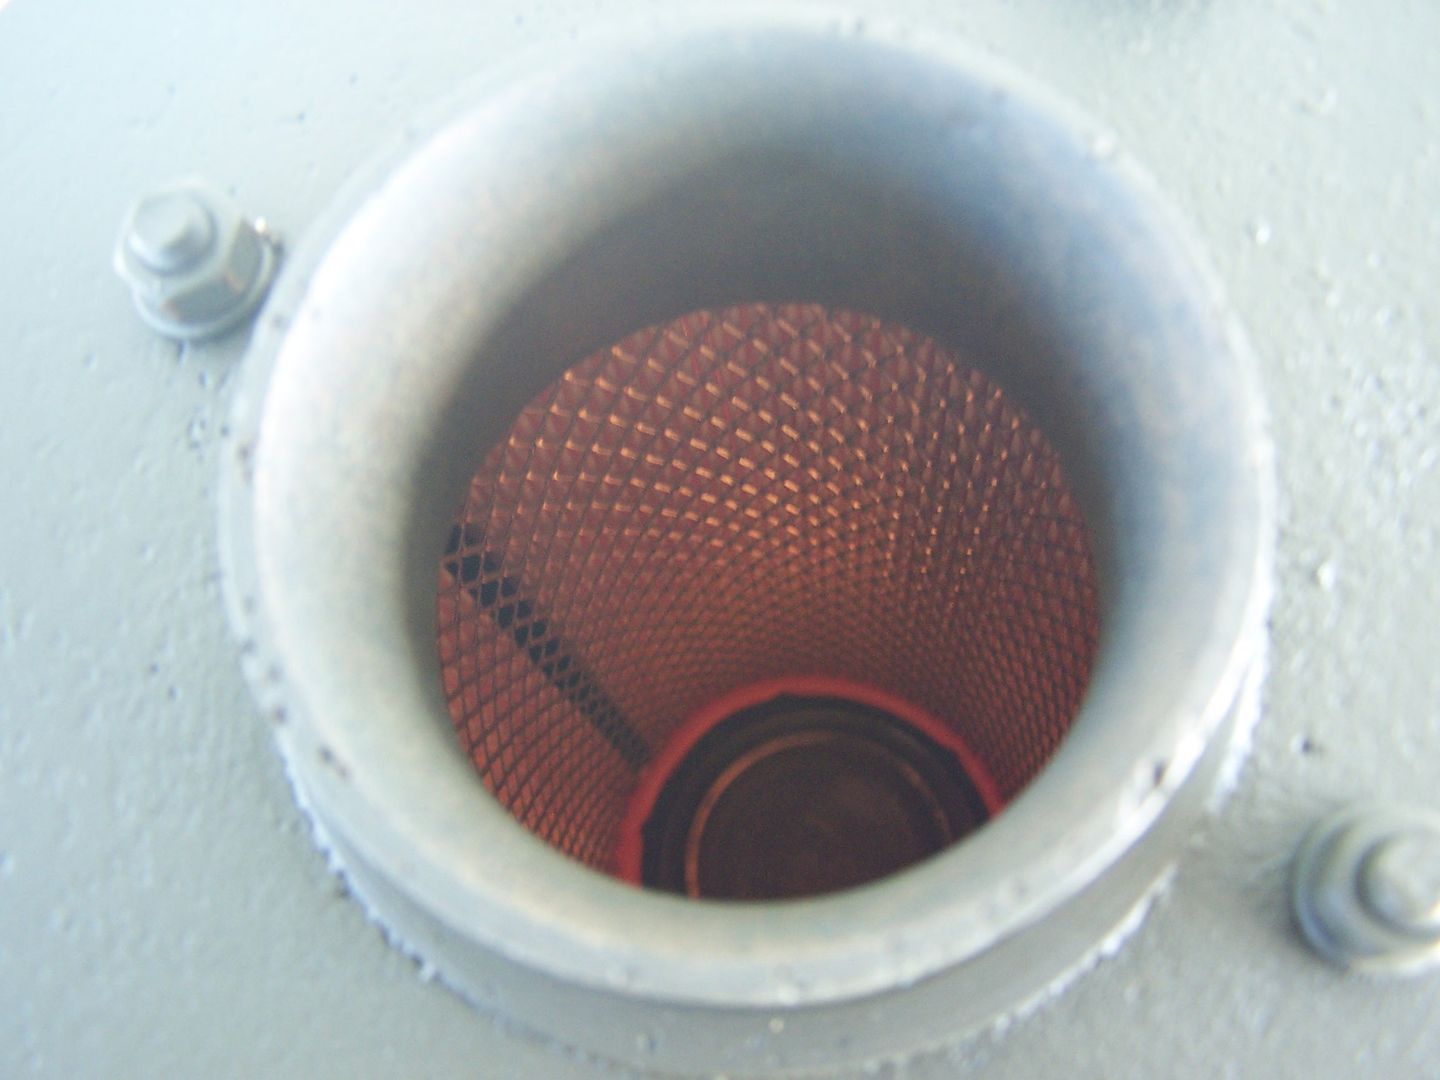 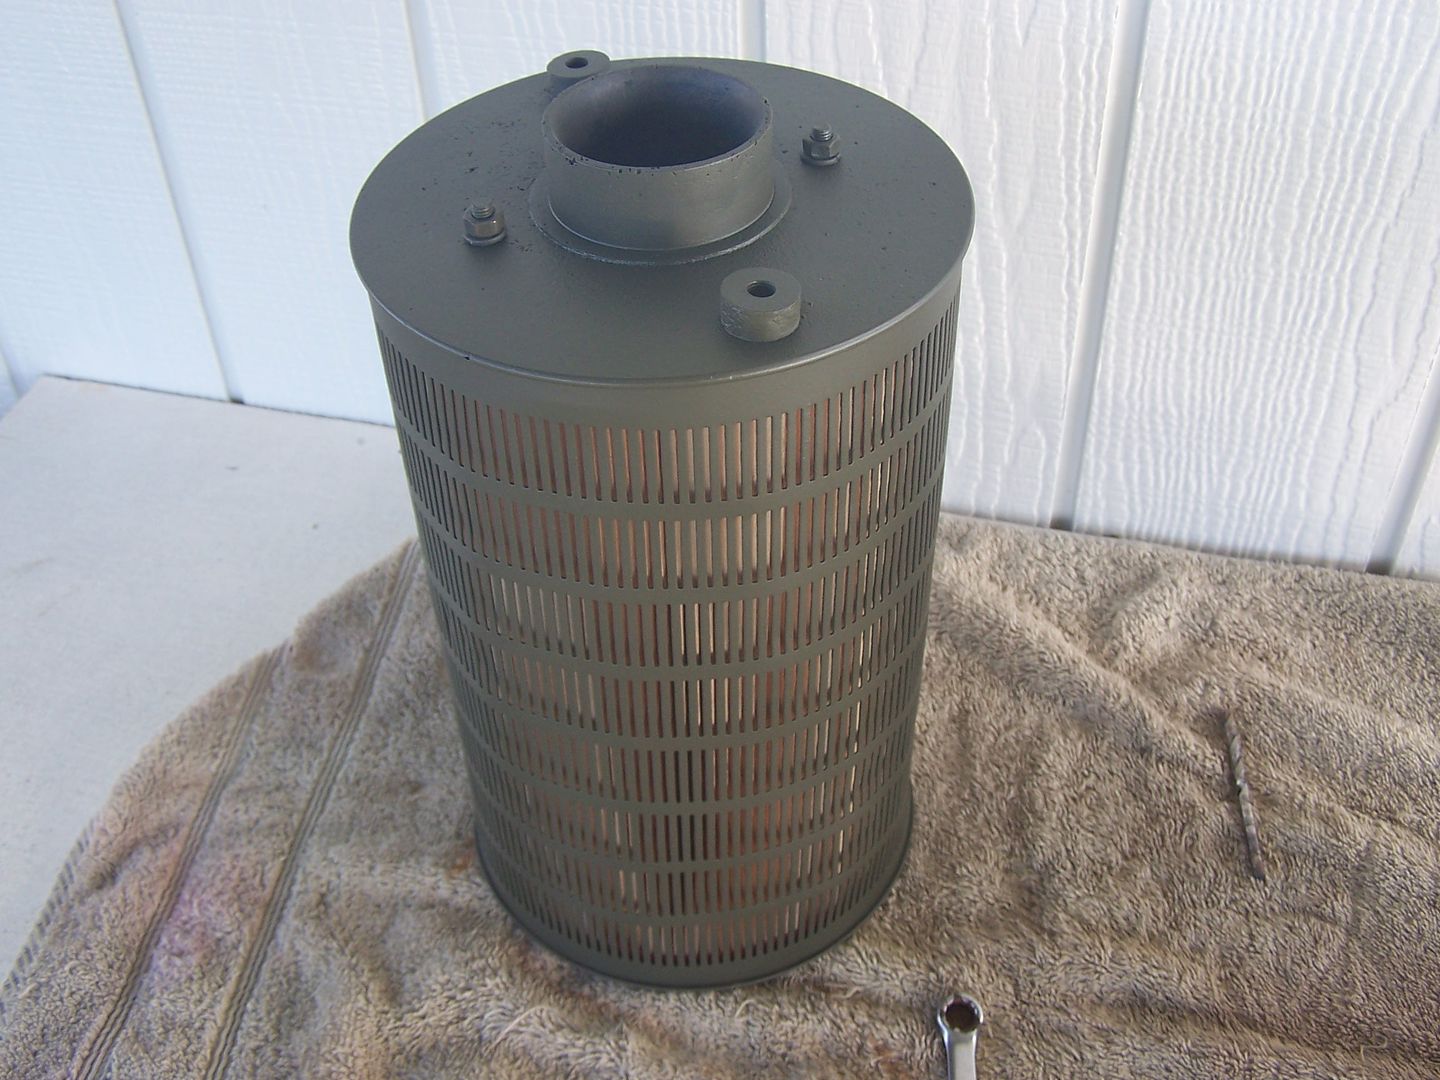 Pick up the 2 1/2 inch radiator hose fits like a glove 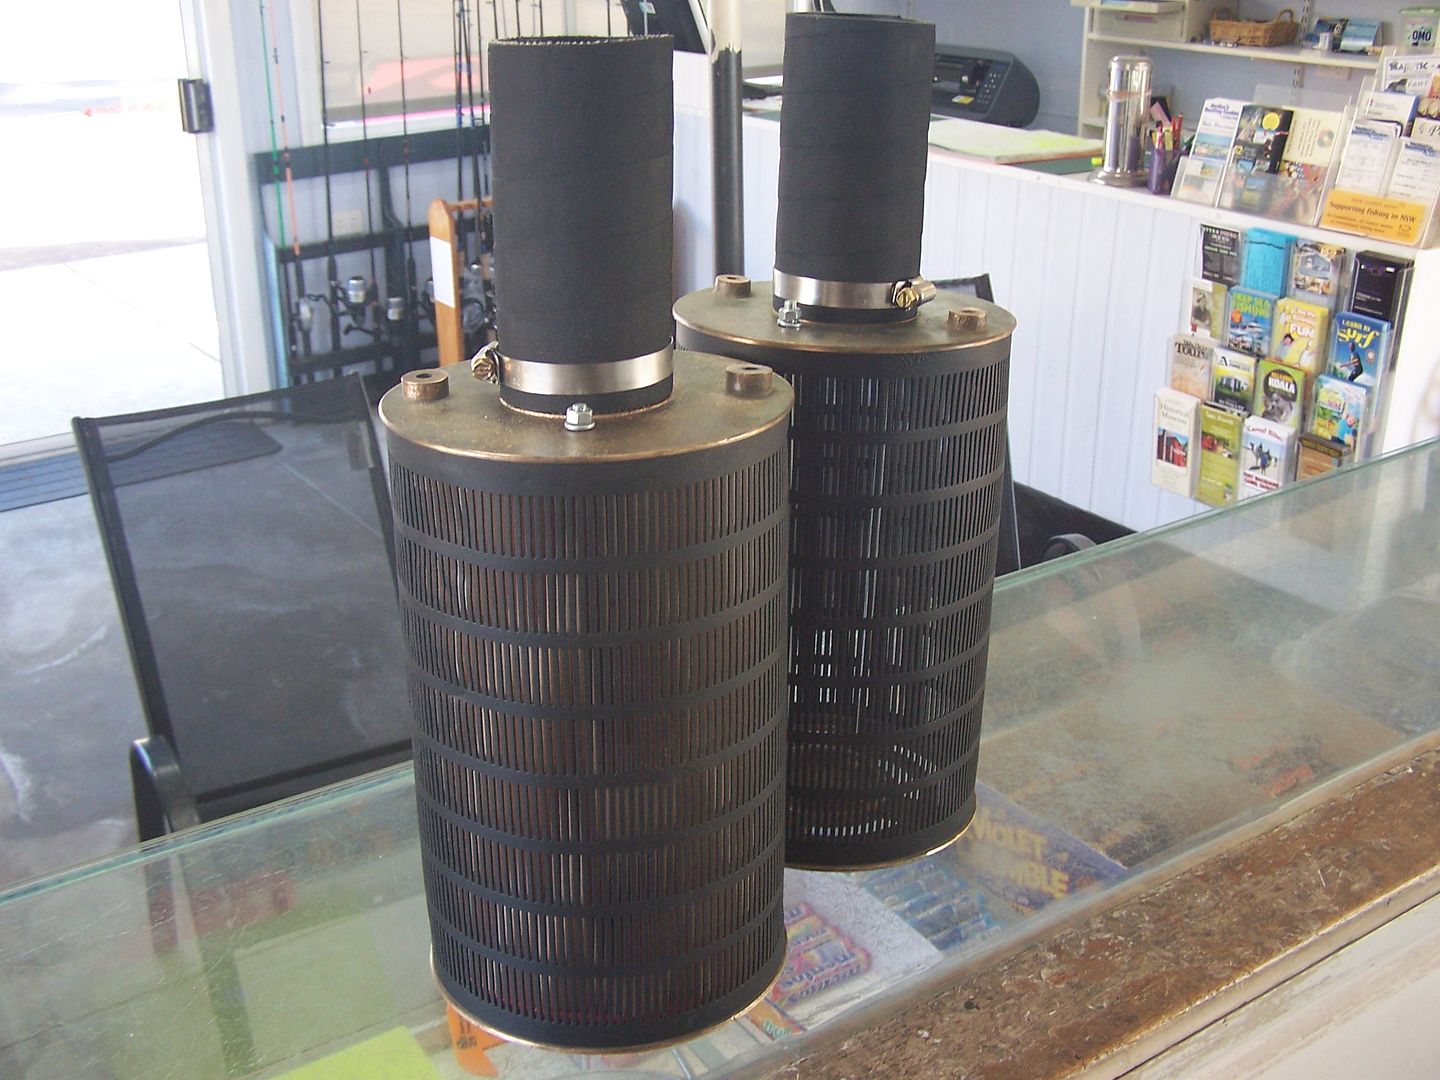
__________________
1944 GPW and Bantam trailer Last edited by Dale Jordan; 09-08-15 at 10:42. |
|
#185
|
|||
|
|||
|
Another Job out of the way . Big thank's to my contact across the Ditch
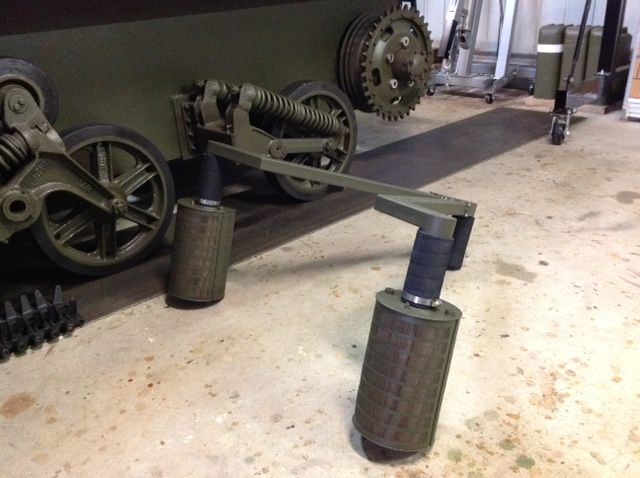 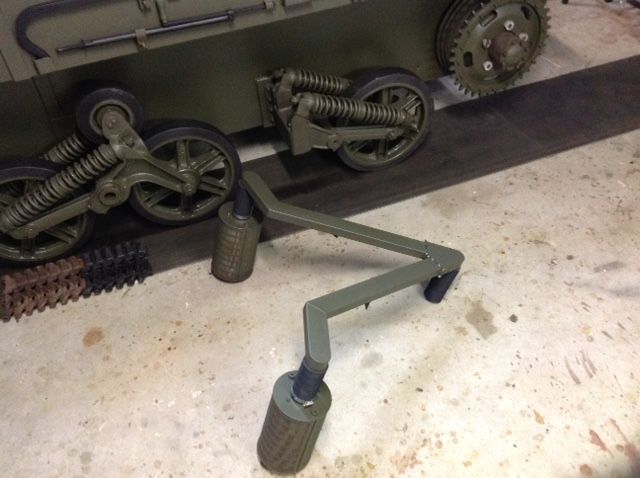 Next job is to remove the brake drums and check out the workings in there . I'm just waiting on motor after that . Dale
__________________
1944 GPW and Bantam trailer Last edited by Dale Jordan; 09-08-15 at 10:47. |
|
#186
|
|||
|
|||
|
Any tips to remove this , I have the hydraulic puller set up , but no movement yet . I have a NOS 8 point coupling on it's way to me so this needs to come off . Dale
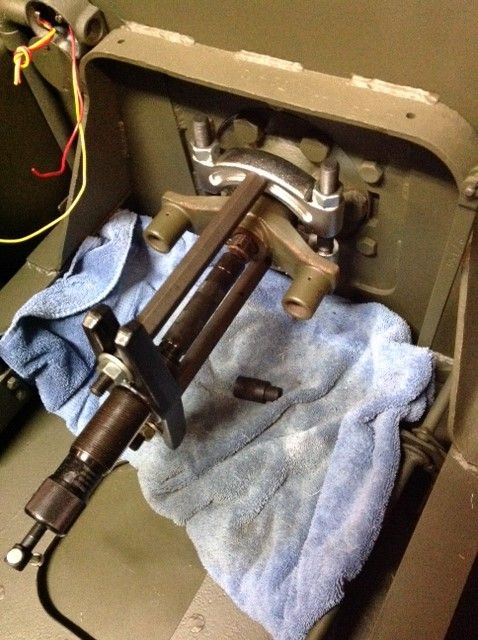 Got it off , with help from one MLU members advice more pressure then I used a brass drift then a couple of good hits with the old hammer then "pop" it ended up in my lap . Dale
__________________
1944 GPW and Bantam trailer Last edited by Dale Jordan; 18-08-15 at 11:12. |
|
#187
|
|||
|
|||
|
Hi Dale,
Glad to hear it worked. Cheers, Jacques
__________________
F15-A 1942 Battery Staff Jacques Reed |
|
#188
|
||||
|
||||
|
Dale,
Thanks for a very interesting thread ... .... and a gentle reminder to attach the photos to your postings. Thanks! Hanno Quote:
__________________
Regards, Hanno -------------------------- |
|
#189
|
|||
|
|||
|
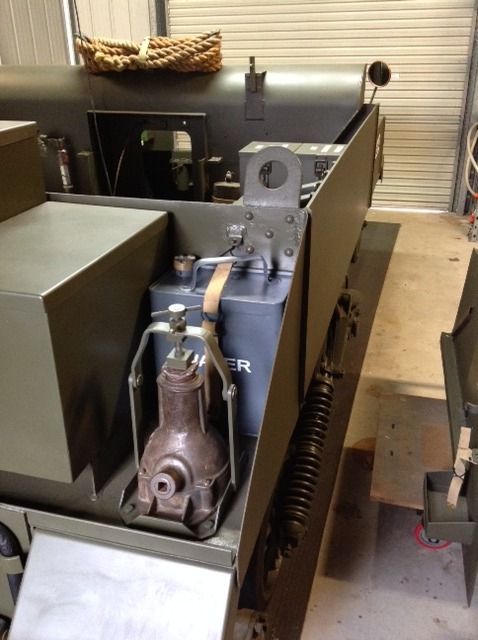
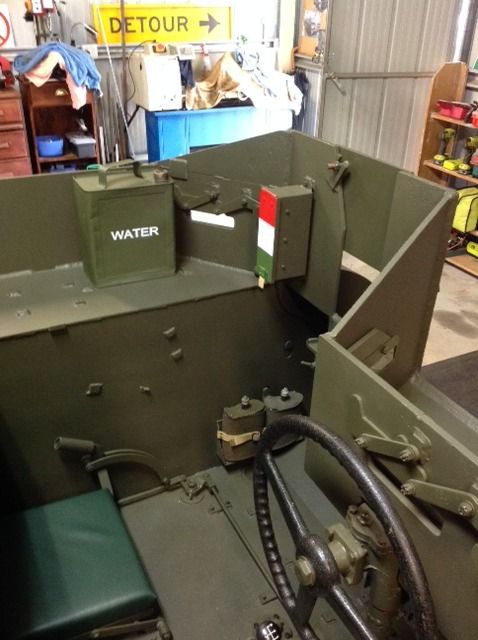
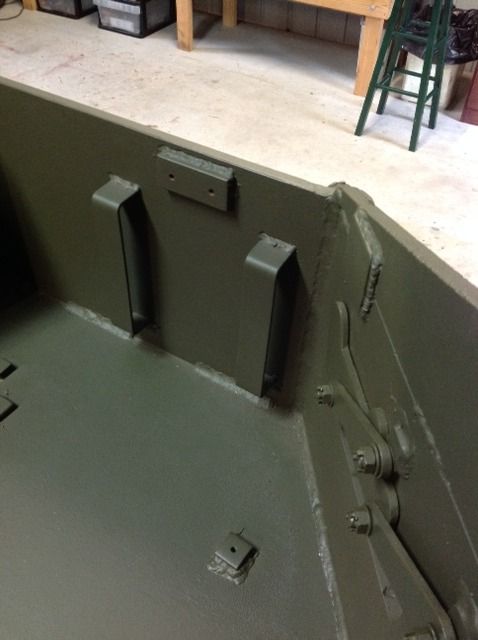
Not much happening with my carrier lately , to many jobs around the house I'm still waiting on the motor , did have some luck with the two gallon water cans as per the photos below . I would like some help with info on the front water can for the vickers as to what , the top and bottom holder brackets look like . Some photos show a belt like strap , other have a double rubber pull down quick release type of holder . Dale
__________________
1944 GPW and Bantam trailer |
|
#190
|
|||
|
|||
|
Im looking for the water can strap too. I've got the bottom bracket, I'll take some photos of it tomorrow so you know what you're looking for. I'll finish those vickers ammo box brackets for you next week hopefully.
__________________
1967 Land Rover Plant Repair Vehicle 1941 Matchless G3L 194? Wiles Junior Trailer 1941 Morris Commercial CS8 |
|
#191
|
|||
|
|||
|
Thanks Alex . Do the NZ carriers over their , have the same top block welded to the hull with the two 1/4 inch threaded holes as per my photo . Dale
__________________
1944 GPW and Bantam trailer |
|
#192
|
|||
|
|||
|
Yes, my LP2 is exactly the same arrangement as your picture
__________________
1967 Land Rover Plant Repair Vehicle 1941 Matchless G3L 194? Wiles Junior Trailer 1941 Morris Commercial CS8 |
|
#193
|
|||
|
|||
|
I'm after some tips on what goes in first before the motor is lifted in ? and any does and don't . Dale
__________________
1944 GPW and Bantam trailer |
|
#194
|
|||
|
|||
|
A couple of pics depicting the bracket and strap.
__________________
1943 Ford GPW Jeep "Follow Me" 1943 MBT trailer 1943 Dodge WC-57 Command Car 1943 Chev C60L Army Cargo Truck 1941 LP2 VR 731 Bren Gun Carrier 3" Mortar Carrying Under restoration: 1940 LP1 Bren Gun Carrier 194? 1 Ton Trl Ben Hur 1942 C15A with sunshine cabin MVPA 31338 |
|
#195
|
|||
|
|||
|
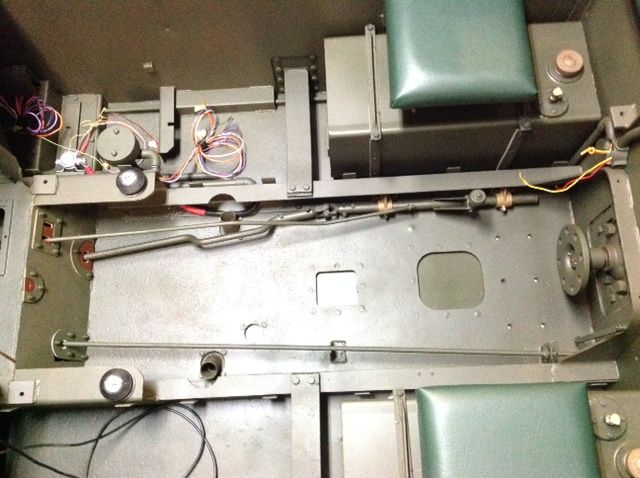
Thanks Darrin and Alex for the photos . I just need to see what the top bracket looks like ? Here is a photo below of where i'm at before the motor goes in , with the clutch rod how do the bends look ? does it go behind the exhaust extensions can it be put in after the engine is in ? as it might need test fitting and re bending
__________________
1944 GPW and Bantam trailer |
|
#196
|
|||
|
|||
|
Hi Dale, put all your rods in including the accelerator rod. The clutch rod goes along side the starter motor by memory and definitely not around the exhaust. When fitting the engine just make sure a guy is easing the clutch and Acc. rods around the starter , and to the side ,as the engine is lowered. When the two rods are connected , make sure the bend is right so when you put your foot on the pedal it does not touch the starter motor terminal .Make sure the 2 bottom rubber hoses for your radiator can side on your water pumps easy, and push them hard back on the water pumps, length should be 110mm for ease of sliding onto rad. outlets. Top hoses should be about 85mm long. Leave gen. off so you do not stick the blades in the fan when lowering. You can leave the fan belts on though . Gap between your 2 flanges on the 8 point coupling should be 8mm approx. Make sure speedo cable is tucked out of the way. You can also leave the 2 exhaust pipes in the floor elbows, and with a guy either side when lowering, they can ease them up onto the 2 studs as the engine comes down to rest, so you are making sure they do not get jammed. Also do a trial fit with basic engine to make sure you are shimmed to height on the gearbox mount, and that the rubbers and bolts can slide easy in the steel flanges for ease of making this final connection. Do not force the 8 bolts to line up in the holes, they should just push in by hand if the 2 flanges are parallel and centred, that is why you should try with a pretty bare engine and even your rods removed for this exercise, before the final fitting and bolt up of engine .Cheers.
__________________
Valentine MkV Covenanter MkIV Lynx MKI and MKII Loyd Carrier / English / Candian / LP. M3 Stuart Last edited by Andrew Rowe; 01-10-15 at 08:09. |
|
#197
|
|||
|
|||
|
Moderators, can you copy Andrews very useful post into the LP2 carrier helpful hints thread please?
Great info from a guy who has put a few together. Cheers Andrew. 
__________________
Bluebell Carrier Armoured O.P. No1 Mk3 W. T84991 Carrier Bren No2.Mk.I. NewZealand Railways. NZR.6. Dodge WC55. 37mm Gun Motor Carriage M6 Jeep Mb #135668 So many questions.... |
|
#198
|
|||
|
|||
|
Excellent help Andrew . Is it best for the radiator to be in first or after engine ? also when you look at my clutch rod in the photo above is it to be bent like that , or straight ? I'll take your advice and test fit and do a dry run . Dale
__________________
1944 GPW and Bantam trailer |
|
#199
|
|||
|
|||
|
Do your test fit without the radiator, so you do not damage it, and yes the clutch rod has a couple of kinks in it.
Once you have done the test fit at the diff coupling, install rad. and you should be good to go for the final fitting. Other thing to note is the fuel tank straps on the top of the engine do not protrude too far toward the engine, as when you come to fit the engine cover, they should clear by 5mm or so, ie. they should be flush or just short of the outside face of the little guide tabs that are on the engine rails. You will realise the meaning to this when you fit your engine cover!
__________________
Valentine MkV Covenanter MkIV Lynx MKI and MKII Loyd Carrier / English / Candian / LP. M3 Stuart Last edited by Andrew Rowe; 01-10-15 at 09:56. |
|
#200
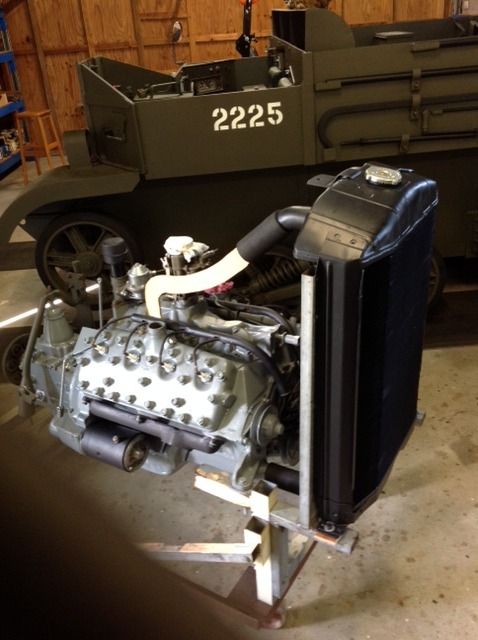
|
|||
|
|||
|
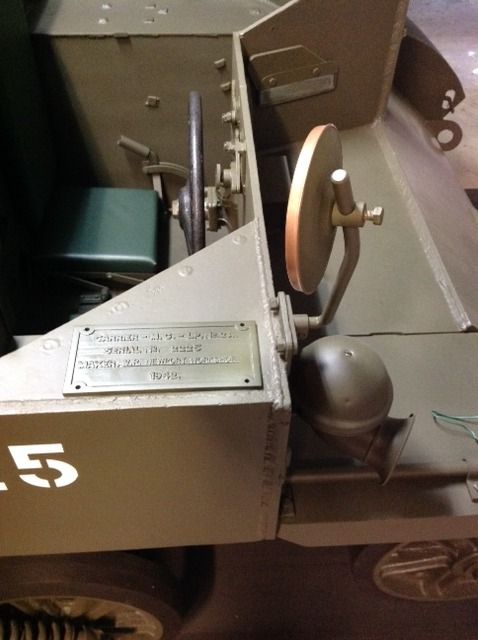
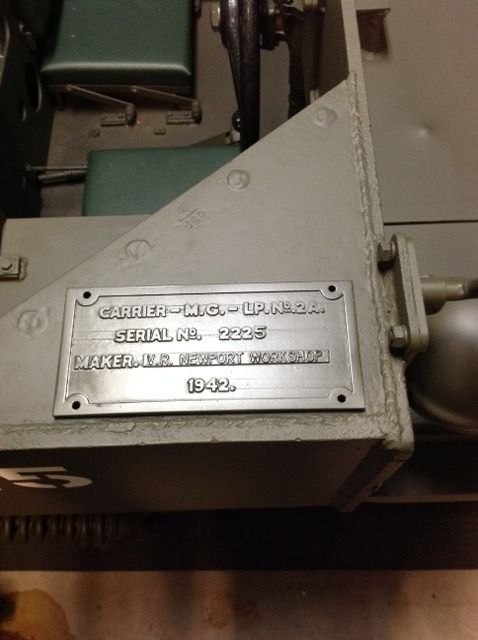
Data Plate done . The holes line up as well , looks great . Thank's Matt , Darrin and Rick .
  Rebuilt motor is back after Couple of months of waiting, all's good I'm going to test run with radiator all hooked up before installing in carrier 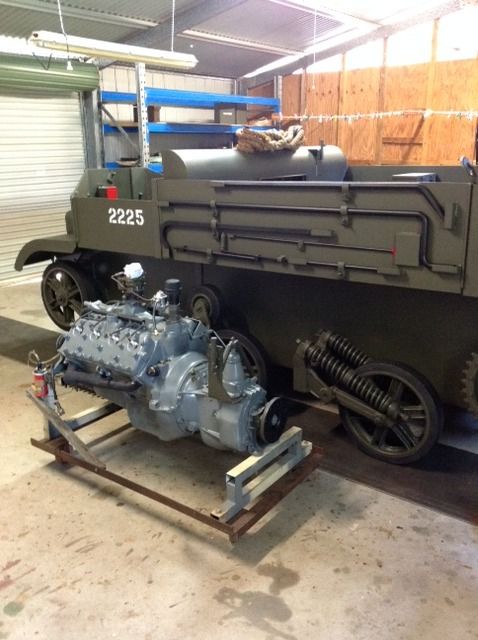 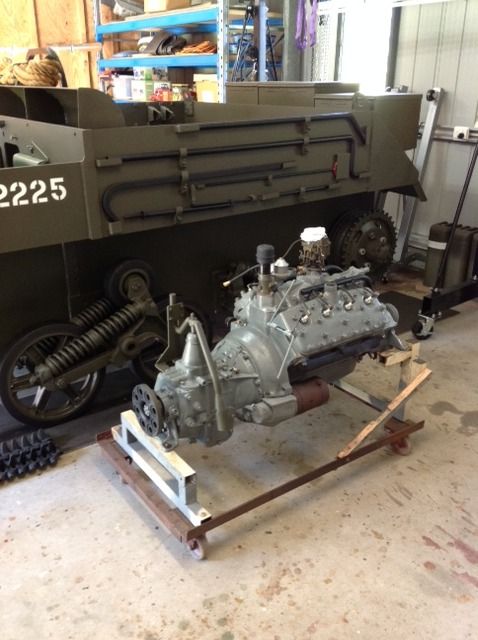
__________________
1944 GPW and Bantam trailer Last edited by Dale Jordan; 07-11-15 at 06:51. |
|
#201
|
|||
|
|||
|
Hi Dale , just out of interest, did you use a C59 block? and also, it might pay to swap your clutch lever for the correct one as I see you have a standard truck one on at the moment. You will probably have to un-bolt the g/box from the engine to do that, but you probably already knew that! Also was the gearbox out of a carrier? as the 2 lugs on the top, just make sure they do not interfere with when you change gear, Cheers Andrew.
__________________
Valentine MkV Covenanter MkIV Lynx MKI and MKII Loyd Carrier / English / Candian / LP. M3 Stuart |
|
#202
|
|||
|
|||
|
More info please Andrew ? didn't know about clutch lever was wondering about lungs when playing with gear changes , got my finger stuck between them . Some photos would be great . an if someone can help out with the correct lever parts , is it longer ? yes this is a C59 A Motor and truck box . Dale
__________________
1944 GPW and Bantam trailer |
|
#203
|
|||
|
|||
|
Yes it is longer, about 6" , will get a pic today for you if it helps, The C59A are good blocks, the hotrodders like them because they can bore them out to 3 and 5/16th without breaking through the cylinder walls, I think I have even heard of them going out to 3 and 3/8th if the blocks will take it. I think they date from about 1947 onwards .Cheers Andrew
__________________
Valentine MkV Covenanter MkIV Lynx MKI and MKII Loyd Carrier / English / Candian / LP. M3 Stuart |
|
#204
|
|||
|
|||
|
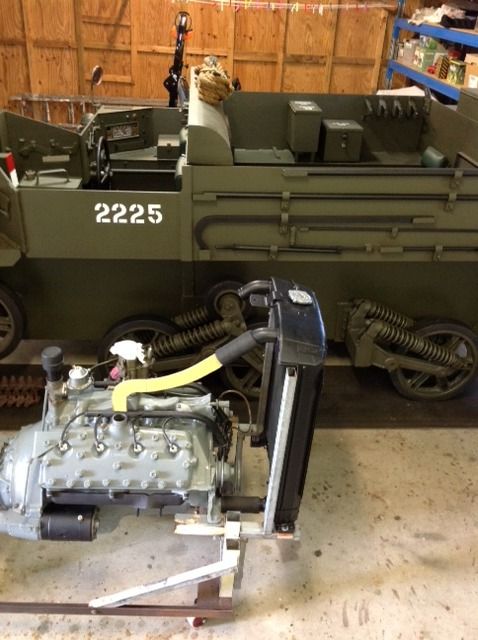
Just made up a template out of cardboard for the radiator top metal pipe to be bent up next week , does this look to be correct . Dale
__________________
1944 GPW and Bantam trailer |
|
#205
|
|||
|
|||
|
Hi Dale, can get a pic tomorrow of the correct pipes. Also remember the top left and right front corners of the metal surround of the rad are bent and angle forward to take the 2 x radiator stay rods.( there should already be a 5/16 hole there) Your rad has probably come straight out of a cmp, truck without this mod. Also the overflow tube has to be shortened with a joiner union put in the line to take the pipe to the rad overflow bypass valve. Cheers Andrew
__________________
Valentine MkV Covenanter MkIV Lynx MKI and MKII Loyd Carrier / English / Candian / LP. M3 Stuart |
|
#206
|
|||
|
|||
|
I think you mean pressure valve, Andrew?
__________________
Bluebell Carrier Armoured O.P. No1 Mk3 W. T84991 Carrier Bren No2.Mk.I. NewZealand Railways. NZR.6. Dodge WC55. 37mm Gun Motor Carriage M6 Jeep Mb #135668 So many questions.... |
|
#207
|
|||
|
|||
|
Your good Andrew , you don't miss a trick , thank's for the heads up and a photo of the pipes will be great , yes my radiator has those Tabs with the holes , I'll bend them forward . I'll add the pipe and joiner union . What can I do if I can't find a pressure value can I just run the pipe out to the hole in the pannier floor will that work ? Dale
__________________
1944 GPW and Bantam trailer |
|
#208
|
||||
|
||||
|
This is what the rad pipes should look like.
__________________
Euan McDonald 4? C-GT (Aust) #8 44 C-GT (Aust) #9 42 Jeep, Trailer Aust 3 Welbike MK2 complete Welbike MK2 inconplete under resto C15A x3 C60S x1 ex ambo F60L x3 LP2a carrier SAR #4993. Trailer No27 Limber Trailer, Cario cargo Trailer, Pontoon semi Wiles Cooker 2 wheeled (jnr) |
|
#209
|
|||
|
|||
|
You should be able to find a pressure valve. (try an add here on MLU?)
The part number is; 553 - Assembly, pressure valve radiator overflow. As the thing indicates, it is what causes the pressure in the cooling system. They are adjusted (I think) to 3 1/2 psi (adjustable?) Some (later?) radiators are fitted with the correct neck for a 4 lb pressure cap, but yours looks to be the plain blanking cap. Raising the pressure raises the boiling point of the water 4 degrees F. per pound of pressure, so a 3.5 pound cap raises the boiling point 14 degrees F. (at sea level) This is a good thing. In fact I'd say very important for a reliable carrier in the potential temps you might want to operate your carrier in.
__________________
Bluebell Carrier Armoured O.P. No1 Mk3 W. T84991 Carrier Bren No2.Mk.I. NewZealand Railways. NZR.6. Dodge WC55. 37mm Gun Motor Carriage M6 Jeep Mb #135668 So many questions.... |
|
#210
|
|||
|
|||
|
Hi Dale, Euan is right on with his picture of the pipes. The only thing is that you will struggle to get them to look like this in todays manufacturing, back then they would have had some form of mandrel pulled through the pipe to form the bend, that's my guess. I have "hot dip" galvanized mine , to stop any internal corrosion, even though I am running anti-freeze. The pressure valve is also shown and rad. stay rods. If you need one you know how to contact me, Cheers Andrew.
__________________
Valentine MkV Covenanter MkIV Lynx MKI and MKII Loyd Carrier / English / Candian / LP. M3 Stuart |
 |
|
|
 Similar Threads
|
||||
| Thread | Thread Starter | Forum | Replies | Last Post |
| Vic rail 2225 | colin jones | The Carrier Forum | 109 | 13-07-13 15:15 |
| My GM engine number when was it build?? | 8threcce | The Restoration Forum | 7 | 09-01-12 08:39 |
| Iltis carb re-build kit | servicepub (RIP) | Post-war Military Vehicles | 2 | 15-05-11 22:33 |
| How To Build A 2/5 Sherman Tank | T.J. | The Armour Forum | 1 | 16-01-08 11:17 |
| Pssst... want to build a gun tractor? | Keith Webb | The Softskin Forum | 12 | 16-07-04 00:13 |