|
#1
 08-07-10, 03:03
|
|||
|
|||
|
can anyone lend a newbie that is familiar with a MIG welder some advice on welding flush patches on his vehicle.
I have a MIG with shielding gas. im not sure what I need to cut sections out and other tools. I have been slacking for 2 months on my project and I think its time I started at least doing body work on the spots I can while the tub is still on the frame. 
|
|
#2
08-07-10, 04:27
|
||||
|
||||
|
Quote:
Most important tip I can give you when working with MIG on sheetmetal is that everything must be clean and free of rust, grease, and paint, otherwise you will never get anything decent. This is crucial with MIG. Secondly, if your starting out, all of your butt welds should really be a series of quick tacks until its complete. Heat is your enemy with sheet metal body panels. It is very easy to warp things if you get carried away, and it takes surprisingly little heat to do allot of warping. Try and use the smallest wire available. IIRC, I used .22 wire. Same with the voltage, lowest possible, with a nice slow feed speed. Turn your Argon/CO2 up to no less than 20 psi, not only will it keep your weld clean, it will also help keep things cool. Practice on some sheetmetal first before you attempt anything on your project. Take extra time to make sure your patch panels fit well prior to tacking them on. No more than 1/16" less gap between patch and the body for your butt weld, but you will need some gap. Use welding magnets to hold them in place as this will keep everything level/flush. Lastly, and this is my own personal tip. If you want it to be flush, try to keep your gun perpendicular to the weld when your doing your tacks rather than the angle most use when wire feed welding, this will keep the heat evenly distributed between both the existing body and the patch. Lots of good tips can be found all over Google. Thats about all I can give you now. Scotty
__________________
Gone but never forgotten: Sgt Shane Stachnik, Killed in Action on 3 Sept 2006, Panjwaii Afghanistan
|
|
#3
08-07-10, 04:43
|
|||
|
|||
|
Hi Michael,
Anybody wants to learn about forming and welding coachwork I recommend Ron Fournier's series of sheetmetal handbooks. I highly recommend the Metalshapers Association website. Heaps of pictures and advice to learn from. I bought a MIG and then had to learn how to use it which for some reason was hard for me and after that knowledge, it improved my oxy and stick welding - go figure. You can't weld rust despite what some jokers will tell you. Some steel rusts such that the whole thickness is a hard rust that looks like its solid - it kinda is and it's hard to sand and grind but it's brittle and touch the mig to it and it just melts and falls out. All that has to be replaced if you encounter it. You need good replacement steel same thickness as the old. I've used zinc anneal sheet with success. I'd be interested to know what anyone else thinks about that. I use 0.6mm MIG wire on body panels. Don't hold a bit of 16 gauge on the edge of a lump of channel and tip the edge with a hammer - clamp it down or use some sort of weighted bag (sand bag or lead shot filled leather bag) and rest your hand on the bag to support it - my wrists didn't take to the shocks from holding it down. The most important tools are the eye, ear, face, nose and throat protection. You only get one pair of eyes, you want to protect your good looks (face), and you want to be able to breathe without rasping when you're old. The most often used tool tools for me are a 4" angle grinder (can get 1mm cutting discs here now), a Black and Decker PowerFile. One hammer - I'd pick one with a round, slightly convex face and maybe with a pick on the other end but not needed. You want some clamps - G clamps, vice grips, whatever you can scrounge. You want something solid to clamp things to that has a straight edge and can handle being hammered - a bit of I-beam might do the trick and the grinder with grinding disk can dress it up how you want. A magic marker and a pencil and a ruler and some scissors and cardboard to make templates and mark out. Also some snips are handy - I prefer Wiss left and right cut pair of aviation tin snips. Try and make your patches an exact replacement shape. The powerfile is quick and easy to clean the edges around the hole you intend to patch. Can't mig weld paint, grease, or sealant. (use scraper and or degreaser on grease). You aim to shape and fit your replacement steel patches with no more than about a 1mm gap all around. You turn the mig up a bit and tack the piece FLUSH all around and with a minimum number of spot tacks i.e. 4. Stop and check the position and flushness with the surrounding metal. Cut the spots and make corrections until its perfect. Then tack half way between using same small hot tacks. Don't let the metal get too hot. Once you have nice low build tacks with 100% penetration every one inch, then I tend to do 1cm (just under half inch) welds at opposite areas and keep the panel cool. I use a wet rag from a bucket to cool the panel if I think it needs it. I'll think about what I've forgotten to mention  Regards Alex
|
|
#4
08-07-10, 05:26
|
|||
|
|||
|
Another top tip is using a Copper backing plate. Piece of old electrical Buss Bar is perfect. Clamp behind and across the patch to be welded. As the weld will not stick to this Copper plate, it makes filling the join a lot easier, as well as sucking a lot of the heat out of the job.
Most Scrappies have drums of this stuff, and at pay per weight it is worth every penny. As mentioned above, the extra thin cutting discs are a must, they are magnificent. The better fit a patch, the less welding, less heat, less clean up. Speaking of clean up, standard grinding discs tend to leave a pretty nasty finish. I use a softer compound polishing disc (they're white and I can't rember the brand, usually used for stainless steel work) after removing the worst of the weld. Take your time, amazing what a mess that extra 1/2 second of welding can do. Good Luck. Rich.
__________________
C60S Austin Champ x 2 Humber 1 Ton & Trailer
|
|
#5
08-07-10, 05:31
|
|||
|
|||
|
WOW!
thank you lots Scotty and Alex! I feel much more confident about my first try. going to keep your responses handy as I will be referring back to them some more and the links provided. Alex. I dont understand this part "Don't hold a bit of 16 gauge on the edge of a lump of channel and tip the edge with a hammer - clamp it down or use some sort of weighted bag (sand bag or lead shot filled leather bag) and rest your hand on the bag to support it - my wrists didn't take to the shocks from holding it down." also, willys used 18guage steel? and should I expect to be using any body filler? seems I need to pay a visit to my uncle for some tools (vice grips for body work) thanks again 
|
|
#6
08-07-10, 05:33
|
|||
|
|||
|
Quote:
one of my neighbors told me about putting clay or something around the weld area to pull in heat also, not sure if I understood it right.
|
|
#7
08-07-10, 05:46
|
|||
|
|||
|
Very difficult to blow through with a copper back plate, but too keen an effort will still make a mess....
Rich
__________________
C60S Austin Champ x 2 Humber 1 Ton & Trailer
|
|
#8
08-07-10, 10:30
|
||||
|
||||
|
Hi speedy, some good advice here so far,practice on some old unwanted metal of the same thickness for a start(so yo do not bugger up the good stuff first)till you get the hang of it.
Also be care- full not to grind too much out of the weld when cleaning up the weld as it will crack and you have to do it all again. Check out metalmeet dot com as well. Do not hesitate to ask questions as there are a lot of talented people on this site .
__________________
kenney
|
|
#9
08-07-10, 12:11
|
||||
|
||||
|
Hi Mike, lots of great advise here if you already have the basics of mig welding. Set your gas at 15-20 make sure the material is clean from paint and oil and if its thin body work keep your amps low and spot rather than trying to do long runs as apart from heat distortion you may run the risk of thinking it all looks good then 'plop'! you've got a big hole. If you are a novice then it will be a bit of trial and error. If you are welding a truck cab then I would use .6 wire. This will reduce the amount of heat generated while welding. Wire speed to amps is very critical and you will need to do some test pieces to familiarise yourself to the machine. Even a experienced welder would do a couple of small runs to set the machine. Lots of little spots can achieve great things. I also use 1mm cutting discs for cutting and flap discs for grinding.
Regards and good luck! Colin.
|
|
#10
08-07-10, 12:23
|
|||
|
|||
|
Hi Michael, I was in a hurry when I typed it. I was just writing that you should protect your wrists from undue shocks when trying to bend heavy guage steel sheet by holding the metal with one hand and trying to belt it around something solid to form a shape with a hammer in the other hand.
Also when I say 1mm gap then that's about what I suggest you aim for. I agree with the Scotty where he wrote Quote:
You ask about body filler. Everyone has different ideas. Some fillers work better on bare steel and others over primer. Same for stop putty's. some people declare any filler is bad. On American Hotrod they cover the car in filler and then shape it down. You can lay tins of the stuff on ($$$) and end up with 99% of it on the floor as dust. They used to use a Lead/tin alloy for filler but its hazardous to health but then plastics got better. I try and get the steel work as close as poss and then as little body filler as I can get away with. I think filler and primer are hygroscopic? they absorb moisture so consider that. A faint overspray of a dark colour is sometimes used as a 'guide coat' before sanding so once you get stuck into sanding you can see the high and low spots in the primer or filler. Always have a layer of primer over filler before colour coats. Understand that I'm mainly discussing the single pack acrylic paints here. I've never touched 2-packs and single pack enamels generally need fewer coats than the old acrylic because enamel is thicker. But the basics are the same. Oh and flap discs and sanding discs are good. Pick your grit size carefully (clogging vs damaging older paint layers). And rough your bare steel before applying filler if that's how you're doing it - to provide a key for the filler. You might also consider a bare metal prep/etch but not sure that many people really know how to use it properly - me included. Regards Alex
|
|
#11
08-07-10, 16:37
|
||||
|
||||
|
Just a small point, but one alluded to earlier in this thread. When I was MIG welding a long time ago, I used both argon and CO2 and I found that the argon worked a lot better. It's more expensive, but gives smoother welds with less splatter. Welding sheet metal is tough enough at the best of times, so I concur with the advice to practice, practice, practice first! When you're confident you can do it well, then go for the real thing.
Let us know how it works out!
__________________
SUNRAY SENDS AND ENDS :remember :support
|
|
#12
08-07-10, 17:54
|
|||
|
|||
|
All of the tips points given are what most experienced welders would tell somebody starting out. The most important tip of all for the new vehicle restorer though is Ken's practice.
It can not be over stated DO NOT start on the part you want to use. Start with scrap bits and keep practicing until you can produce the kind of weld on junk that you want. Cheers Phil
__________________
Phil Waterman `41 C60L Pattern 12 `42 C60S Radio Pattern 13 `45 HUP http://canadianmilitarypattern.com/ New e-mail Philip@canadianmilitarypattern.com
|
|
#13
09-07-10, 00:18
|
|||
|
|||
|
Two of the best tips so far mentioned are the use of Argon as opposed to Co2, as Argon is not as "cold" as Co2 when welding ( if you are feeling really flush try Aztec 25, which is a mixture of Methane/Argon). The other one is the use of copper as a backing plate, I've use this technique for many years now, and even the largest hole can be welded up. Once you get good at welding with MIG, you will be amazed at what you can acheive, believe me you will not be needing much in the way of filler !. Interestingly enough, steel from the 40's welds exceptionally well, much better than today's steels, far too many impurities these days.
Regards Keith Last edited by Keith Orpin; 09-07-10 at 00:24. Reason: Text change
|
|
#14
09-07-10, 12:56
|
|||
|
|||
|
Speedy,
Further to the constructive comments by other forum members. Here are some other thoughts to consider. 1. Always check what lies behind the proposed patch panel ie will it burn!!!!! Is there a fuel line or electrical wiring looms. 2. Prepare the joints to ensure that you are welding clean metal, Any contaminants in the weld pool will either weaken the join or blow out while you are welding like a mini volcano! 3. Keep the joint width between 0.5 to 1mm 4. Use 0.6/0.8mm dia wire with your smaller Mig welders. Having said that my thoughts on MIG welders are the bigger the better. Small MIG welders are fine but the bigger welders have more OOMPH! 5. If possible try to avoid using flux cored wire. 6. With patch panels don't try to weld in continuous seams, spot here then move away and place a spot there. Continue staggering your spotting until the join is filled-This takes more time but will help dissipate the heat and minimise your patch panel and parent metal from heat distortion. Remember HEAT is your enemy. A good cup of Tea or Coffee can be enjoyed many times 7. Use heavier gauge metal ie 1.2mm or at a pinch 1.6mm (than your parent metal)to make your patch from. This will help you to start your weld without blowing a hole in the joint. Looks no different on the outside. 8. Use sunscreen on exposed parts of your skin as MIG welders have a tendency to burn your skin with excellent results.  Better still, try to cover all exposed parts of your body. Better still, try to cover all exposed parts of your body.9. I know it is hard but try to weld with elbow length gauntlets (Leather gloves). I am sure experienced welders at some time in the past have grabbed a hot bit of metal with their bare hands by mistake. OUCH! 10. If you can borrow an auto darkening helmet, do so. Good for tak welding. 11. Buy yourself a cheap Chinese angle grinder but always use good quality cutting and grinding discs. Use the very thin section cutting discs and always use PPE (Eye protection and hearing defenders) 12. When grinding off the finished welds try not to use excessive force to speed up the removal of excess weld. All you will do is create heat with the end result being metal distortion. Once you have leveled the ground surface, get hold of a flapper disc to further smooth the surface. 13. Paint/prime the exposed metal as soon as possible to prevent corrosion. 14. The point of a screw driver is a very good tool for probing around the affected area to try and determine the extent of rust damage. Once you have cut the rust out of a particular area, then and only then is when you will know where to start your repairs. Anyway I hope this will give you something to work with. Don't rush the job Good luck Cheers John Wilson Reply With Quote
|
|
#15
11-07-10, 00:29
|
|||
|
|||
|
thank you everyone!
I felt confident enough to give it a shot today. needed 18 guage first so I went to the local metal supermarkets and they were all closed on the weekends. went home and found a small sheet in the garage, prepped it and set it up to be welded. got the welder out and found the sweet spot playing with the current and speed. go to my part and it was out of wire!  so I will go and purchase the smallest wire my welder will take. .024
|
|
#16
13-07-10, 02:32
|
|||
|
|||
|
so here is attempt #2.
attempt #1 resulted in a epic fail. but I learned and todays attempt went much smoother. woke up early stopped off at mr.metal. no small 18guage offcuts to give me so they handed me a large piece for free (enough to start patching the jeep after my practice) with a nice flat sheet I took out the sawzall (wish I had something better) and cut out a test piece, got out the welder and found its sweet spot. I know everyone is saying low wire speed and low voltage, but I went with what my welding book suggested (3-4 volts) as bench mark and worked from that. here are some pictures.    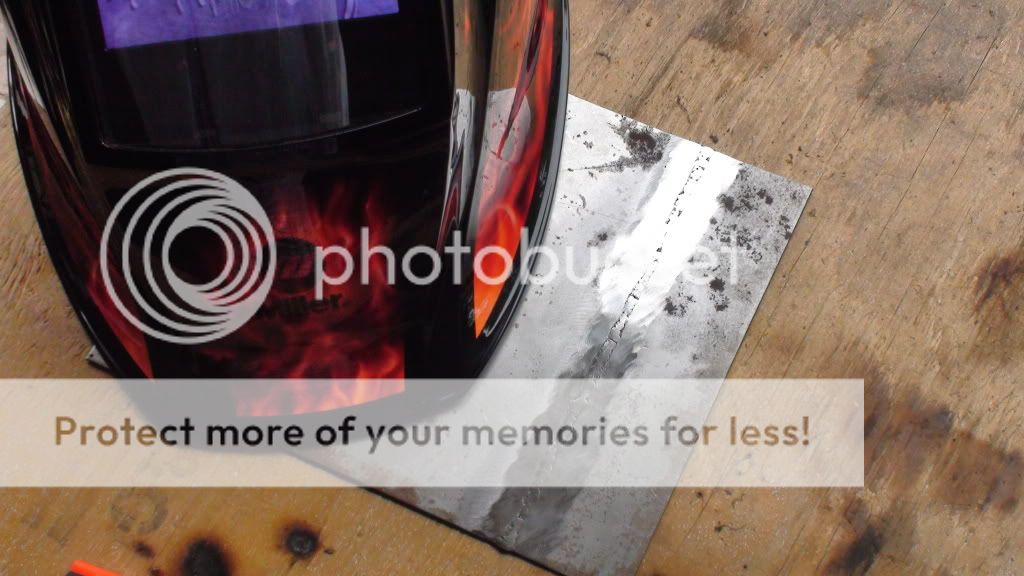  shielding gas was used, compressor to cool down the welds with a blast of air, grinder with grinder wheel, 40 and 80 grit flappers to work it smooth. I would always start my welds on the big piece of metal and move it to the smaller piece being attached. should I try just following the cut?
|
|
#17
13-07-10, 05:27
|
||||
|
||||
|
Michael
looks like about 1/8" plate you welded ... try leaving a small gap between the plates for the weld to fill in, instead of butting them together .. you havent got full penetration yet . Good effort for a 2nd try . Im the worst welder in the world ..MIGS were invented for speed and non-skilled operators.. as in cheap factory labour in the 3rd world. 1 hour of training and away you go . I found a great book at library here on Welding
__________________
1940 cab 11 C8 1940 Morris-Commercial PU 1941 Morris-Commercial CS8 1940 Chev. 15cwt GS Van ( Aust.) 1942-45 Jeep salad
|
|
#18
13-07-10, 06:35
|
|||
|
|||
|
Keep up the practise Micheal but practice the right stuff.
Read as many books and tutorials as you can find to learn the basics. There is a forum, (http://weldingweb.com/index.php) that is a bit like MLU for welders. Very experienced and helpful guys there will answer your questions and critique your work. Just reading the forum posts helped me a lot when I was starting out with TIG on my body panel parts. Good luck with it all. Terry
__________________
Terry F30 13 Cab CMP Morris Commercial C8
|
|
#19
14-07-10, 08:28
|
||||
|
||||
|
hi there
the only thing i can add is on cutting out the rusty hole for repair . I always cut the new patch first then lay your new peice over the rusty spot and trace around it with a jiffy marker or paint marker . Then you can cut out the rust with a zip disk grinder exactly following on the marker line . Then you know your patch will fit perfect the first time , hold in place with magnets ,and your weld gap should be perfect as long as you use the very thin zip discs to cut out the rust spot. good luck Anthony
|
|
#20
14-07-10, 18:19
|
|||
|
|||
|
Anthony wrote:
Quote:
Quote:
Alex
|
|
#21
15-07-10, 02:08
|
|||
|
|||
|
Quote:
Once you become an 'Artiste' with MIG welding techniques, Making replacement patches to fill holes is an easy task. Also MIG welding is very forgiving and it is easy to fill holes/gaps that either exceed 1mm or holes that you have made an 'error of judgment' shaping the patch. I would not get too flustered about finding more rust behind a section that you have just removed. Here are some photos of my weasel repair to give you an example. Cheers John W.
|
|
#22
15-07-10, 02:45
|
|||
|
|||
|
Quote:
 here is todays attempts much better  bottom weld = todays  bottom again 
|
|
#23
15-07-10, 04:50
|
||||
|
||||
|
This is the book I found most handy //written in laymens language
http://www.bevenyoung.com.au/prdt502.htm
__________________
1940 cab 11 C8 1940 Morris-Commercial PU 1941 Morris-Commercial CS8 1940 Chev. 15cwt GS Van ( Aust.) 1942-45 Jeep salad
|
|
#24
15-07-10, 16:26
|
|||
|
|||
|
thanks! I liked millers videos.
I made one fast because someone asked http://www.youtube.com/watch?v=4Tw8oBdqm7s I dont think any attempts will be taken today, busy 
|
|
#25
16-07-10, 04:25
|
||||
|
||||
|
Quote:
MIKE
__________________
1940 cab 11 C8 1940 Morris-Commercial PU 1941 Morris-Commercial CS8 1940 Chev. 15cwt GS Van ( Aust.) 1942-45 Jeep salad
|
|
#26
18-07-10, 05:47
|
|||
|
|||
|
Quote:
I am going to try a small bead. still learning and practicing so I will try every thing. I am liking the tacks. im guessing the bumpyness after grinding would be covered with body filler? (thats the next area I need help with) so I did another attempt. this time I tried rotating the torch and took down my wire speed some.     only thing, it warps way to easy. I am thinking when I work on my jeep I will do some anchoring welds like that then turn it down some where I can control it easier. im sure it would hold.
|
|
#28
18-07-10, 07:34
|
|||
|
|||
|
I'm No welder by any stretch but can stick stuff together with out it falling apart.
And everyone has their own method for doing light guage metal. The trick is to find what works best for you. For me the voltage your using is not near high enough and is leaving welds that are sticking up. On your last photos your getting closer in a couple spots to full penetration as you can see on the back side where the gap has been welded closed. That is what you want to strive for. Give this vidieo a look at. http://www.youtube.com/watch?v=JohBH...eature=related I use the same method for body panels and all light gauge metals. High heat short weld time with a cool down in between each spot weld and after few spots let the area cool to prevent warpage. My machine does not have a weld time setting but you can do that on your own and after some practice you can get the spot welds all identical. I personally prefer this method as pentration is guarenteed and it leaves a low weld that is easy to dress. Perfect for body panels. While your waiting for the most recent welded area to cool you can spot up another location if the piece is large enough. If you want to speed up the proesses you can help speed the cooling with blast from your air compressor. That will aso help from over heating and warping the surrounding metal. This is not the fastest method to join light gauge metal, but if you have to dress the weld, the time is recovered in dressing out the welded areas and can usally be done with just a flapper wheel on a grinder. The bonus is it does not take huge amounts of skill to master this technique. Matthew
|
|
#29
23-07-10, 12:59
|
|||
|
|||
|
Hi Michael,
I agree with Matthew except I gave up on the weld spot timer as I could wing it with less hassle. And hrpearce's bigger gap sounds right too. I've just checked what controls your Mig has in your earlier pic and I see your wirefeed was at that time set higher than your voltage. At those settings I normally would be doing continuous welds. If your welder dials do equate to mine (different brand) then for tacking I set the wirefeed rate just below the voltage rate (took me ages to work this out !@#$%^&)!! So set on '4' for voltage and just below 4 for wirefeed for single spot tacks. That has the heat high and the wirefeed slow to really fuse the tack with low buildup and maybe a little bulge on the back - but no gap still remaining at that spot. If you see gap still at the back then you're being too gentle and you have to find a closer compromise between tacking and melting through. If you're grinding flush (maybe you're removing a little too much I think and concaving the panel which means more body filler or spray putty) then in my opinion you want the back of your welds to be slightly bulged to provide strength. For thin stuff I never continuous welded longer than about 3/8" or I'd burn thru, or not penetrate, so good spotting was the go. And tacking at opposite places like tightening wheel nuts helps you keep progressing without stopping all the time to cool it (by force or naturally) - subject to patch size like Matthew says. Also you might be able to squeeze a slight improvement (cos your pics are great) for us out of your pics if you wirebrush the soot off first. Would make it slightly easier to see and compare the tacks. Regards Alex
|
|
#30
27-07-10, 05:35
|
|||
|
|||
|
Nice job Stuart....... have you tried a copper backing plate to save on the grinding....?
Same process using the clamps but get a piece of copper from the scrap yard..... the heavier the better.... I have some 1/4 inch printing plates..... 3 by 7 from Cohen..... about $3.00 a pound..... brass blocks are also good and really absorb a lot of heat.... If you set up your copper plate behind the gap... held tight with clamps.... you could reduce you wire speed by 25% and your heat by 10%..... still get good penetration but much less grinding to be done on both side. Have you tried the heat absorbing "gel" they sell for such butt welding..... said to be fantastic at soaking heat and reducing warpage...... Do you have to change your polarity on your Mig when you change over from .035 wire to .025....? Boob Bob C.
__________________
Bob Carriere....B.T.B C15a Cab 11 Hammond, Ontario Canada
|
 |
| Thread Tools | |
| Display Modes | |
|
|


 Linear Mode

