|
#1
 07-06-09, 12:09
|
||||
|
||||
|
Well thought i would start a resto thread, saves people sifting through my intro thread to find progress on the carrier.
Well she finally hit UK soil Thursday 4th June 2009. and what a mess she is in ! i took all the bits out of the hull and checked everything was there which it was. started the resto by removing the asbestos heat sheilds which are breaking up so off they came, they have been bagged up and will be used as templates later. managed to get ther air intake boxing removed from the remnants of the center bulkhead, everything as you can imagine is seized up and severely rotted. i have not got my compresser at this garage yet so everything is being done by hand (which are now both cut to ribbons hahhah) took the heads off the engine and poored AT fluid down the pots, then took the inlet manifold off and filled the valley with the same fluid, I used this on recomendation from a carrier collector from Thunder Bay  needless to say the engine is severely clogged up and after some gently prying on the crank it was obvious that this is going to be a full rebuild. good thing is the block appears to be good and is holding fluids. Engine comes out when i can scrounge a hoist able to take the weight ! needless to say the engine is severely clogged up and after some gently prying on the crank it was obvious that this is going to be a full rebuild. good thing is the block appears to be good and is holding fluids. Engine comes out when i can scrounge a hoist able to take the weight !i went around the carrier just spraying all the nuts and bolts with penetrating oil just in preperation for the tear down. the battery holder disintegrated as i brushed past it so that will need re made after blasting. managed to get the gunners side track off, basically as i have been working on my own i have had to improvise somewhat, so i removed the sprocket tied a strap to the track tied the other end to my tow hitch and slowly drove away pulling the long section off without incident. So far i have about twelve links which need broke free, i have free'd the rest off. That said looking at the pins i have knocked out they are pretty bad i dont think they will be safe to run so i may have to steel Kevins pins...........Just kidding mate....... will have to make some new pins.. noticed that both my rear bogie wheels are caput, i thought it was just the rubber that was perished but the beading on the rim has been smashed out on both wheels in various sections, so they are goosed to say the least. have a source that can make front and rear fenders and the fender skirts so i have farmed that job out will wait and see what the quality of the repro is like if its good will let you all know who did them. so order of service is to get the engine out strip the hull and remove the road wheels etc cut the remainder of the center bulkhead out and remove the remainder of the glacis plate, trip to the blaster then etch prime, followed by high build zinc oxide prime. then the bits go back in to make a running tub. thats the plan anyway ! 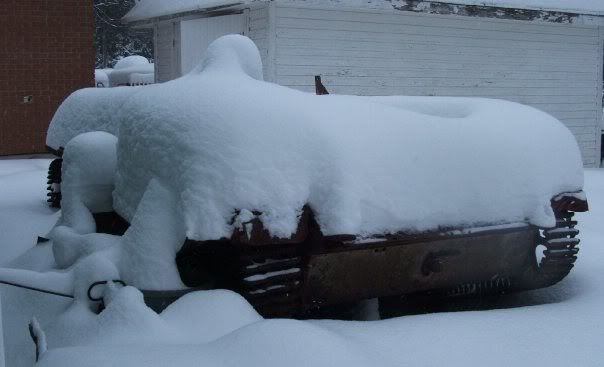   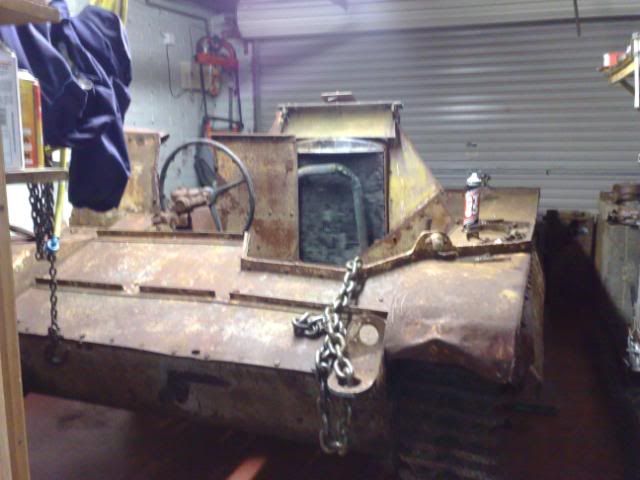 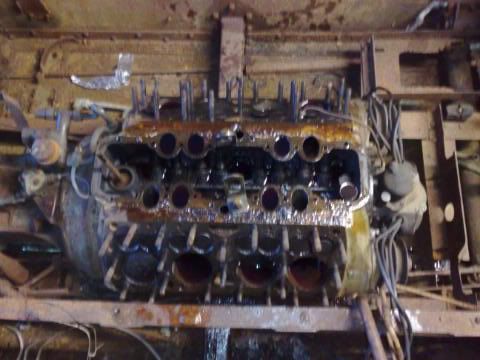 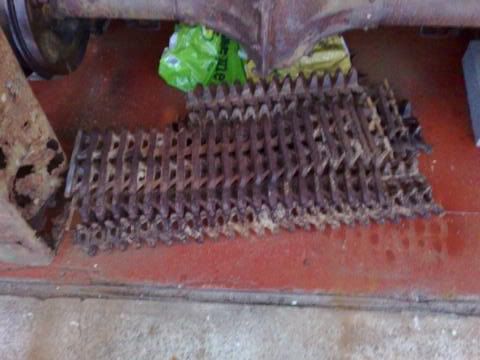 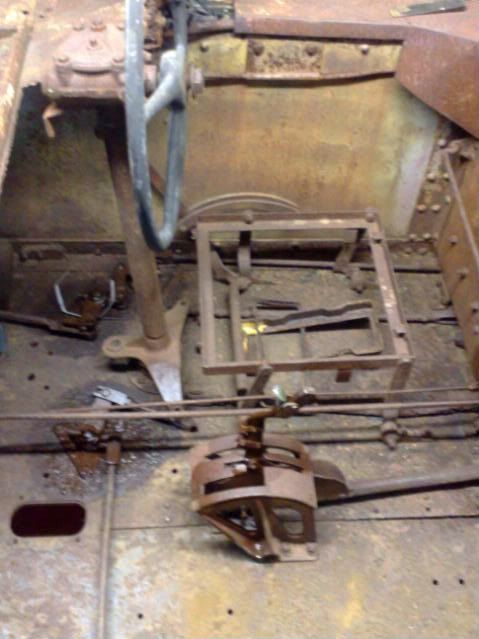 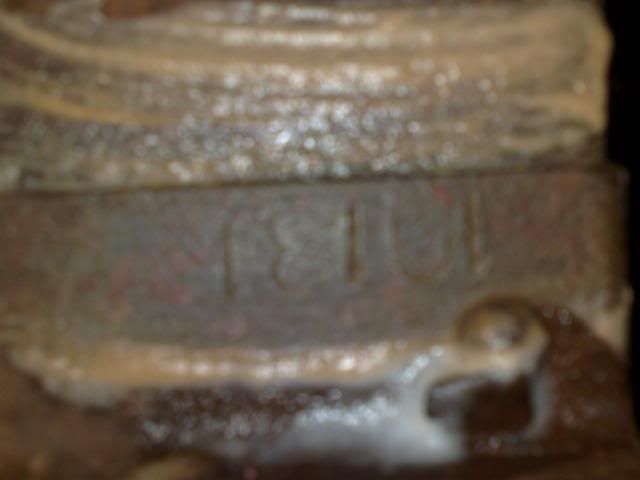 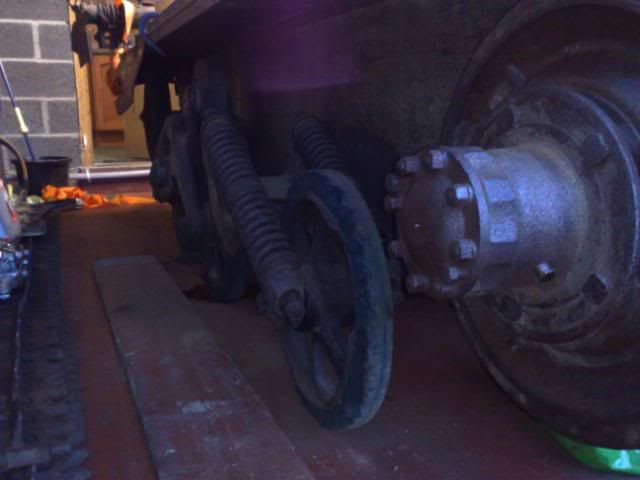 also the lower tub number is confirmed as 10131 it has too many digits and does not appear in the lists, however 1013 appears in a batch listed as "Missing"
__________________
is mos redintegro __5th Div___46th Div__ 1942 Ford Universal Carrier No.3 MkI* Lower Hull No. 10131 War Department CT54508 (SOLD) 1944 Ford Universal Carrier MkII* (under restoration). 1944 Morris C8 radio body (under restoration). Last edited by RichardT10829; 25-08-12 at 19:34. 
|
|
#2
08-06-09, 06:41
|
||||
|
||||
|
Hello Richard
Thanks for posting up the pics, something I am as yet still unable to do. Every time I look at an image of another carrier, especially british Mk1's I learn somthing new. Keep up the good work it is appreciated Cheers Phill
__________________
Ford GPW Jeep USMC Ambulance Willys MB Jeep Daimler Ferret Mk 1 Daimler Ferret Mk 2 Land Rover S2A Field Workshop Land Rover S3 FItted For Radio x2 Land Rover Perentie GS (SASR) International No 1 Mk 3 2.5 Ton 4x4 International No 1 Mk 4 2.5 Ton 4x4
|
|
#3
08-06-09, 09:24
|
|||
|
|||
|
Well come on Phillip, I'm waitng for the detail pics of your scout.
__________________
Bluebell Carrier Armoured O.P. No1 Mk3 W. T84991 Carrier Bren No2.Mk.I. NewZealand Railways. NZR.6. Dodge WC55. 37mm Gun Motor Carriage M6 Jeep Mb #135668 So many questions.... Last edited by Lynn Eades; 08-06-09 at 09:25. Reason: cause.
|
|
#4
08-06-09, 11:18
|
||||
|
||||
|
couple of queries i have. one being the lower hull number 10131 anyone any idea's about this as it seems to have one digit too many ?
secondly i will have to put the base coat onto the lower hull so i can get the road wheels etc back on can anyone tell me what cammo scheme would have been used by RSF or KOYLI regiments in Italy and Persia ? i have asked before and was refered to a chap that has written books on cammo for mv's but only came back with a "possible" general pattern used, which was sand and a light green which does not appear on any pics i have seen of vehicles in Italy at the time my Grandad was there.
__________________
is mos redintegro __5th Div___46th Div__ 1942 Ford Universal Carrier No.3 MkI* Lower Hull No. 10131 War Department CT54508 (SOLD) 1944 Ford Universal Carrier MkII* (under restoration). 1944 Morris C8 radio body (under restoration).
|
|
#5
08-06-09, 22:08
|
|||
|
|||
|
Hi Richie,
Glad the wagon go to you OK. Now the fun starts. as for the paint/colours i would surgest that you build it in the factory finish green for a start and then do the cammo once you have finished the build. that way you get the correct colour layer build up. I always use a paint made by Cromadex its a 222 fast air drying, matt - egg shell - or full gloss , they do all the BS paint codes as well as all the RAL. ( may be some one on the forum knows the colour code ) from spraying to being able to handle the paint part is about 15 mins. its a good hard paint but will take anything on top of it. Yes the move is now over (150 loads) so i have a bit of time on my hands again to sit infront of the computor. Keep at it ! Shaun
|
|
#6
08-06-09, 23:03
|
|||
|
|||
|
10131 is a normal hull serial number. I have seen many numbers around that serial block, and many of them were mortar carriers.
The numbers on the carrier (lower, upper, serial number) would normally be several hundred apart by this time of production. Mk1 carriers can run up to around 17 or 18000, with mk2 carriers running from there up to the end of production.
|
|
#7
09-06-09, 20:37
|
||||
|
||||
|
Rob, am i reading the lists wrong in Nigels book, the numbers on the lists only have four digits. i know what your saying though. It would be nice to find out what it was and if it was used by any particular regiment.
busy maing a gantry system that the hull can drop onto, it has four castor type wheels this will make moving the bare hull around much easier without making stuff to bolt onto the tub. more pics to follow as the build/tear down progresses
__________________
is mos redintegro __5th Div___46th Div__ 1942 Ford Universal Carrier No.3 MkI* Lower Hull No. 10131 War Department CT54508 (SOLD) 1944 Ford Universal Carrier MkII* (under restoration). 1944 Morris C8 radio body (under restoration).
|
|
#8
09-06-09, 22:57
|
|||
|
|||
|
I do not have Nigel's book, so am not familiar with the list you are talking about. I offer the following data from one of the 5 carriers we stripped in Northern Ontario several years back:
CTno: CT113354 Date of Mfgr: 10-23-1942 Front armour: 11101 Div Plate: CB10099 Hull no 10094 DND markings 42-1-8591 and also T56-749 Note that this hull serial is just 30 or so away from yours. In the absence of any other numbers, you can go with numbers near to what was listed above and be in the ballpark. If someone has Peter Ford's infoex around, they might be able to come up with some closer numbers, but 30 +- isn't bad.
|
|
#9
12-06-09, 17:36
|
||||
|
||||
|
Well Sunday the rear axel will be comming off and the engine out the hull. can the rear axel be removed with the engine in situ ? i only ask as if i can drop the axel off i will get the engine hoist in much closer to do the lift for the engine.
pics will follow on sunday. Rich and back to the number query CT 113354 is listed in a batch (CT112735 - 113685) UC Mk? 951 units made by contract number CDLV213 by ford Canada so if my tub number being 30 or so from the one you provided may put it into this batch......at least we know it was Mk1 ! will have to tell Nigel. typical mine would potentially be in the unknown section hahahahaha.
__________________
is mos redintegro __5th Div___46th Div__ 1942 Ford Universal Carrier No.3 MkI* Lower Hull No. 10131 War Department CT54508 (SOLD) 1944 Ford Universal Carrier MkII* (under restoration). 1944 Morris C8 radio body (under restoration). Last edited by RichardT10829; 12-06-09 at 17:43.
|
|
#10
12-06-09, 18:26
|
||||
|
||||
|
Your is for sure a Mk1. You can easily tell by the two cutouts in the hull beside the exhaust mufflers.
__________________
Jordan Baker RHLI Museum, Otter LRC C15A-Wire3, 1944 Willys MB, 1942 10cwt Canadian trailer
|
|
#11
12-06-09, 20:50
|
||||
|
||||
|
yeah, that and the battery box for sure. i was reading the carrier handbook and the mk2 the battery box is different design.....and on the other side of the hull
__________________
is mos redintegro __5th Div___46th Div__ 1942 Ford Universal Carrier No.3 MkI* Lower Hull No. 10131 War Department CT54508 (SOLD) 1944 Ford Universal Carrier MkII* (under restoration). 1944 Morris C8 radio body (under restoration).
|
|
#12
12-06-09, 21:08
|
|||
|
|||
|
Quote:
|
|
#13
12-06-09, 22:05
|
||||
|
||||
|
hahhaha, excelent will give it a go on sunday then.
__________________
is mos redintegro __5th Div___46th Div__ 1942 Ford Universal Carrier No.3 MkI* Lower Hull No. 10131 War Department CT54508 (SOLD) 1944 Ford Universal Carrier MkII* (under restoration). 1944 Morris C8 radio body (under restoration).
|
|
#14
14-06-09, 12:09
|
||||
|
||||
|
well managed to get the gunners side drive hub off last night, remarkably very very clean inside, the shoes look brand new ! springs are in excelent condition too. some heathen had previously taken the large flat nutts off with a chisel and they are in a right mess !
the bearing is in good condition too, so it was a pleasant find to say the least. anyone know of a good way to remove the rivets on the hull, i tried cutting the heads off but realised this was fruitless as the rivets are all counter sunk. Rich
__________________
is mos redintegro __5th Div___46th Div__ 1942 Ford Universal Carrier No.3 MkI* Lower Hull No. 10131 War Department CT54508 (SOLD) 1944 Ford Universal Carrier MkII* (under restoration). 1944 Morris C8 radio body (under restoration). Last edited by RichardT10829; 14-06-09 at 12:19.
|
|
#15
14-06-09, 12:51
|
|||
|
|||
|
Drill; a pilot hole in the centre of the rivet, then drill it out to near the rivet dia. drill about 2/3rds through, then put a punch in the hole, and hit it.
If you hit it hard enough the rivet will break in the middle. Use all the safety gear etc., and try not to damage your self. The centre of the rivet hole is not necessarily concentric with the head, so dont start with too big a drill, but the more meat you cut out, the easier it is to break the rivet. I have not used the arc/air gouger to blow out rivets, but it is an option , if available. There will be other ideas.
__________________
Bluebell Carrier Armoured O.P. No1 Mk3 W. T84991 Carrier Bren No2.Mk.I. NewZealand Railways. NZR.6. Dodge WC55. 37mm Gun Motor Carriage M6 Jeep Mb #135668 So many questions....
|
|
#16
14-06-09, 14:55
|
|||
|
|||
|
Hi Richie,
The nuts were probably damaged by a fitter in the field. as for removing the rivets, try gas cutting gear. the rivet is softer than the armour so you cane blow it away very cleanly. cut the head off the punch the rest out. with regards to the hull numbers never assume anything. lots of people know a lot about carriers - but not everything ! keep an open mind ! TTFN Shaun
|
|
#17
14-06-09, 19:06
|
||||
|
||||
|
sure will. i have a photo in black and white of you giving me a quick lesson in your wagon, i have put it on the wall in the garage to keep me inspired. my imagination was running wild when i saw the nuts, "Its 1942/43 Tunisia or perhaps Qum, as you say a field mechanic may have had to quickly improvise......... dead easy, Reme lad is busy servicing the carrier, a couple of the RSF lads come over for a chit chat, "fancy coming into town tonight with the lads if we get free passout ????" the spanner is on the ground, sand gets kicked over it and its lost Improvise Adapt Overcome
 and iam not saying REME lads are heathens.... far from it...... but you should see the state of the nut hahahaha. great stuff iam loving every minute i get to work on her.
__________________
is mos redintegro __5th Div___46th Div__ 1942 Ford Universal Carrier No.3 MkI* Lower Hull No. 10131 War Department CT54508 (SOLD) 1944 Ford Universal Carrier MkII* (under restoration). 1944 Morris C8 radio body (under restoration).
|
|
#18
14-06-09, 23:27
|
||||
|
||||
|
Right managed to get the rivets out, i used a wafer thin cutting disc and took the heads off the rivets from the inside, they punched straight out no problems, and through patience and a steady hand i might add
there is no marks left behind from the grinder. i had tried for over an hour with a new drill set but the rivets although mild steel were killing the drill bits off in minutes despite slow speed drilling and with oil.whilst working on the tub i noticed loads of holes, wondering what they were all for ? thought i would post them up see what you think. anyway here is the brake shoes and gubbins for the gunners side. 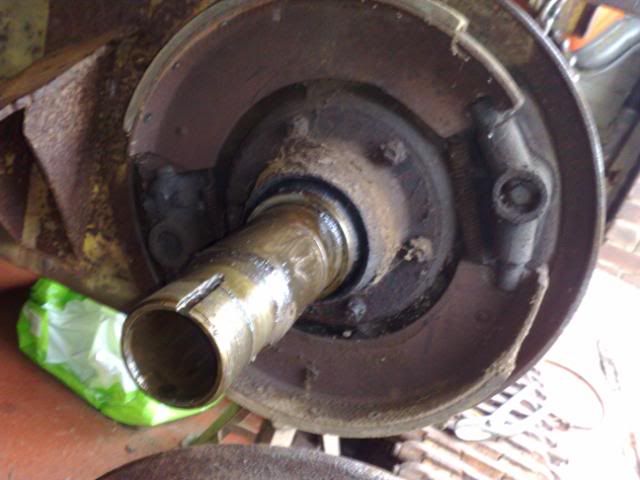 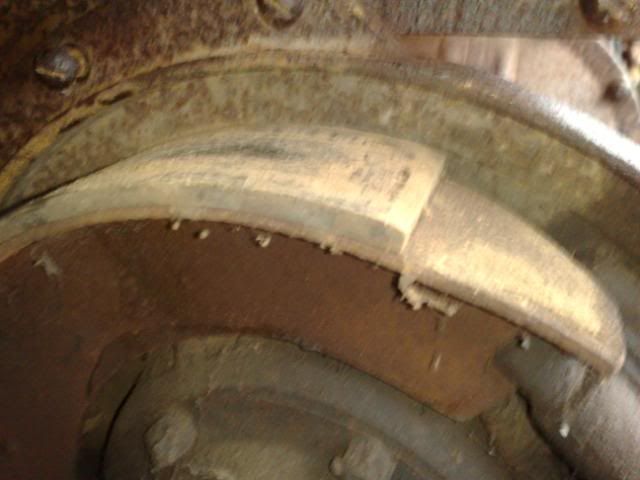 and the holes..... there are a load on the gunners side, but as all my tools were there i will get photos soon. drivers cockpit 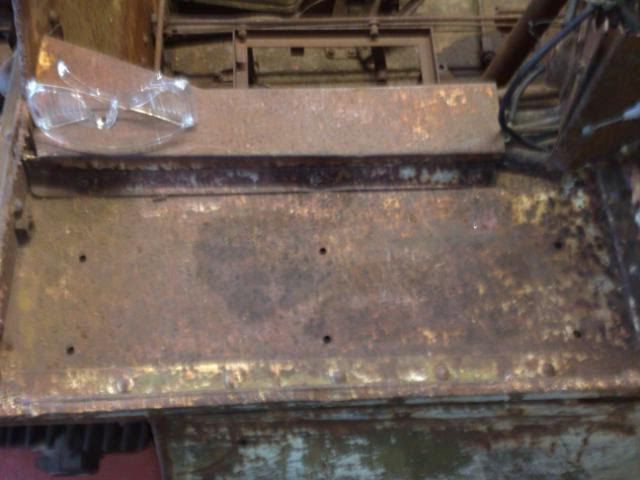 drivers side rear part of tub (looking from front backover) 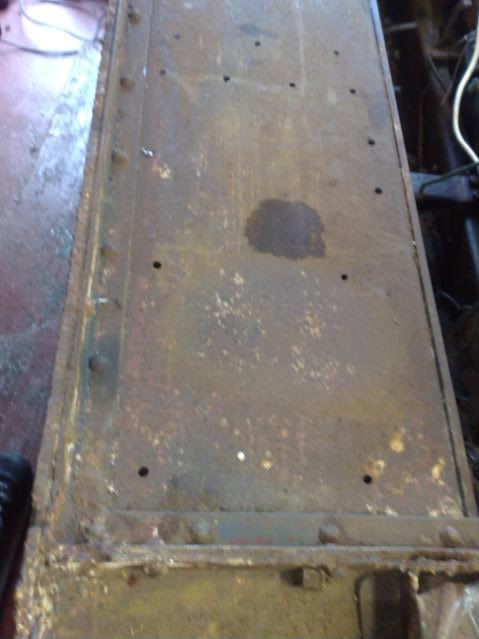 drivers side rear part of tub (looking from the rear forwards) 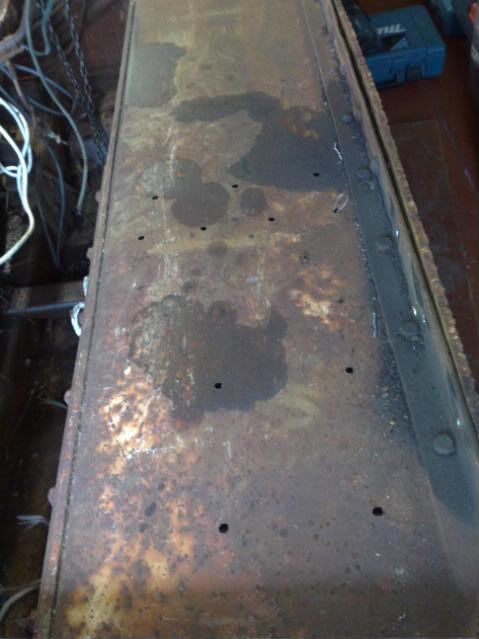 and finally the rear drivers side track guard sits over the sprocket 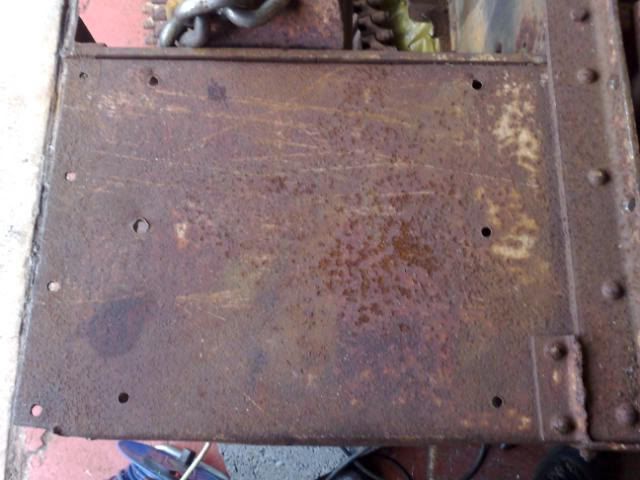 i know holes could be drilled for any number of reasons and by anyone, just trying to figure what if anything she has been fitted with. i know she has had the radio as the rear armour plate i have left has the holes and evidence of the battery box . just plodding on bit by bit, will get the axel clear and engine out this week, glacis plate removed and hopefully center bulkhead or whats left of it out this week.
__________________
is mos redintegro __5th Div___46th Div__ 1942 Ford Universal Carrier No.3 MkI* Lower Hull No. 10131 War Department CT54508 (SOLD) 1944 Ford Universal Carrier MkII* (under restoration). 1944 Morris C8 radio body (under restoration). Last edited by RichardT10829; 15-06-09 at 11:28.
|
|
#19
15-06-09, 00:43
|
||||
|
||||
|
hi rich, that first pic, holes for drivers side ammo bin, holds down the three straps on the bottom of the bin. Last pic are the holes for the ration box tray, you have the remains in the bottom right corner of the pic of the crank extension holder, best to take out those brake shoes wearing a face mask and bag them up, hoover out the drum housing of all lost dust and pressure wash the rest, you can refit the asbestos shoes later.
I have attached some pics of what is fitted to the holes. kevin.
__________________
2pdr Tank Hunter Universal Carrier 1942 registered 11/11/2008. 3" Mortar Universal Carrier 1943 registered 06/06/2009. 1941 Standard Mk1 stowage Carrier, Caunter camo. 1941 Standard Mk1 stowage Carrier, light stone. 10 cwt wartime mortar trailer. 1943 Mk2 Daimler Dingo. 1943 Willys MB. 1936 Vickers MG carrier No1 Mk1 CMM 985.
|
|
#20
15-06-09, 09:46
|
|||
|
|||
|
If you look up from the uderside,you will find all the holes are countersunk.
If you put bolt heads or nuts under there, the track will wipe them off. Id say that all those holes are original.
__________________
Bluebell Carrier Armoured O.P. No1 Mk3 W. T84991 Carrier Bren No2.Mk.I. NewZealand Railways. NZR.6. Dodge WC55. 37mm Gun Motor Carriage M6 Jeep Mb #135668 So many questions....
|
|
#21
15-06-09, 10:41
|
||||
|
||||
|
awesome. cheers for the replies guys ! it is like a pandora's box this thing so many little things you miss on a particular day only to discover later. Gantry should be ready this week to drop the tub onto (it has strong castor type wheels with breaks) once the axel is clear and the lump out i will be able to push it in and out the garage easier, i can pretty much push it now, even with all the weight in.
bought some boxes and plastic bags with labels, all to be designated. got some etch primer coming and some high build red oxide primer, when the tub is away i will pick a box of components at a time to clean up and prime, then place back into the bags idea being that they are "new" parts ready to go back on out of the bags.
__________________
is mos redintegro __5th Div___46th Div__ 1942 Ford Universal Carrier No.3 MkI* Lower Hull No. 10131 War Department CT54508 (SOLD) 1944 Ford Universal Carrier MkII* (under restoration). 1944 Morris C8 radio body (under restoration).
|
|
#22
20-06-09, 14:51
|
||||
|
||||
|
well managed to get most of the armout slithers off now, i noticed that on the gunners side of the carrier in the rear compartment all the rivet heads on the inside had been hammered flat ?
took the remnants away from the gunners port, and removed the glacis plate which i think i will replace as it is full of holes and the corner is ripped. the removal of the gunners plates were not without incident, i looked at the way the plates lie and i could swear looking at it the gunners armour was on top of the glacis, i cut the rivet heads off and began to ease it without success... my mate came along and plodded on as i worked at a bench nearby. next thing i recall is being struck in the face...........my pal bless his heart was using a crow bar to persuade the armour away from the angle bar, obviously under a great load it slipped and catapulted three feet before hitting me in the face OUCH !! my cheek is pretty bad the worst thing is today i got to go to a wedding ! and on monday i have an important meeting....luckily it had spent most of its inertia before striking me, that and i had my safety gear on, otherwise it could have been real nasty. never mind an hour and half of frozen pea application has kept swelling to a minimum and i continued finishing my jobs i had set myself. pics of progress will follow once i get a chance to upload them. so for those who are doing as i am remove the glacis before trying to pry the front armour off !!!!! Rich
__________________
is mos redintegro __5th Div___46th Div__ 1942 Ford Universal Carrier No.3 MkI* Lower Hull No. 10131 War Department CT54508 (SOLD) 1944 Ford Universal Carrier MkII* (under restoration). 1944 Morris C8 radio body (under restoration).
|
|
#23
28-06-09, 23:12
|
||||
|
||||
|
well a bit more done, just ticking over really. i am having major trauma removing the drivers side brake drum, it is solid. i have removed the sprocket, removed the drive axle and outer bearing, i cant move the adjuster for the shoes it is solid. anyone any ideas of how to get the drum off without breaking the cast ? i am pretty stuck.
had a look through the tin cover at the cam plate which looks in a bad way, so not looking forward to that bit, nevertheless it will get done. finally i may have found the serial number or part of it (unless it is wishfull thinking) the actual number can anyone show me a picture on the top edge of the armour ? the "ghosting" that i can see contains a five but the number is towards where the dash pannel cover would be ? just wish i had photographed it ! i will try and put some acid on to reveal any stamping evidence. the area i beleive i can see the numbers is as below 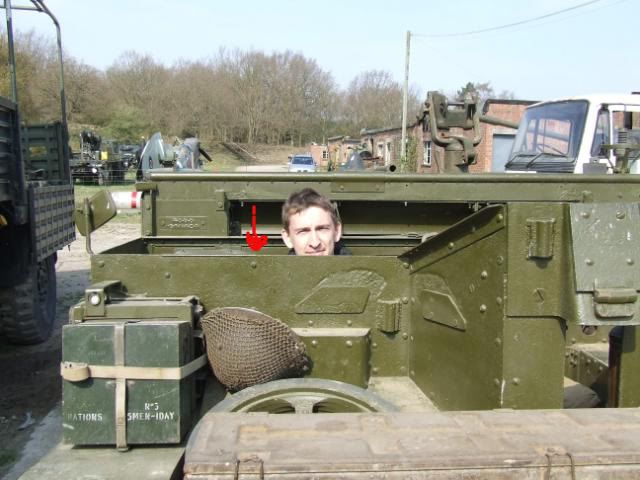 my armour has been cut straight down level with the dash pannel then it slopes in from the outer edge of the hull to the outer edge of the dash pannel.
__________________
is mos redintegro __5th Div___46th Div__ 1942 Ford Universal Carrier No.3 MkI* Lower Hull No. 10131 War Department CT54508 (SOLD) 1944 Ford Universal Carrier MkII* (under restoration). 1944 Morris C8 radio body (under restoration).
|
|
#24
28-06-09, 23:39
|
|||
|
|||
|
Is this what you want? your location is correct.
__________________
Bluebell Carrier Armoured O.P. No1 Mk3 W. T84991 Carrier Bren No2.Mk.I. NewZealand Railways. NZR.6. Dodge WC55. 37mm Gun Motor Carriage M6 Jeep Mb #135668 So many questions....
|
|
#25
28-06-09, 23:49
|
||||
|
||||
|
cheers Lynn. the number i can see is faint, i will try and recover it with acid, fingers crossed ! would any of those number have ben covered by the dash pannel top plate ?
cheers for the help by the way
__________________
is mos redintegro __5th Div___46th Div__ 1942 Ford Universal Carrier No.3 MkI* Lower Hull No. 10131 War Department CT54508 (SOLD) 1944 Ford Universal Carrier MkII* (under restoration). 1944 Morris C8 radio body (under restoration).
|
|
#26
29-06-09, 00:27
|
|||
|
|||
|
I dont think the number would be covered, but I'm not sure.
I don't know if you've already done this, but try undoing the mounting bolts/ nuts for your bisector / brake adjuster. soak around them with CRC and try chasing them back out of the backing plate, as you try to draw the brake drum off. If there is a groove or shoulder in the drumthis may make it easier to get apart. Another thing you might try is bolting a bit of steel bar accross a couple of you sprocket mounting holes, so that you might be able to rotate the drum. You can put a shouldered plug into the end of the axle tube to pull the hub against, being carefull not to do any damage to the thread of the axle tube. I would remove the outer bearing first.(I note you have) Then you can "woble " the hub as you pull it. It's a frustrating struggle, but be patient or you'll damage something, thats hard to get. I would get hold of a good fitting tool to back of that brake adjuster. the force you put on it maybe enough to nudge the shoes into moving, and if you can back off the adjuster, it gives the shoes some where to go.I would do this first. When removing rivets, note where the flattened ones, and the flush ones come from. there is always a reason. Something won't fit later. When rebuilding the bisectors, be very careful at assembly. They can be assembled wrong and in that case will be ineffective. If your cam plate is rusted on the working edge it can be built up with weld.
__________________
Bluebell Carrier Armoured O.P. No1 Mk3 W. T84991 Carrier Bren No2.Mk.I. NewZealand Railways. NZR.6. Dodge WC55. 37mm Gun Motor Carriage M6 Jeep Mb #135668 So many questions....
|
|
#27
29-06-09, 08:57
|
||||
|
||||
|
thanks Lynn, will give it a go, once i have made significant progress i will post up some more pictures.
__________________
is mos redintegro __5th Div___46th Div__ 1942 Ford Universal Carrier No.3 MkI* Lower Hull No. 10131 War Department CT54508 (SOLD) 1944 Ford Universal Carrier MkII* (under restoration). 1944 Morris C8 radio body (under restoration).
|
|
#28
30-06-09, 23:44
|
||||
|
||||
|
right, i managed to get the remains of the front plate off, i cleaned the top edge up and used some scotch brite I can see a faint "T" as apposed to "CT" a faint 5 and a faint 2 perhaps this is wishfull thinking or iam seeing what i want to see..... the plate goes into the SMV unit at work tomorrow for chemical and heat treatment.
i took a photo of the plate section but the camera cant pic up the detail. 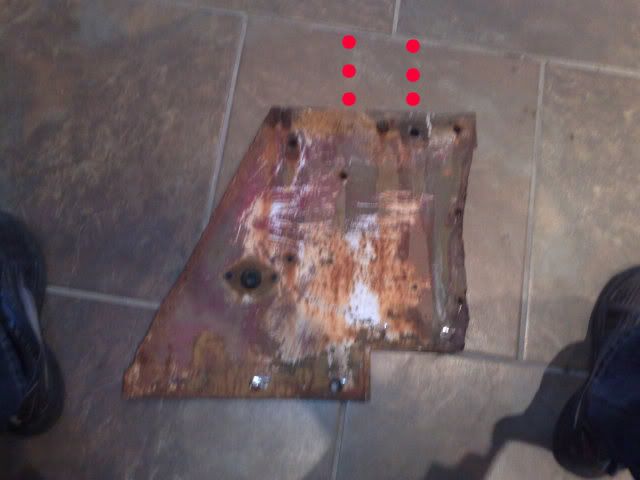 between the red dots is where the ghosting appears, the T the 2 and the 5 are very clear i tried to zoom in but the camera is basic. hopefully i can recover it !  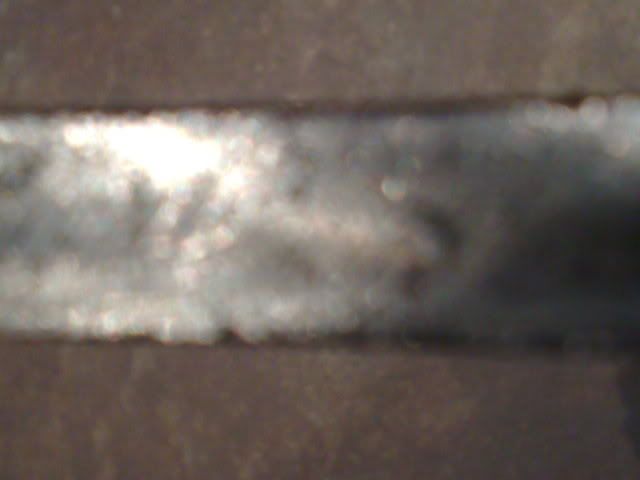
__________________
is mos redintegro __5th Div___46th Div__ 1942 Ford Universal Carrier No.3 MkI* Lower Hull No. 10131 War Department CT54508 (SOLD) 1944 Ford Universal Carrier MkII* (under restoration). 1944 Morris C8 radio body (under restoration).
|
|
#29
05-07-09, 12:35
|
||||
|
||||
|
well the plate has gone to work they have tried copper sulphate type acid solution with electric current with brings up the numbers, they say they have recovered a 4 but are struggling so i said they could try heat but to photogrpah it first. we will wait and see i guess.
i have ordered some pullers to get the hub off so waiting for that. managed to rip my boiler suit (which was wrecked anyway) so went onto ebay and found a nice olive crewmans suite so paid a few pennies and got that, popped my grandads Div flashes on it when it came , just to keep in with the theme used one of Kevins NOS fenders to make a pair as mine were wrecked, just need to drill the holes they are direct reproductions using same gauge steel etc etc. I can create more of these if people require, they will come with holes or without and will be red oxide primed (if anyone needs some) 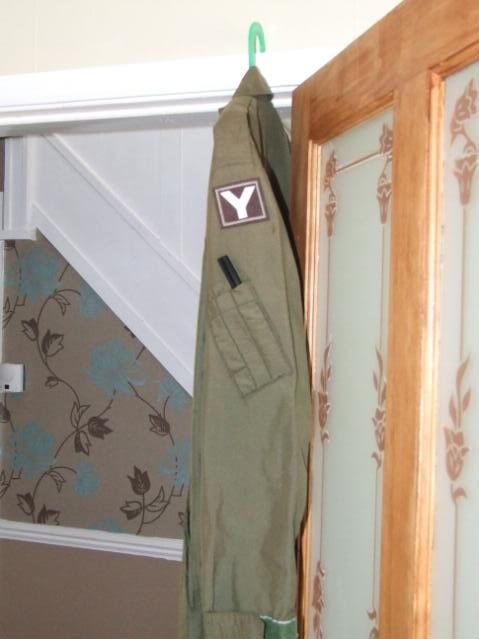 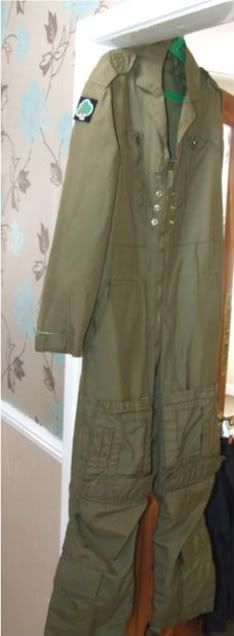 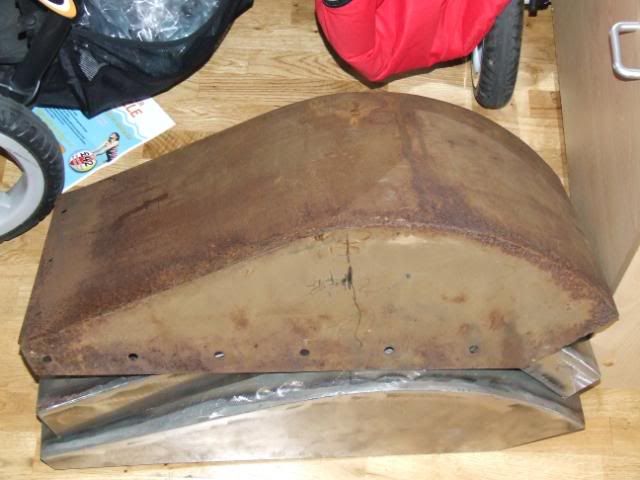 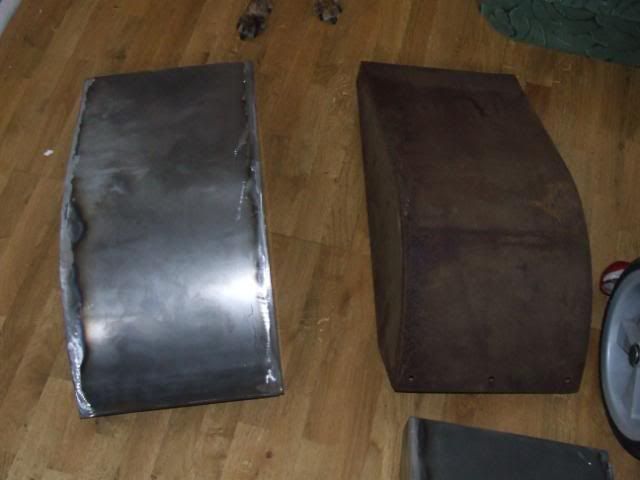 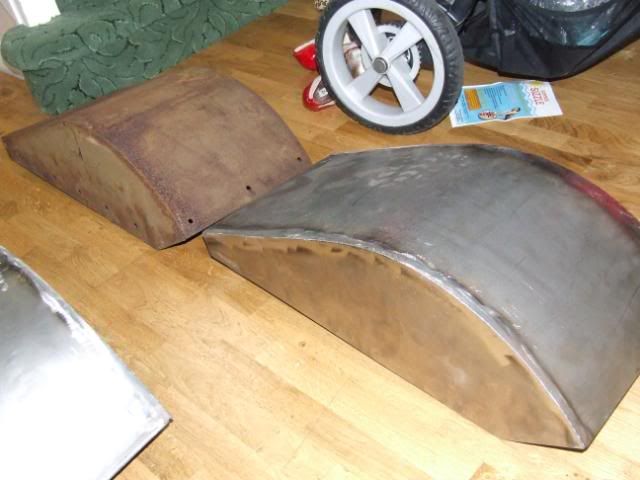 i have read the thread on posting pics, i cant seem to get my imgaes like a film strip which most you guys do, i used the add image on the reply box, but it still brings them up as i have been doing.
__________________
is mos redintegro __5th Div___46th Div__ 1942 Ford Universal Carrier No.3 MkI* Lower Hull No. 10131 War Department CT54508 (SOLD) 1944 Ford Universal Carrier MkII* (under restoration). 1944 Morris C8 radio body (under restoration). Last edited by Hanno Spoelstra; 05-07-09 at 18:19. Reason: edited for screen lay-out purposes
|
|
#30
05-07-09, 16:06
|
||||
|
||||
|
Quote:
|
 |
|
|


 Linear Mode

