|
#31
 23-10-10, 20:47
|
|||
|
|||
|
Hello Scott
How is the project going? It looks fantastic. No doubt a project you can be proud of. Its come a long way since i last saw it. Eric
__________________
Collecting data on the WW2 Canadian jeep and trailer. Serial, WD Numbers etc. 
|
|
#33
27-01-11, 18:42
|
||||
|
||||
|
Well, after another huge delay, I got going on the MUTT again.
This is what 4 hours in the Sandblasting Booth nets you:      I'm super pleased with how it all turned out. I chose to go with Gloss Black on the Suspension Parts. Although they were originally either Semi-Gloss Black or OD, my Painter suggested going with the Gloss as its superior to Semi-Gloss of Flat for corrosion resistance etc.
__________________
Gone but never forgotten: Sgt Shane Stachnik, Killed in Action on 3 Sept 2006, Panjwaii Afghanistan Last edited by Scott Bentley; 29-01-11 at 04:42.
|
|
#34
27-01-11, 21:02
|
|||
|
|||
|
looking good.
Good idea on the gloss. On each of the tops of my rear fenders mine had an anti slip surface in black. Eric
__________________
Collecting data on the WW2 Canadian jeep and trailer. Serial, WD Numbers etc.
|
|
#35
28-01-11, 16:35
|
||||
|
||||
|
Quote:
|
|
#36
29-01-11, 00:55
|
||||
|
||||
|
Scott: No wonder you don't answer x 7196...you're hiding in the maint shop!

__________________
PRONTO SENDS
|
|
#37
29-01-11, 04:46
|
||||
|
||||
|
Quote:
 Besides, all the action happens in the Maint Hanger 
|
|
#38
31-01-11, 01:37
|
||||
|
||||
|
Well, after a massive garage weekend, I fell short of my goal of getting my MUTT back on its wheels again.
Turns out my NOS Ball Joint Dust Boots are all cracked and dry rotted. I'm going to have to see if I can find some aftermarket replacement Dust Boots this week. Anyway, all the time spent ripping everything apart and the blasting really paid off with the Suspension parts. Everything went together nice and neatly, and looks like new:     Also finished off the Engine Compartment and Brake Lines:  Hopefully i'll have the rest of the parts back this week.....
|
|
#39
04-02-11, 00:55
|
||||
|
||||
|
The parts are back and the reassembly begins...
I can see the light at the end of the tunnel now. Its going together fast, and this is the easy fun part. The way things are looking now once the last few bits are installed and some new ROPS spreaders are welded in, it will be back in for its final coat of paint next week, and then I can start on the driveline: Engine Bay:  Sitting on all Fours:  Parts to install:  Also, lastly, a little tip. If anyone is looking for Tires, Summit Racing is handling Coker reproduction Firestone NDCC 7.00x16 Tires. 5 x Tires worked out to be $605 CAD shipped to your local UPS Store at the US Border.
|
|
#40
16-02-11, 03:47
|
||||
|
||||
|
What a crazy couple of days.....
The ROPs ended up being one of the biggest, dirtiest pains in the ass of this whole resto. From trying to remove the feet when I got it, to now trying to get them sorted. My Cage was either poorly put together from the get go by the folks at the now defunct "KitchCraft", or really abused when the Jeep was demilled. When I installed the Cage, nothing lined up nice and it was no-where near square. I wasn't satisfied with the fit and proceeded to cut the Cage in no less than 6 places, and realigned it all. After everything was butt welded together, I went back through with a drill and drilled some wells in all of the joints, and then plug welded it up. I'll sleep at night knowing it won't come apart if........ Anyway, painful task, but well worth it. Now I can stand in the Tub and lift the whole Cage up out of the Feet with minimal effort, and the Top fits like a glove. Well, its finally ready for the top coat of paint. I spent alot of time trying to make sure everything is properly situated, the correct things are masked etc. I also needed to get all the other things like the Shifters, Park Brake Lever and Wiper Arms ready to go to be painted along with the Jeep as I can't install them, but want them to match. I also made sure that none of the wiring or rubber parts were exposed as it will end up peeling and looking like crap later. I took Robs advice and put the Radio Power Trays and all the other misc stuff in. Basically, only the Canvas will not be installed.  The ROPs is also going to get a good sandblasting and prime prior to the final paint. All that will be left for painting later is the new Rims after I pick them along with the new Tires. Next Up, Powerpack and Diffs............
|
|
#41
16-02-11, 05:21
|
||||
|
||||
|
Scotty,
A big Bravo Zulu on this resto. Looking good. Clive
__________________
Those who live by the sword will be shot by those of us who have progressed. - M38A1, 67-07800, ex LETE
|
|
#42
27-02-11, 23:45
|
||||
|
||||
|
Moved on to the Engine now.
Its all stripped down and headed off for a Hot Tanking tomorrow. I've found a new little sub-hobby, trying to bring Data Plates back from the dead. Here is the Rebuild Tag off of my Powerpack:  I find it amusing that the Rebuilder referred to the Type as "M151 Jeep". I'm sure they didn't just pull that out of their ass, as they were only delivered Engines for Rebuild and not the whole "Jeep". Point is, someone in Contracts called it a Jeep. Again, nothing serious, but just adds to the whole is a MUTT a JEEP discussion.
|
|
#44
14-03-11, 03:20
|
||||
|
||||
|
Congrats on a super fine job...excellent work! Love to see these historic vehicles restored back from an uncertain fate,
What was the exact material you used on the underside?
__________________
I see you stand like greyhounds in the slips, Straining upon the start. The game's afoot!
|
|
#45
14-03-11, 05:45
|
||||
|
||||
|
Quote:
Speaking of Ziebart, are they still around? I've got nearly 100 holes in this thing that I'd like to plug with the correct body plugs.
|
|
#46
14-03-11, 07:17
|
|||
|
|||
|
A quick google shows Ziebart rustproofing still exists, although likely not on a street corner near you. They seem to be in all the major centers like Montreal, Ottawa, Winnipeg, peterborogh, a couple in Alberta....
|
|
#47
14-03-11, 14:35
|
||||
|
||||
|
I forgot to ask.. spray it on, or brush? If former, can it be brushed on and if so what kind of finish does it leave? (I dont have access to equipment or location for spray)
My thinking is, Id like to do the underside of the Iltis just to have some long term protection, although they were painted green. I wonder if you could paint over the coating? or would that just end up looking like a dogs breakfest and flaking off.. Anyone know if any of the suspension parts on Iltis painted,? black or green?
__________________
I see you stand like greyhounds in the slips, Straining upon the start. The game's afoot!
|
|
#48
14-03-11, 20:31
|
||||
|
||||
|
Quote:
That being said, I wirebrushed, degreased, steam cleaned and Zinc Oxide primed prior to spraying the undercoating on it. The finish is adjustable depending on how close you spray. In my case, there was still alot of Ziebart under it, so I tried to mimic it by spraying close. If you back off, it will go on fairly smooth. It is fully paintable after 48hrs as its a rubber base and not ashpalt.
|
|
#49
15-03-11, 03:56
|
||||
|
||||
|
Quote:
Turns out there is actually one in Saint John. I'll have to give em a call.
|
|
#50
15-03-11, 04:23
|
||||
|
||||
|
ny the way. I published a story by Mike McKinley about Mutts and put in some additionsl info about Mutts in Cdn service, and in Vietnam, also a story about Mikes Mutt when he first got it.. Its in one of the Convoy Magazines..Mike should have a copy. In fact i think Mikes Mutt- yours- is on the cover
__________________
I see you stand like greyhounds in the slips, Straining upon the start. The game's afoot!
|
|
#51
15-03-11, 04:30
|
||||
|
||||
|
Little bit more progress:
The Rolling Chassis and Body is complete minus the ROPS which is still waiting for a coat of Green along with a complete set of NOS Rims I found locally:  With Tub and Suspension complete, I moved on to the Driveline and Powerpack. I decided to fully dismember the Differentials, soak and clean the internals, sandblast the Housings, reassemble, set Pinion preload and Backlash, and install new Seals: 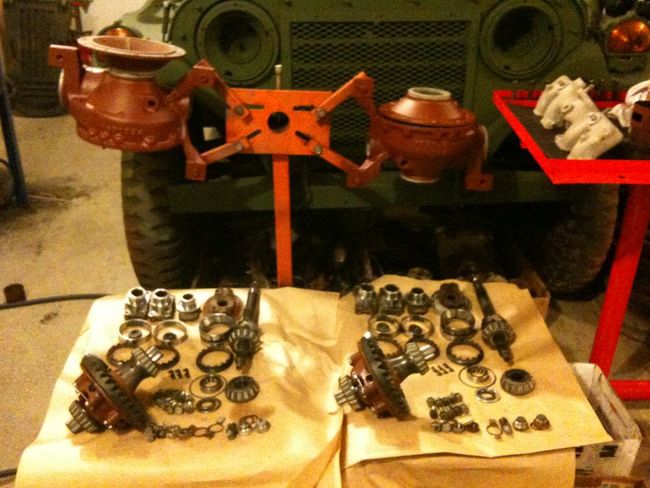 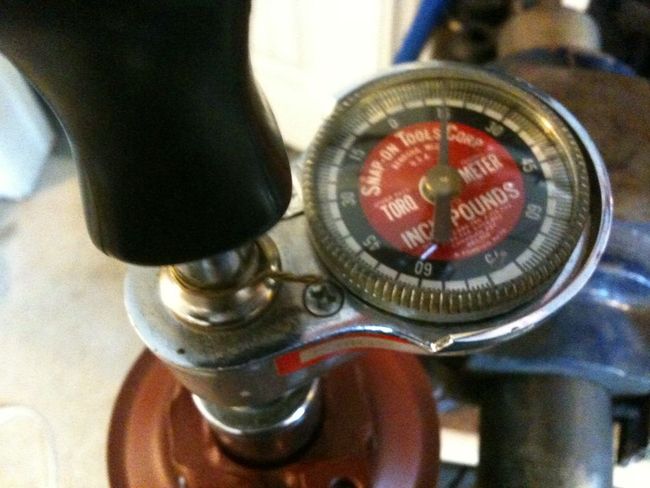 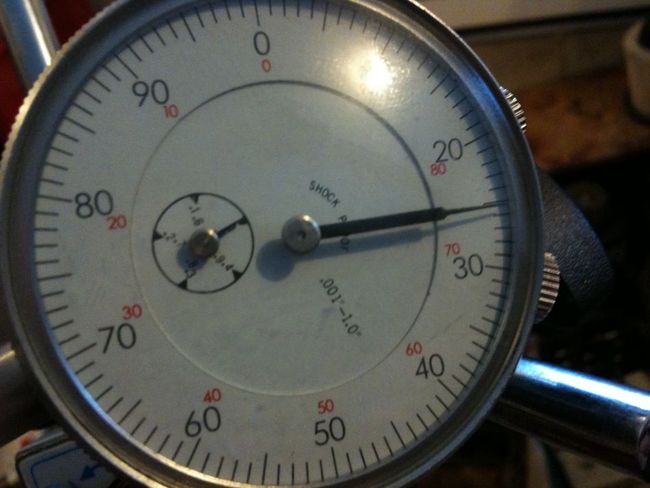  I then, disassembled, cleaned, reassembled and painted the U-Joints. This sounds crazy for U-Joints, but replacing them all would be upwards of $200:  Lastly, with the Engine Block and Cylinder Head gone to the shop, I sandblasted, cleaned and repainted all of the Engine components:    Also, gutted, sandblasted, cleaned and rebuilt with NOS innards:  When it comes to the Powerpack, I ended up choosing to refresh this Ford Rebuilt unit. When its all said and done it really wasn't too pricey as i'm doing all the wrench bending myself and having the Machine Shop handle to detailed work on stripped components: Engine = Free Overhaul Gasket/Seal Kit = $38 Intake Valves = $25 Exhaust Valves = $20 Piston Ring Kit = $20 Cam Bearings = $35 Crank Bearings = $45 Conn Rod Bearings = $42 Hot Tank Engine and Head = $60 Lap Valves = $24 Hone Cylinders = $15 Install new Freeze Plugs = $25 Crank and Cam Polish = $50 GRAND TOTAL = $400 So essentially, for $400, i'll be able to add some Oil and forget about it. That just leaves me with the Radiator. I have 3 here that i'm going to drop of to the Rad Shop and have them select the best one and go from there.....
|
|
#52
20-03-11, 15:59
|
|||
|
|||
|
Scott,
It looks incredible. Who would have thunk that what you had to work with could turn out so nice, purely shows what can be accomplished when you got your own space, some skill, and a nice selection of hammers. When is it going to be road worthy? I'll be in town in a couple weeks, and might have a bottle of scotch to bust across her bow for ya. Cheers Rick
|
|
#53
20-03-11, 16:33
|
||||
|
||||
|
Quote:
Not sure how much longer til it's running now. Ryan Adams took me for a burn in his M38 yesterday (windshield folded down in sunny -2* weather) and that really put a bug in my ass to finish it once my smile thawed out. Really it's only 2 full days of work left on it now. More of a money than time issue Shoot me an email or a call. If your still lacking the constitution for Scotch I've got a nice bottle of Napa Valley Designer Gin here.
|
|
#54
31-03-11, 23:46
|
||||
|
||||
|
Moving on to the cleaner more gentlemanlike work, I started picking away at the Comms System:
Finally got the Cabling run nice and neat. Spent nearly hours cleaning the grunge off the rubber cords: 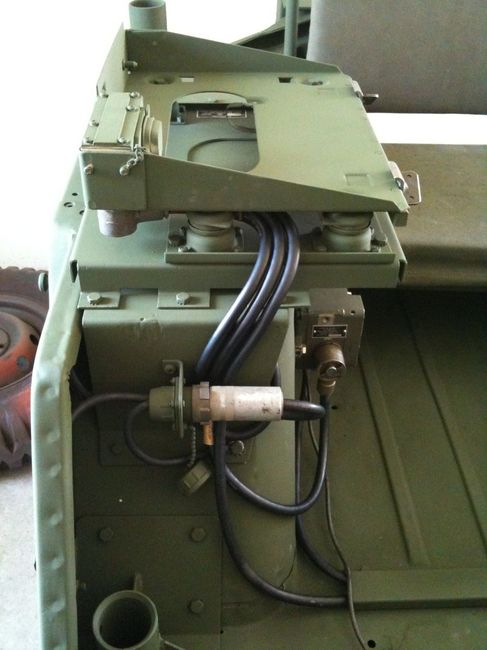 C-2299 Mounted. I have a LS-454U Speaker on the Dash, you can see the cord plugged into the bottom. My "A" Set (524) will be mounted right above the C-2299, so I plugged it into the left side port on the 2299, with the "B" Set (GRC-160?) in the other:  Mount for the GRC-160?: 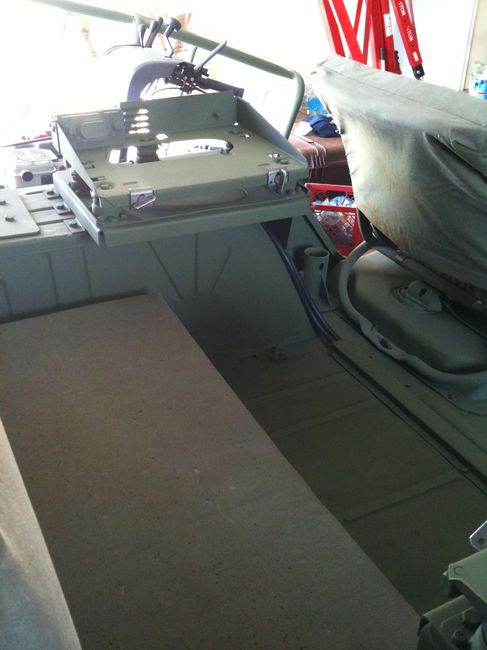 MX-6707s and the Utility Brackets all cleaned up, painted and ready for the ROPS. I painted the springs, as most I have seen in service were also painted over, so it wasn't an accident:  "A" Set all cleaned up and ready to go:  Then there is the Engine..... More on this in the coming days: 
|
|
#56
05-04-11, 02:59
|
||||
|
||||
|
Getting really close now...
ROPs reinstalled along with all the rest of the Comms Gear:   Just the Power Pack left now
|
|
#57
28-04-11, 04:32
|
||||
|
||||
|
Alright... Huge leap forward.
Sadly, as I get closer to the finish line, I haven't been taking as many photos as I should be. Engine is now rebuilt, and I dropped it in sans Tranny for a test run, tuning and hot valve adjustment. Everything is working as it should:  Then I moved on a built a good Tranny/Transfer out of the pair I had sitting on the floor:  I gutted and cleaned out the nicest housing:  Picked out the nicest Gears and Synchros from the pile o parts:    Rebuilt with new seals and then some paint:  Then the final coat of paint followed by the Park Brake install and adjustment:   Then the Engine Enamel:  Getting really really close now........
|
|
#58
02-05-11, 02:22
|
||||
|
||||
|
Can almost taste the flys and exhaust....
Basically its all done minus just a few things now: Need to clean up and install the Fuel hard lines, Install Exhaust System, Get new Windscreen Glass, and Get a pair of 51R Batteries. Then its Safety Check and Registration time. So heres how it sits now:  Powerpack is all settled in again:    Just about completed cab:  This is my favourite shot. Really shows all the time spent on the suspension: 
|
|
#59
02-05-11, 11:48
|
||||
|
||||
|
Well done - looks better than new. Enjoy it this summer.
Regards, Hanno
__________________
Regards, Hanno --------------------------
|
 |
|
|


 Linear Mode

