|
#91
 15-07-11, 08:34
|
|||
|
|||
|
thanks guys. I am sure I can push on now, however, one of the things that is worrying me the most is finding supplies of all the correct fixings. Most of the nuts and bolts that came off were really bad and getting UNFand UNC over here now is hard work. Thats without looking for countersunk domed top etc etc.
It did have both the small mortar bracket and the large one fitted, so maybe it has had one or other retro fitted at some stage. No idea sorry what the four holes on the side are for but will try to find out. More pictures as things progress. Andrew 
|
|
#92
15-07-11, 11:40
|
||||
|
||||
|
Andrew,
BSF / BSW is still available, I was surprised how easy it was, a number of industrial suppliers in the West Midlands who will sell you boxes full, 100's per box. BSF is a little more hit and miss but for the T16, UNC and UNF will be a synch! For odd one offs try Spalding Fasteners nr me (ebay), for boxes full try: Willenhall Fasteners Ltd, they only deal company to company not to the public so I purchased them through a family company. You will want to order HEX heads and if you want then A2 stainless will be available through specialist stainless fastener suppliers, try Apex Stainless nr Wolverhampton, again company only transactions.
__________________
Alastair Lincoln, UK. Under Restoration: 1944 No2 MK2 Loyd Carrier - Tracked Towing 1944 Ford WOT6 Lorry The Loyd on Facebook
|
|
#93
15-07-11, 16:30
|
||||
|
||||
|
For bolts and machine screws, I used a mail-order Internet company here in the USA called Bolt Depot. Cost a bunch as there are so many large bolts in the T-16 but figured it was better to replace everything since it was a complete ground up restoration. I used stainless in most places. Link below is their company:
http://www.boltdepot.com/hex-bolts.aspx For brass fittings needed with the two oil coolers and all the various lines, I used another Internet company linked below. Austin is a big city but a lot of this type of stuff just isn't readily available anywhere that you can walk into. So placing an on-line order was a lot easier overall, even though you need to think things out in advance for the project. http://fittingsandadapters.com/
__________________
David Gordon - MVPA # 15292 '41 Willys MB British Airborne Jeep '42 Excelsior Welbike Mark I '43 BSA Folding Military Bicycle '44 Orme-Evans Airborne Trailer No. 1 Mk. II '44 Airborne 100-Gallon Water Bowser Trailer '44 Jowett Cars 4.2-Inch Towed Mortar '44 Daimler Scout Car Mark II '45 Studebaker M29C Weasel
|
|
#94
15-07-11, 22:16
|
|||
|
|||
|
well thanks once again Guys. I will take a look at both of these websites. I dont think I will stretch to Stainless but usually use copper grease on threads where they will need to be undone again in the course of ordinary service work. It is a pain , as you say David , even in a large City its frustrating to try and find the bolts one needs easily and when you want them! I am hoping that I may find a supplier at War and Peace in 2 weeks time, and try and buy a bucket load of bolts. Currently struggling with the countersunk slot head that hold all the hull fixings on. I have a box of these, some are raised domes which were for a Half track but they are the size up ! Pain. Ah well, need to spend some time on the net sorting this lot out.
|
|
#95
16-07-11, 01:35
|
||||
|
||||
|
Careful with the net, when it comes to nuts and bolts, the phone and a company headed note paper gets you a lot more for your money than companies targeting the 'hobby market'.
__________________
Alastair Lincoln, UK. Under Restoration: 1944 No2 MK2 Loyd Carrier - Tracked Towing 1944 Ford WOT6 Lorry The Loyd on Facebook Last edited by ajmac; 16-07-11 at 09:49.
|
|
#96
19-07-11, 18:53
|
|||
|
|||
|
I call this my Spring Alpine Camoflage. One can increase the ammount of brown in the mix and reduce the white depending on how far into Spring season it is.

|
|
#97
26-07-11, 19:09
|
|||
|
|||
|
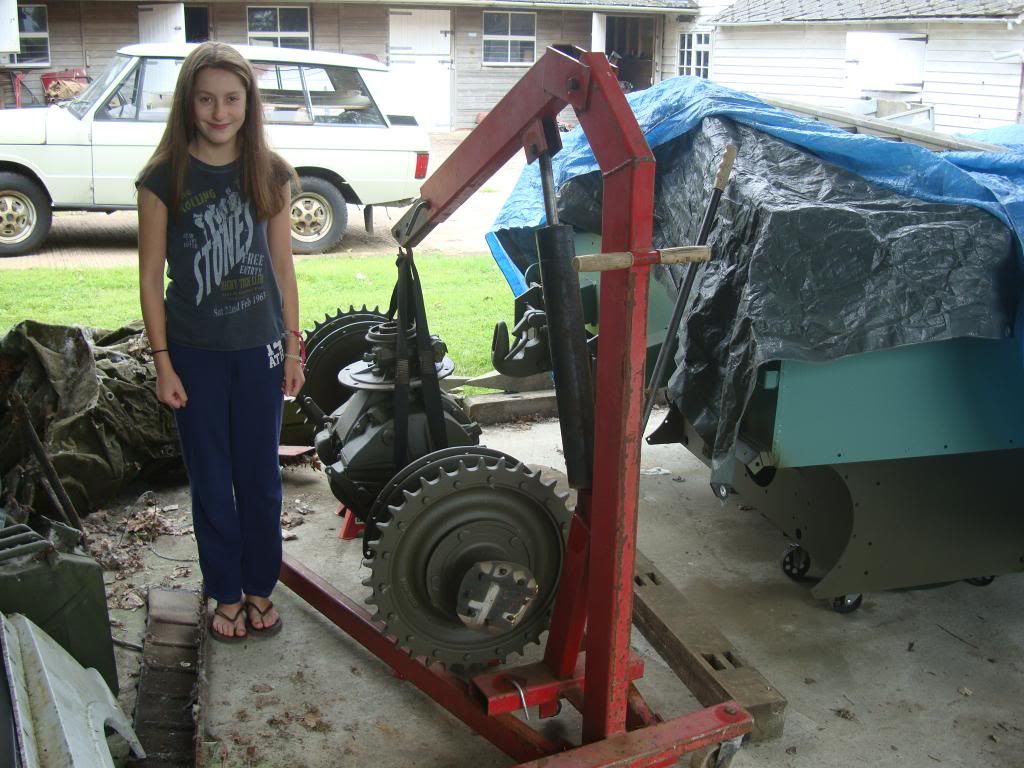
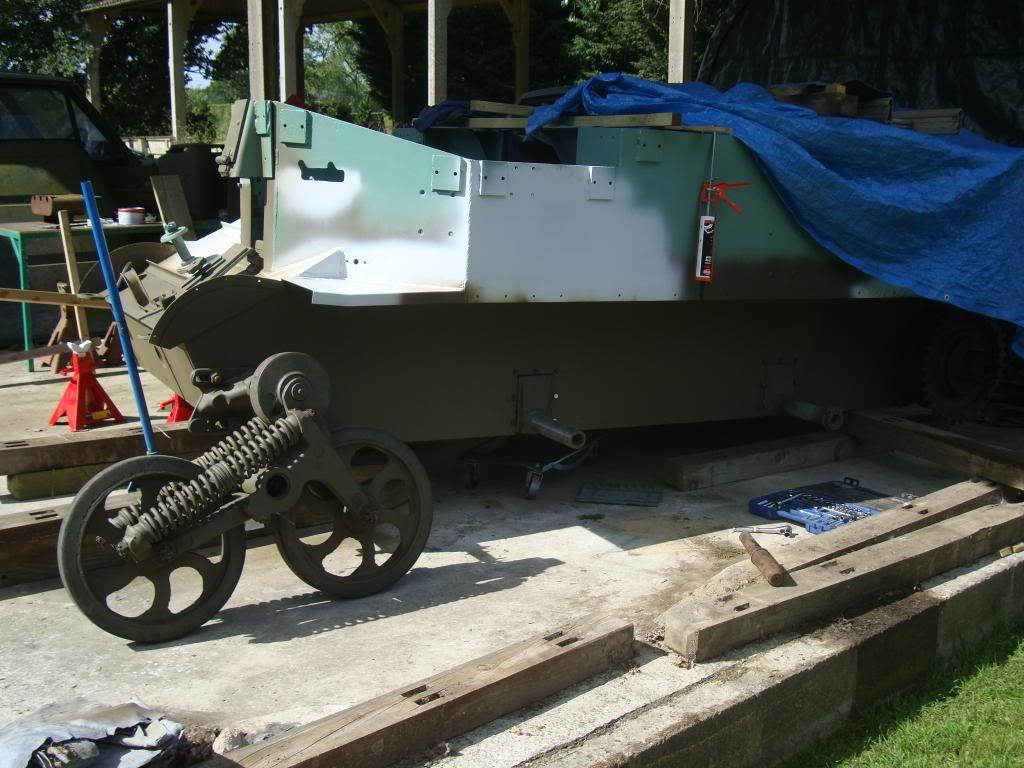
Well I have to say working on the T16 just got a whole lot better and more enjoyable. Not only have I now turned onto the back nine but I dont have any more, as yet, dirty oilly jobs to do. Reassembly is a joy. So far I have dropped in both rear bogie supports and today it was the turn of the rear axle. I had been fearing this job just because the axle weighs a tonne and is a pig to balance as it wants to nose over all the time. However, I seem to have mastered it with great care, a mixture of jacks and axle stands it is now 90% back in the vehicle. All that remains is to apply sealant to the rear flange and fit the shims and the bolts. I think that will be fairly straight forward. Looking at the gap between the axle fixing flange on the hubs and the hull the gap looks rather bigger than the shims, but I assume the hull plates pull in slightly as tightened. At least I dont think the axle has shrunk in the last 12 months. The aim is to get the T16 on its road wheels as soon as possible and then on its tracks thereafter. At least then I can manouvre it around . Still having real trouble getting Nordian Services to respond to my e mails regarding the main bearings. If anyone has some NOS standard mains for a T16 mercury engine then please let me know. Photo of my little helper included!
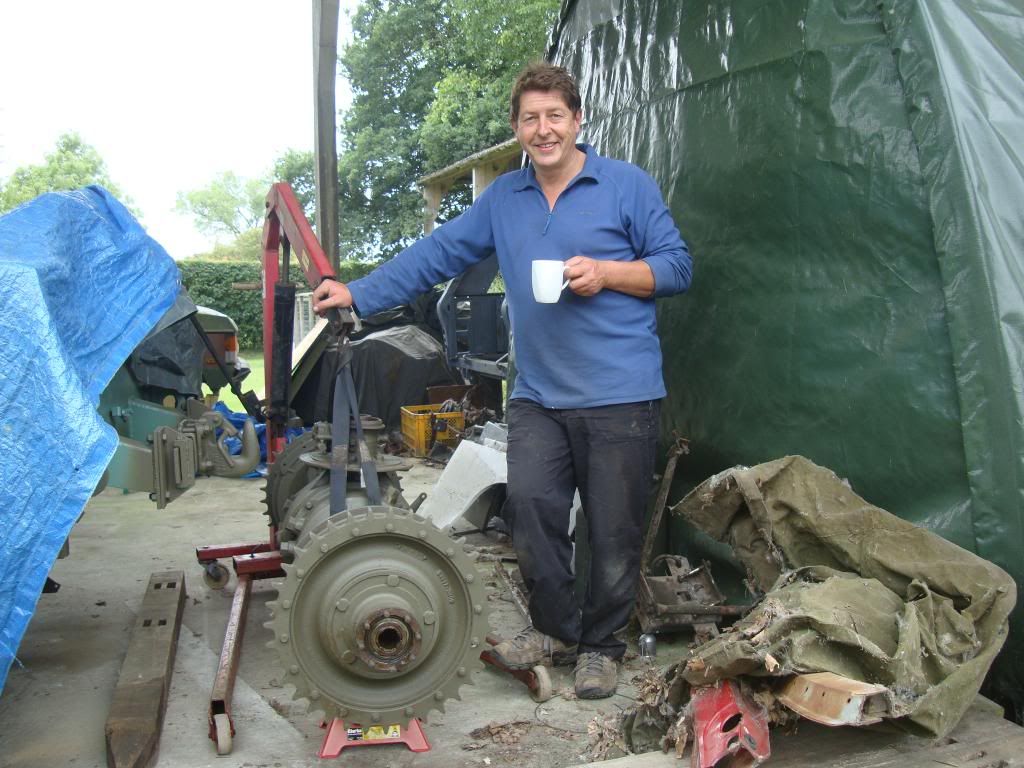   this is a link to my photo album detailing the restoration so far http://s714.photobucket.com/albums/w...sal%20Carrier/ 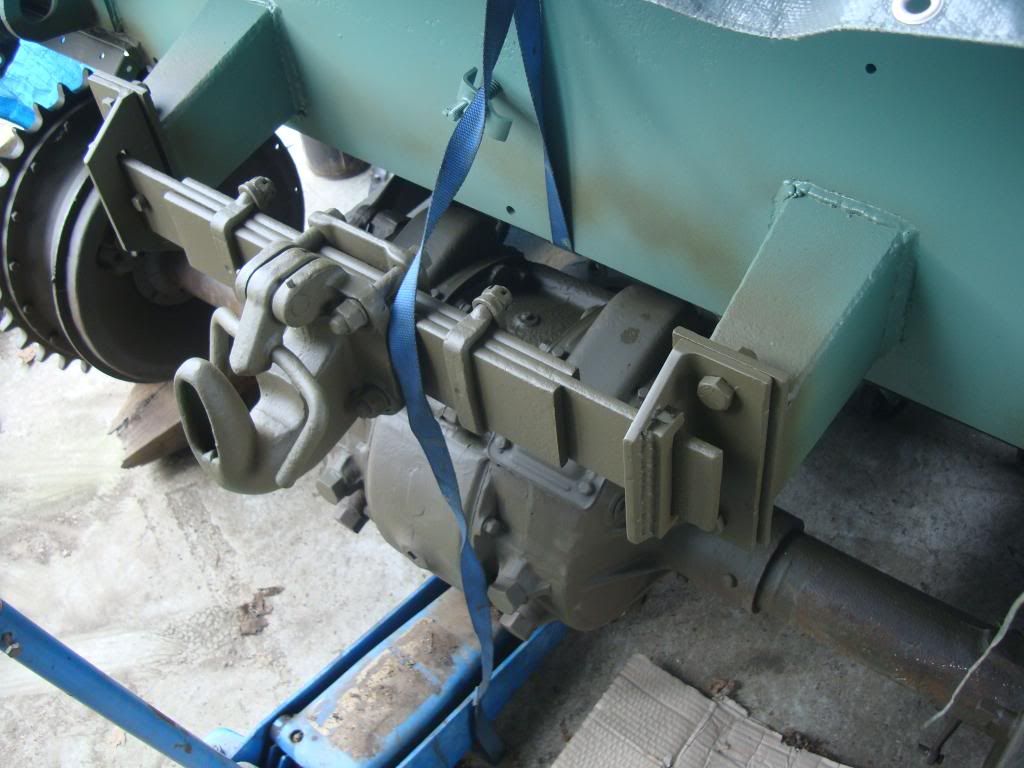 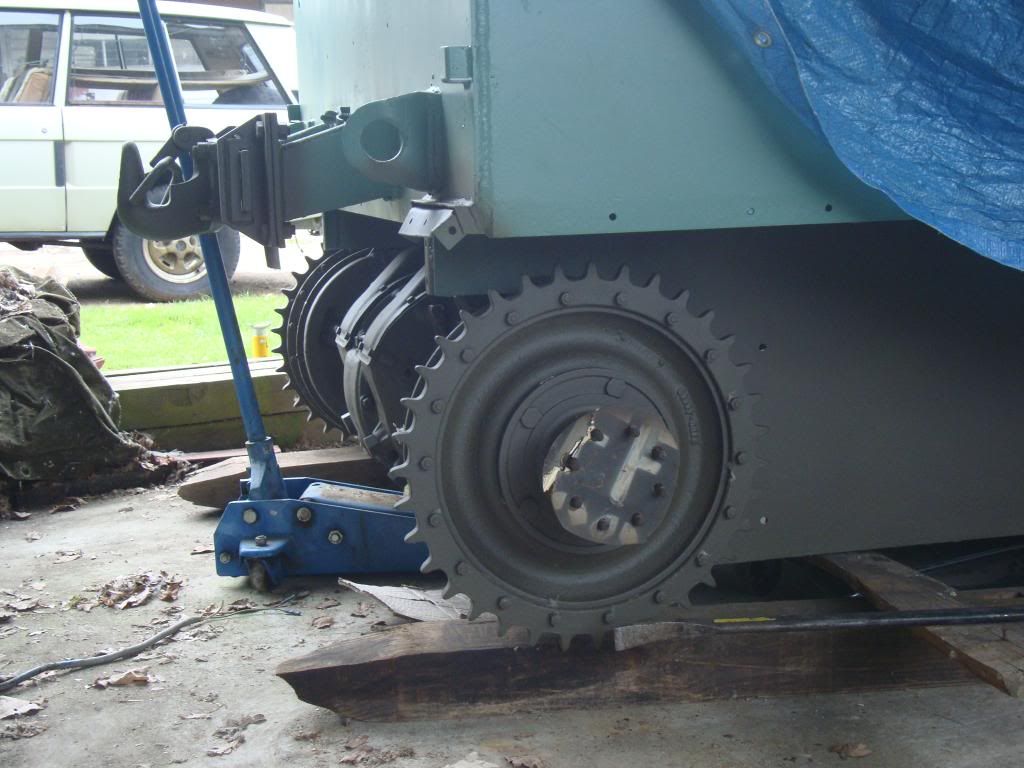
|
|
#98
27-07-11, 08:29
|
|||
|
|||
|
Looking good . Your on the down hill run now. (btw.I think your little helper could do with an upgrade on her safety boots) I take it that you have that front guard thing sorted out.
Lynn
__________________
Bluebell Carrier Armoured O.P. No1 Mk3 W. T84991 Carrier Bren No2.Mk.I. NewZealand Railways. NZR.6. Dodge WC55. 37mm Gun Motor Carriage M6 Jeep Mb #135668 So many questions....
|
|
#99
27-07-11, 09:35
|
|||
|
|||
|
thanks Lynn. I wondered whether anyone would comment on the boots and safety gear. To be fair, she only brought me the cup of tea and I said I would put her on my blog! Naturally I wouldnt have the kids around that sort of work, it would hurt big style if it fell on you! By the way Lynn have sent you a pm
|
|
#100
27-07-11, 11:46
|
||||
|
||||
|
do it..... slave labour ! my boys foolishly showed an interest one day... they were scrubbing rust from metal for the rest of the day

__________________
is mos redintegro __5th Div___46th Div__ 1942 Ford Universal Carrier No.3 MkI* Lower Hull No. 10131 War Department CT54508 (SOLD) 1944 Ford Universal Carrier MkII* (under restoration). 1944 Morris C8 radio body (under restoration).
|
|
#101
28-07-11, 08:30
|
|||
|
|||
|
Indeed Richard, any help is good help as far as I cam concerned. I have a stepladder to get in and out of the T16 but inevitably I have always left something in or out of the blessed thing and have to get in or out to get it. My knees are taking some hammer so little helpers are very useful.
Axle now bolted in, took a little more lining up than I thought but the old advice from my father of getting all the fixings in before tightening any up worked a treat.
|
|
#102
30-07-11, 22:11
|
|||
|
|||
  I wrote a long and detailed account of the days work and then accidently lost it! Cant bring myself to do it again so here are the photos anway! 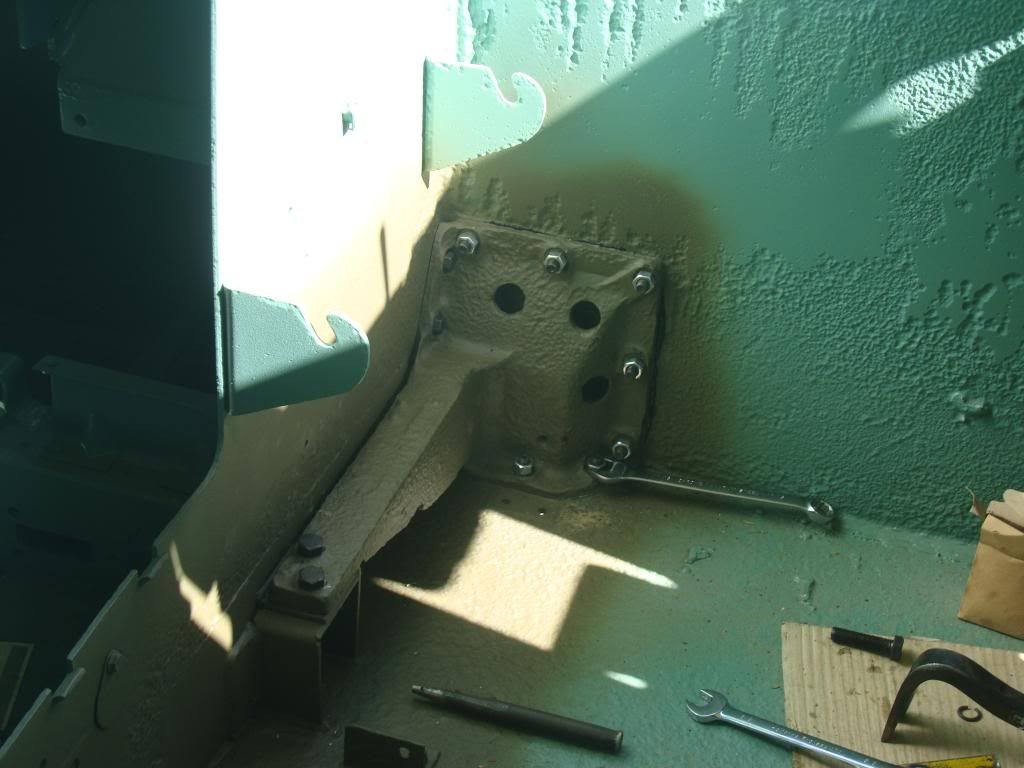
|
|
#103
31-07-11, 01:10
|
|||
|
|||
|
there's nothing worse than spending half an hour doing a post then the bloody thing gets lost somewhere and you have to start again, been there many times. great thread by the way.
__________________
_______________________ 1941 mk1 mortar Carrier 1941 Mk1* Carrier 1942 Mk1* Carrier 1943 T16 Carrier 1945 Mk3 Dingo 1941 Mk3 Covenanter 1941 Mk4 Churchill AVRE (now sold) 1944 Mk6 Cromwell (now sold) 1952 Mk3 Centurion 1952 ARV Centurion 1952 ARV Centurion 1953 Mk3 Centurion (breaking)
|
|
#104
31-07-11, 08:21
|
|||
|
|||
|
Thanks for the kind comments Rick.
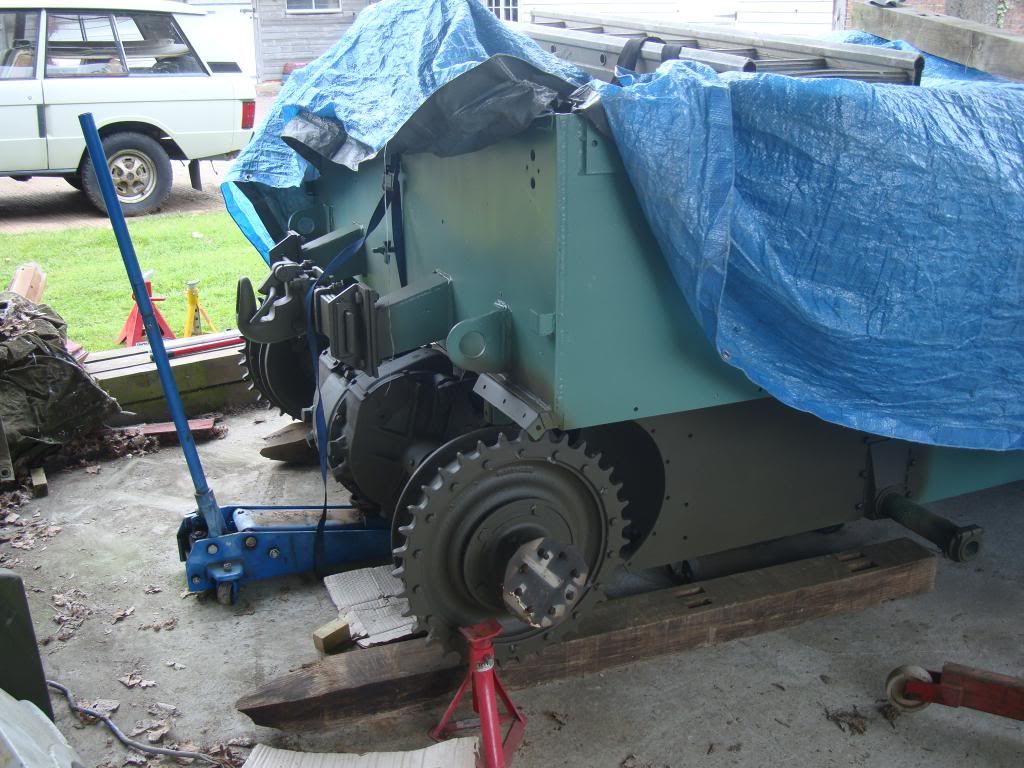
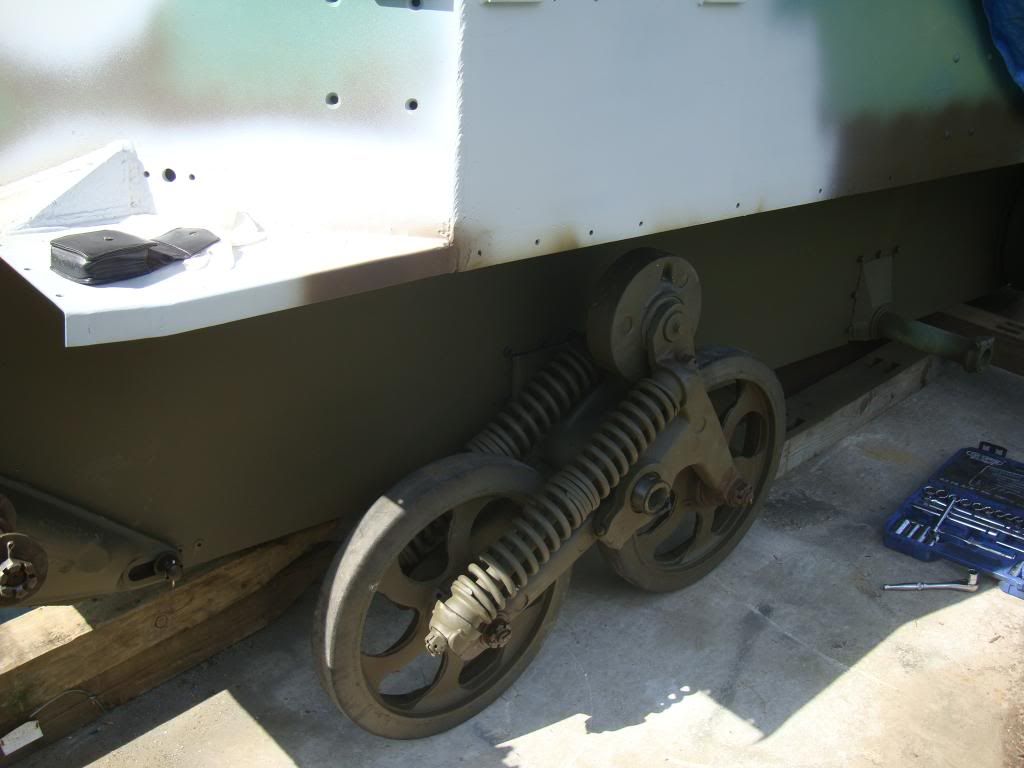
indeed it is most frustrating after all that typing! Anyway, the short version was that I managed to get the front bogie bracket bolted into the hull, but it was more tricky than the rear. There are quite a few, approx 16 or 17 bolts and screws to line to get it fixed in ok. There is quite a bit of flex thankfully for this task in both the sponson side and the bulkhead which enables one to line up the inner fixings near the centre of the vehicle. The TM states that mating sufaces should be sealed to enable deep fording, so I applied a straight forward black silicone which I am able to trim off when its set. I fitted new rope seal around the rear of the suspension unit and front where it seals up against the inner edge of the bogie bracket and the outer thrust washer. I imagine this is a two way seal, one to stop water and grit ingress the other is to retain as much as possible of the grease held within the suspension unit. As I am sure many of you will have already discovered, lifting these units onto the bracket is really a two man job, but somehow I managed now I have a weeks recuperation on holiday and plenty of mental planning for the next stages of the restoration. Eventually got hold of Nordian Services and I should be in receipt of some NOS main bearings awaiting my return. More soon.
|
|
#105
19-08-11, 19:31
|
|||
|
|||
|
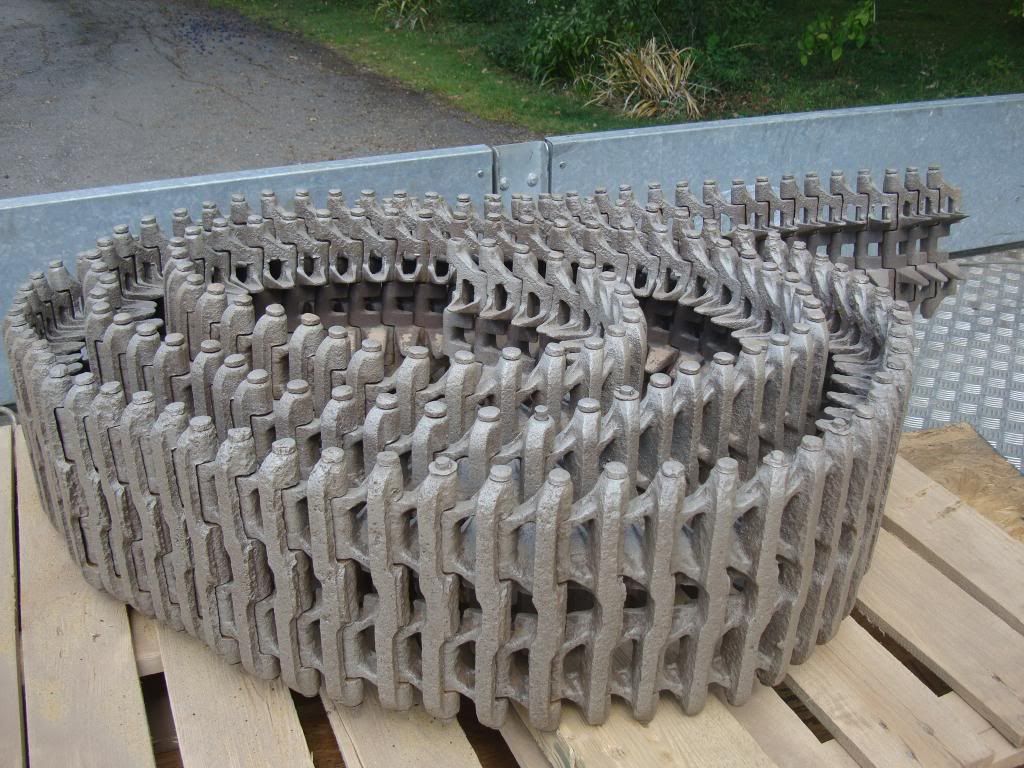
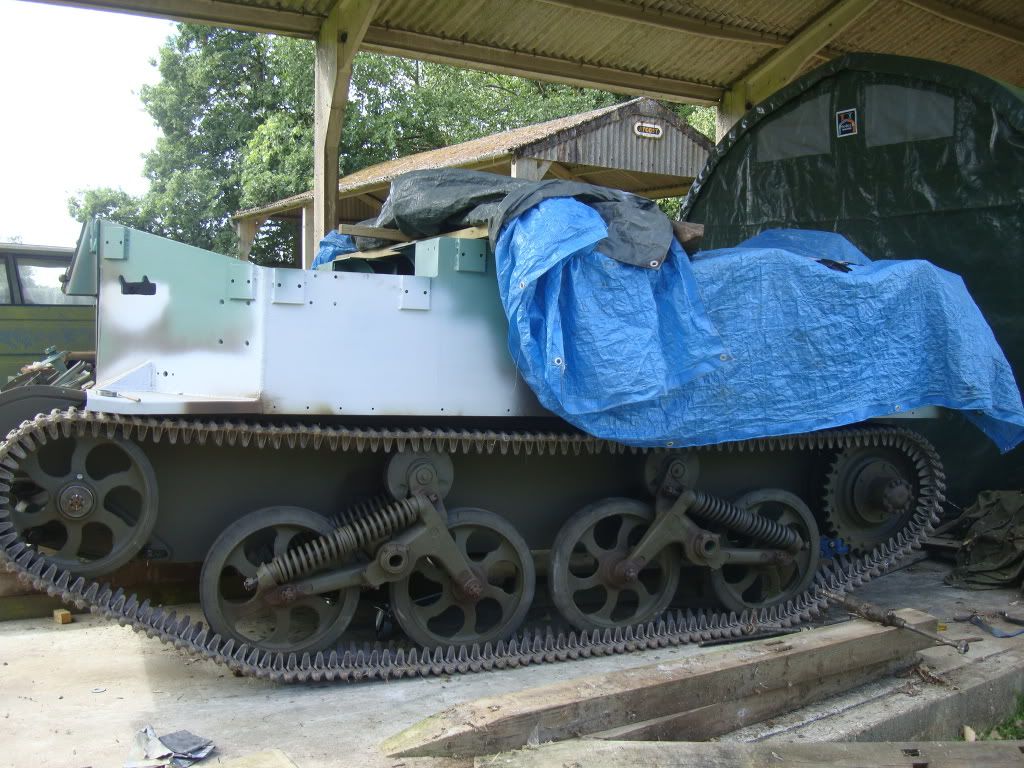
Well onwards and upwards. Picked up the Tracks from the blasters today, and pretty pleased with them, although some of the pins look like they have seen their best days. Do these pins break? I mean of course they break, but do they break readily? Not too sure I am ready to break a track driving around the country roads of Kent. Also need a lot of washers, as most of mine , where fitted seem to have disintegrated from the blasting. Are they special in any way, I doubt it.
 Found the ideal tool for handling the tracks, in fact I took them for a little work out on the field to try and free them up a bit more. Mostly they are free but one or two sections are stuck and will no doubt make it tricky to fit the tracks.  anyway, the tracks are in place ready to be fitted when I finally get the front idler wheels on. I just need to put the bearings back in and get them on. I did want to pull the T16 off the concrete barn where it is, but as the engine is still not finished if I pulled her off I may not get her back up the brick wall and thats the place I want it to stay. So I will labour on with fitting the tracks where she lies. Got all the control levers back in and fitted the plate, just making up new control rods and finishing a few little brackets that need welding in to locate return springs etc. As for the engine, I started to build it up yesterday but ran into trouble with the rope seals for the rear main bearing. It was a complete nightmare to cut as it came over length and then frayed badly. I have sent off for some more and also decided to invest in a new rubber seal for the front of the crankshaft/pulley. Tell me that was a good idea guys? 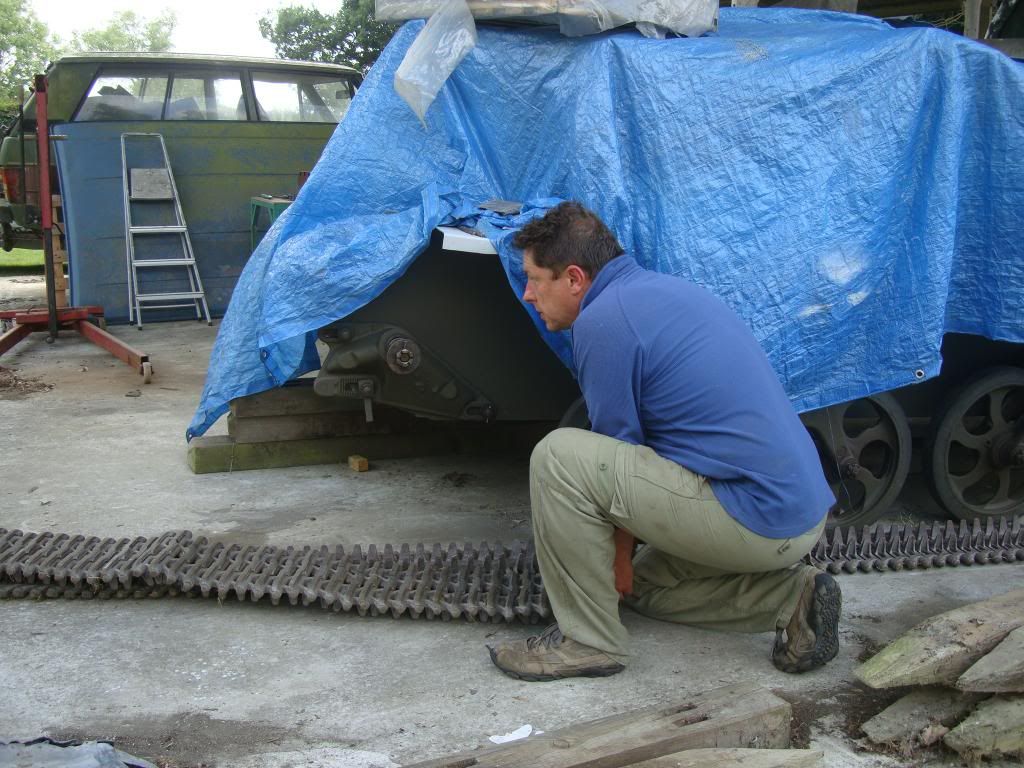 real shame about the corrosion in the sponson sides, but I guess its 65 years old and spend a long time on its side in a scrapyard, so its to be expected. I decided against filling it as I felt sure it would look false and crack out in due course. But hey, when the seats in and if I could get some orginal blanking plates that fit over most of this corrosion it wont look to bad. 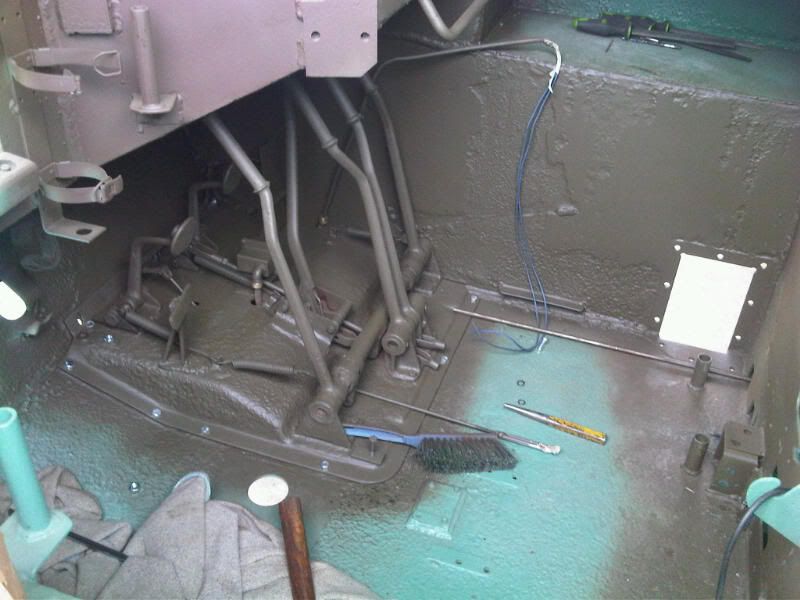
Last edited by andrew honychurch; 19-08-11 at 19:40. Reason: additional photo
|
|
#106
20-08-11, 06:53
|
||||
|
||||
|
Keep the pics coming please. Its quite good to see the pitted rust look,tells the story of age and restoration. 60 plus year old MV's with smooth panels and shiny paint jobs, although fantastic restorations in their own right just don't seem to have that, done the hard yards I survived look. Anyway keep up the good work, enjoy your posts.
|
|
#107
20-08-11, 09:37
|
|||
|
|||
|
thanks, I am glad someone is reading it, and finding it interesting. There is no rocket science here, you all do it, but its fun loading up the photos and keeping the story going. If I can escape from some chores at home, I may try to get those tracks on. We will see.
I noted, bearing in mind the tracks were very rusted and seized before, that there is a lot of lateral movement now they have been blasted. I was discussing this with my Dad last night and we concluded that there should be a steering element to the tracks, other wise they would lurch around corners. Anyway, hope I am right , otherwise they are quite worn on the pins and link!
|
|
#108
20-08-11, 12:24
|
|||
|
|||
|
hi andrew
we're all following your thread with interest and you seem to be cracking on at a blistering pace, at this rate you'll be driving her soon  if you're worried about the tracks then you could remove a link and inspect the pin for wear, a normal used pin would have a stepped wear pattern of maybe 10 thou or so but this is just my guestimation. another method which is actually the official way of track wear testing is to count the links, i don't know how many links a new t16 track has but there will be a figure of so 10 or so less when the track is deemed to be worn out. you'll have to get one of the other t16 guys to give you the correct figures but you can only use that method if the tracks are original and haven't been swapped around with different sections from other vehicles (my tracks are made up from all sorts so the pin is my only guide to track wear) all the best rick
__________________
_______________________ 1941 mk1 mortar Carrier 1941 Mk1* Carrier 1942 Mk1* Carrier 1943 T16 Carrier 1945 Mk3 Dingo 1941 Mk3 Covenanter 1941 Mk4 Churchill AVRE (now sold) 1944 Mk6 Cromwell (now sold) 1952 Mk3 Centurion 1952 ARV Centurion 1952 ARV Centurion 1953 Mk3 Centurion (breaking)
|
|
#109
20-08-11, 20:40
|
|||
|
|||
|
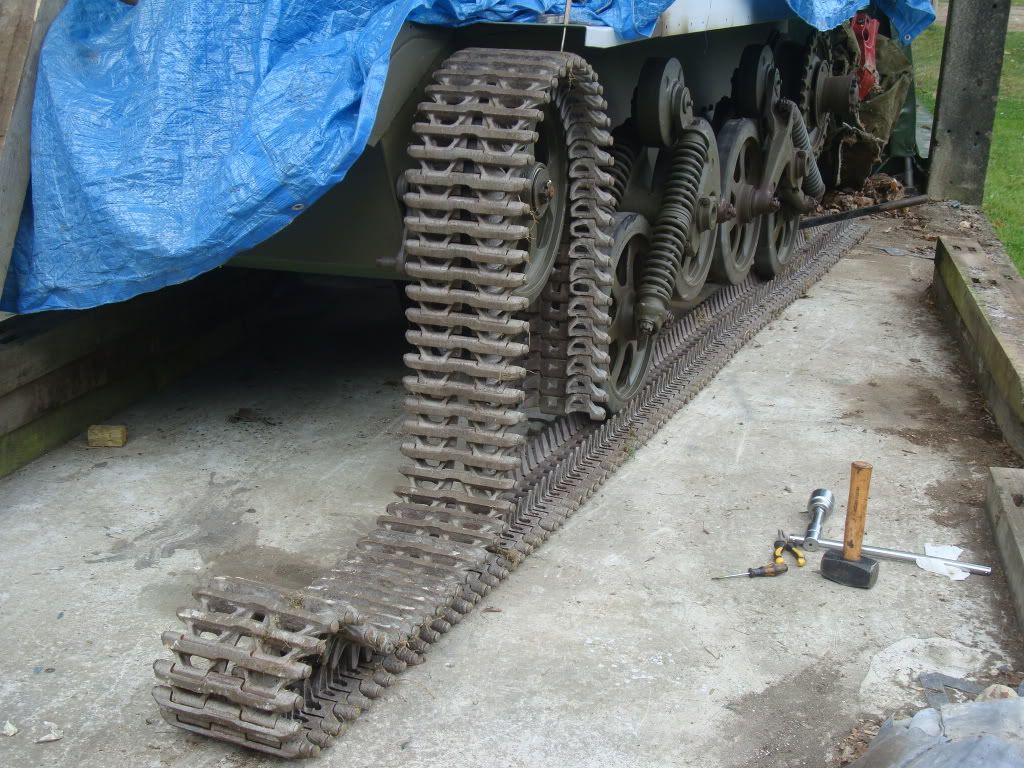
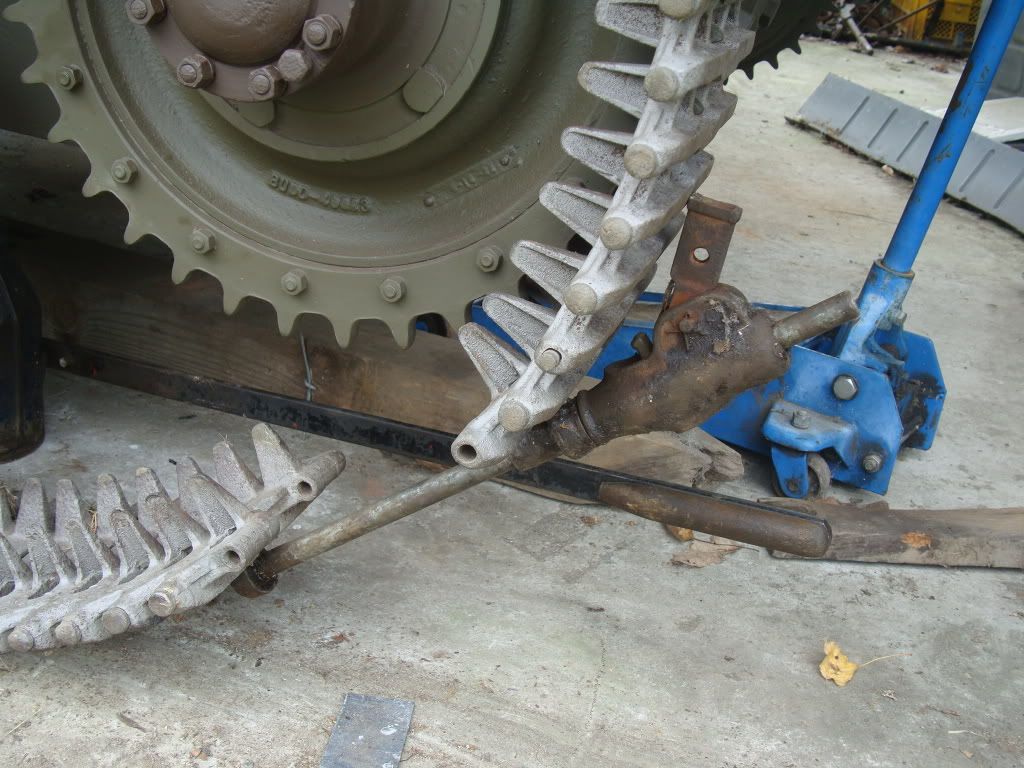
thanks for the advice on the track pin wear. I think they are pretty good to be honest. This T16 was part of a batch that apparently had done very little work, and I think the tracks reflect this. Anyway, got one of the tracks on today, pretty easy with the correct tool. Used the Pin punch to line up the holes and punched it back out with the track pin. Apart from it occurring to me that this is probably a two man job, I seem to have managed ok, except for a crooked neck. I am definitely getting too old for all this!
|
|
#110
20-08-11, 21:39
|
|||
|
|||
|
That is the finest kind of job you are doing on the carrier..The wee lassie will be able to use what you are teaching her for the rest of her life..
My two daughters did and still do do some of the maintenance on their own vehicles ..When they were in their last year of university I bought them each a used car..a Toyota and a Honda Civic.. They would do their own oil changes and my youngest daughter wanted to do EVERYTHING herself,DAD!!! On her little '83 Honda Civic I wanted to repack the rear wheel bearings ..she wanted to help..we did the first side together and she let the jack down..jacked up the other side and did a fine job of repacking the bearing and putting it all back together.. by herself..thank you.. She is still like that today.. Last year I gave her a new cordless drill and a whack of attachments and this summer I went through my tool boxes and took her down a bunch of new tools that I have no long a use for(Retired Refrigeration mechanic/gas fitter)and my 4 year old grandson immediately latched on to the telescoping mechanics mirror I brought down.. It is his favourite toy.. So you can never start them too young..Keep up the great work dad...    
__________________
Alex Blair :remember :support :drunk:
|
|
#112
21-08-11, 09:59
|
|||
|
|||
|
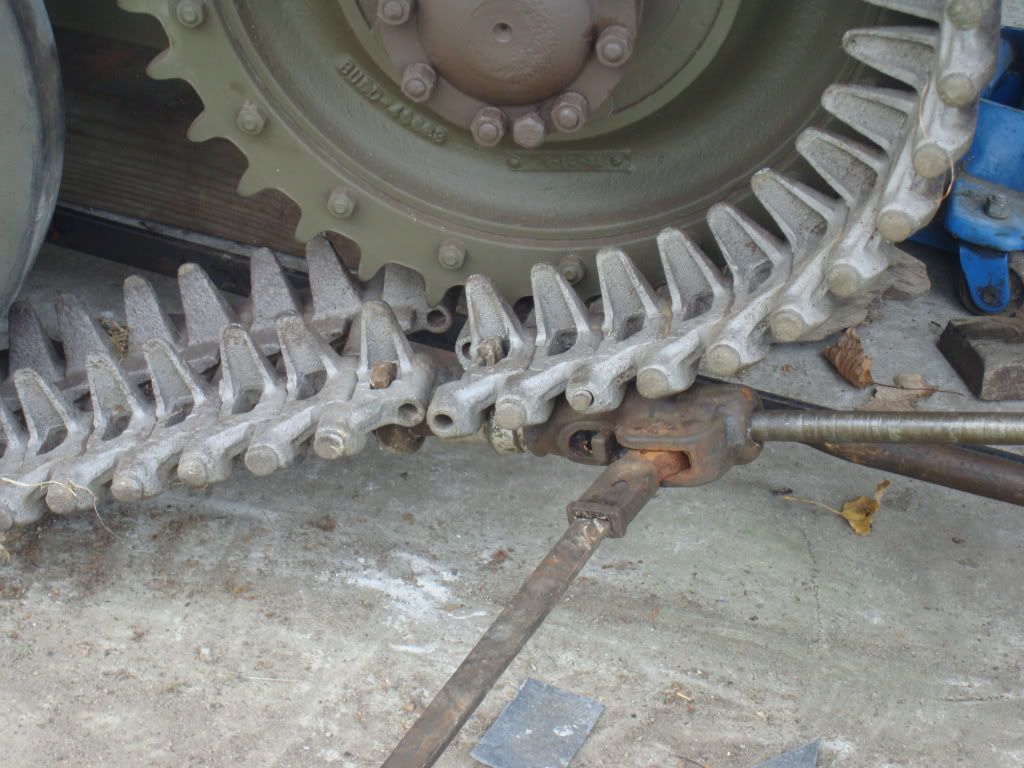
Glad you like the tracks, I must say I am pleased with them too. The blaster was desperate to paint them, for two reasons it turned out. First he could not believe that they would look right in bare metal, and then he admitted to me that he had to do a lot more work if they were not going to be covered with black paint afterwards. My father was adamant that they were not painted when he was building them in the early 40s and they certainly look better like this in my opinion . Of course they will tarnish soon and turn back to rust but as long as I can get the old girl running under her own steam it will burnish them up again.
Good story Alex. My girls are taking it all in. They have not yet got to the stage of doing any manual work, but they sit and watch and help with tea and fetching spanners. My youngest did hold a spanner the other side of the hull whilst I tightened a bracket inside, so I suppose we are moving in the right direction. Gee whizz I am stiff today after manhandling that track over the rear drive hub! Since I have put the new seal around the rear drum it makes it very stiff to rotate, hence I had to manuallly lift the track one tooth at a time until I got it in roughly the right position to use the track jack. Now, shall I do the other track today, or can I think of a nice easy job, like cutting some stencils!
|
|
#113
21-08-11, 19:20
|
||||
|
||||
|
Andrew,
I must say I had no real iterest in T16 Carriers until reading your thread, You are doing a thourgh job there. The track looks good with very little wear on the pads. If the track is worn on the pins or pin holes what you will find is they will not sit square on the sprockets/front idlers and you will get wheel scrub on the inner side of the rear trailing wheel, The sprockets will burr over in time too, but from what I can see your track looks good. I was going to get some track shot blasted but thought it might suffer in getting grit trapped in the pins?. Keep posting the large scale pictures. Kevin.
__________________
2pdr Tank Hunter Universal Carrier 1942 registered 11/11/2008. 3" Mortar Universal Carrier 1943 registered 06/06/2009. 1941 Standard Mk1 stowage Carrier, Caunter camo. 1941 Standard Mk1 stowage Carrier, light stone. 10 cwt wartime mortar trailer. 1943 Mk2 Daimler Dingo. 1943 Willys MB. 1936 Vickers MG carrier No1 Mk1 CMM 985.
|
|
#114
21-08-11, 19:42
|
||||
|
||||
|
must admit that was what stopped me doing mine... but suppose if you take the time to clear it all out of the lugs etc it should be ok.
Tis looking good though Andrew... i would not worry about the pitting on the lower hull......its honest...it is what it is (Original !)
__________________
is mos redintegro __5th Div___46th Div__ 1942 Ford Universal Carrier No.3 MkI* Lower Hull No. 10131 War Department CT54508 (SOLD) 1944 Ford Universal Carrier MkII* (under restoration). 1944 Morris C8 radio body (under restoration).
|
|
#115
22-08-11, 00:22
|
|||
|
|||
|
interesting views on the sand in the tracks. I reconciled this with the simple view that they would see a lot more sand in the desert. There is no residual sand in the tracks and it is not a risk to the working of the track. Basically, I would not leave the tracks as they were as they were jammed up with rust and muck. sandblast every time.
|
|
#116
22-08-11, 02:07
|
|||
|
|||
|
It all looks good to me. The constructive comment from me, is that I think the track jack is fitted in the center of the track.
I have seen the front crank seal advertised. Let us know what you think about them. I'm enjoying your posts and learning about how the T16 is different from other carriers.
__________________
Bluebell Carrier Armoured O.P. No1 Mk3 W. T84991 Carrier Bren No2.Mk.I. NewZealand Railways. NZR.6. Dodge WC55. 37mm Gun Motor Carriage M6 Jeep Mb #135668 So many questions....
|
|
#117
22-08-11, 10:12
|
|||
|
|||
|
HI Lynn, indeed the track jack SHOULD be fitted in the middle of the track or else it pulls one side in more than the other. The reason is that I guessed where the join would be by placing the track on the floor in a position and then pulled the rest over the top and rear drive sprocket. However the join was too close to the drive teeth and I could not get the jack in securely to tried it on the edge and hey presto it worked, thereby saving me from more heavy pulling! Well spotted though.
|
|
#118
30-08-11, 19:07
|
|||
|
|||
|
A few more photos to update the thread. Have just made all new control rods which I am quite pleased about. They are 3/8 UNF but I could not get any turnbuckles in UNF. However, I did find metric ones in M10 which is exactly the correct size for threading 3/8 bar. So I have 3/8 UNF ends to each rod with NF clevis fork ends, and then left and right hand thread metric M10 in the middle for the turnbuckles. If you follow that you are doing better than me! Anyway, all coming back together ok, no real problems but something that has been in the back of my mind and I have been avoiding is now coming to the fore. I have to make some new oil cooler pipes for both the engine and diff coolers. These are 1/2 in steel and have double flared ends. The curves are intricate and sharp. I cannot see that I can bend 1/2 in copper nickel and even if I do I have not got a man enough flaring tool for 1/2 in. I priced up the latest Sykes Pickavant tool but its over £250 just to make up some pipes as a one off. Ummmh. Anyone know whether trucks use steel air piping at this size? My thought being that if they do, some friendly fitter may be able to make my pipes for me? Anyway, hope you enjoy the photos.
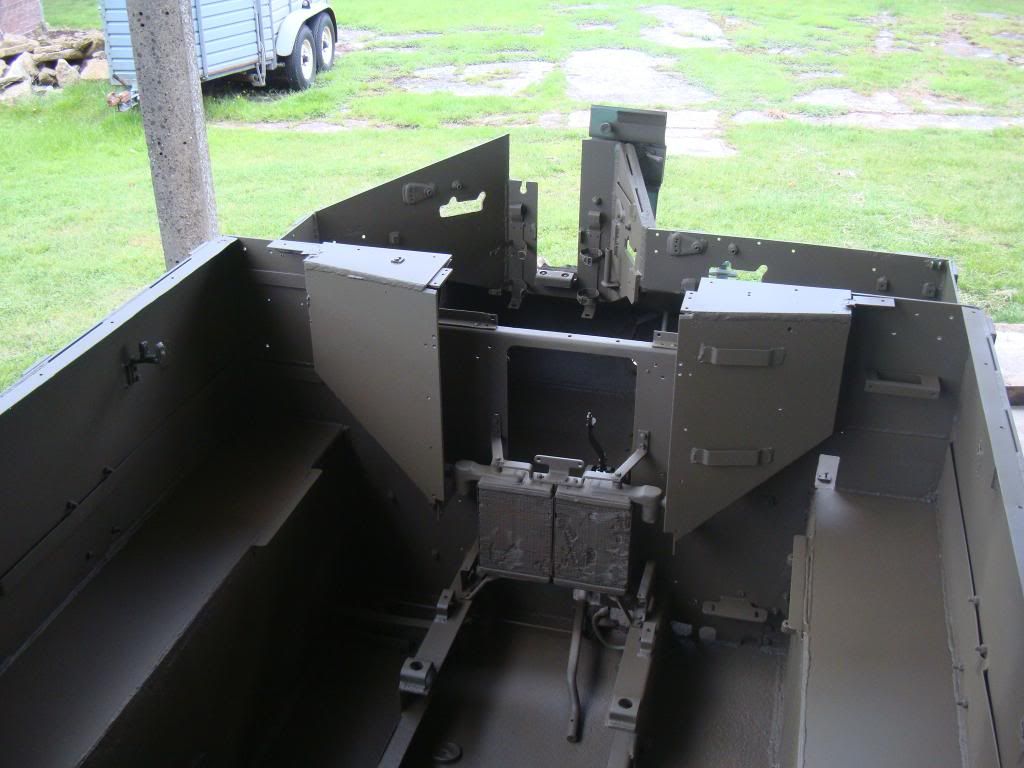 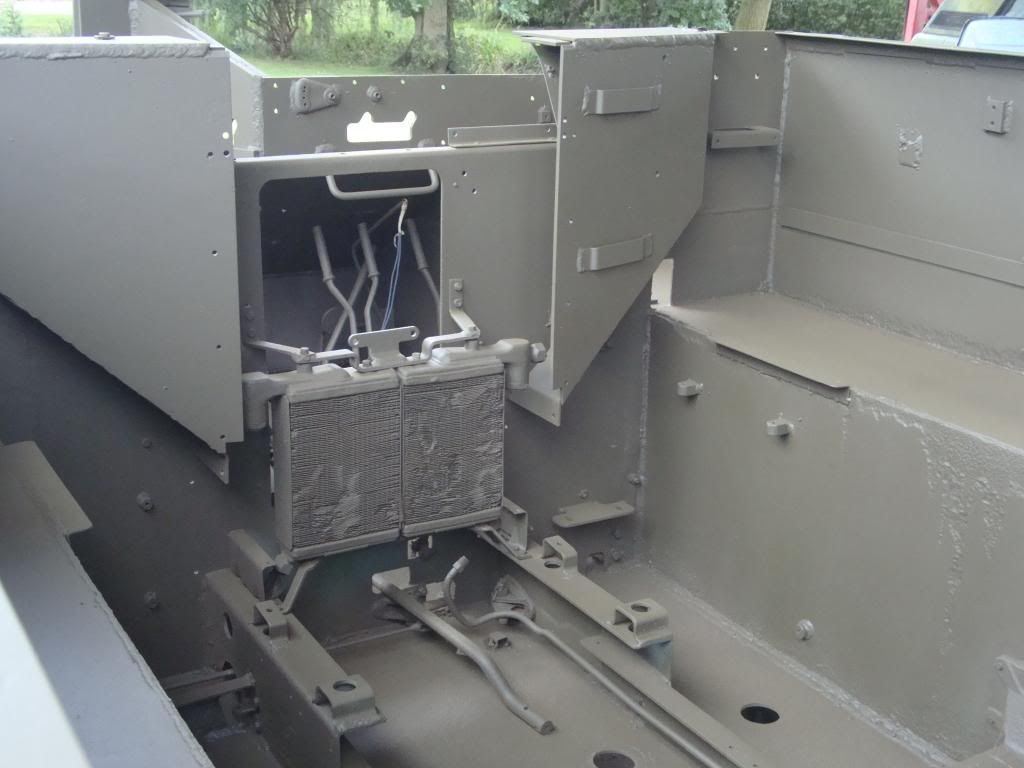 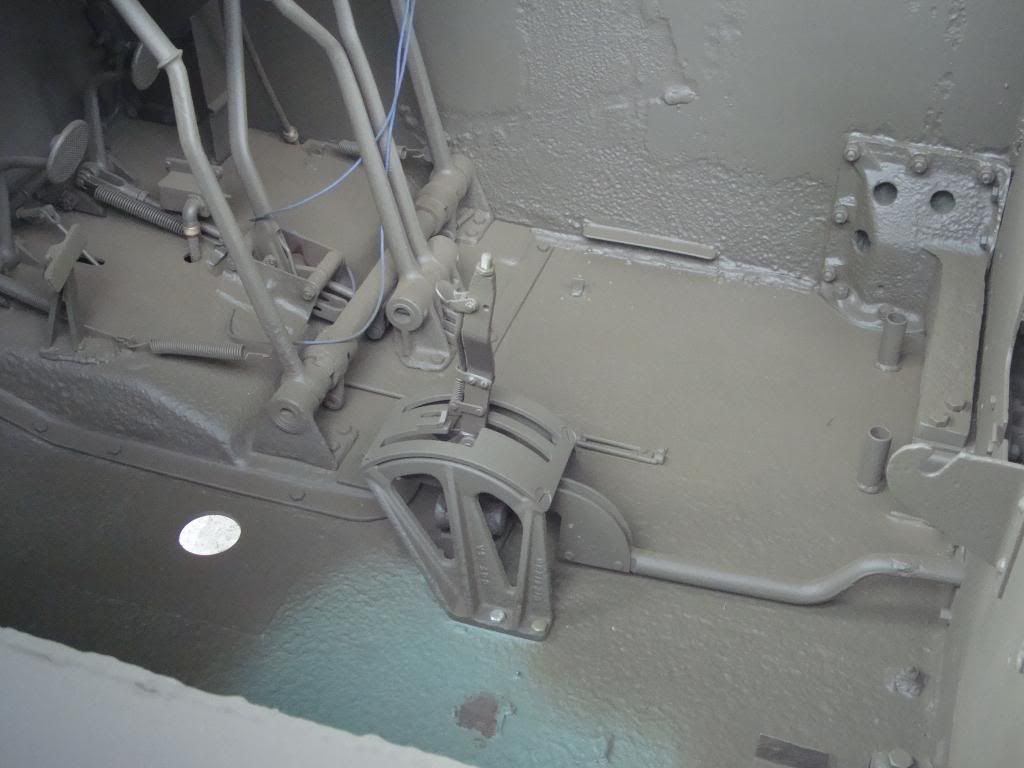 the light green patch is where I was standing when i was spraying! 
|
|
#119
30-08-11, 21:05
|
||||
|
||||
|
Quote:
You could try Pirtek, near Ashford Market, they are hydraulic pipe specialists, not just hoses. I have a Sykes flare set, but not sure if it goes to 1/2", will check tomorrow. regards, Richard
__________________
Richard 1943 Bedford QLD lorry - 1941 BSA WM20 m/cycle - 1943 Daimler Scout Car Mk2 Member of MVT, IMPS, MVG of NSW, KVE and AMVCS KVE President & KVE News Editor
|
|
#120
30-08-11, 22:18
|
|||
|
|||
|
hi Richard. you ok? thanks for the idea on Pirtek. I have to say that I have spoken to them a few times , mainly regarding the special threads that the t16 has, and they have not been able to help. In fact I did call them today and ask whether they could supply 1/2 pipe but they couldnt. That said, I have not asked them if they could make the pipes up so will call tomorrow. However, I am very interested to hear whether your Sykes tool goes to 1/2. Please let me know. By the way, dropped off the magdyno at PB today. Am i going to beat you back onto the road?
|
 |
|
|


 well worth blasting the track prior to fitting.


 Linear Mode

